Deploying Lync2013 Edge in Coexistence 27 Feb 2013

In a previous article, the steps to introduce a Lync2013 Standard Edition FE server into an existing Lync2010 environment was discussed. That existing Lync2010 environment also had an Edge server for remote user access and federation. This article has 2 parts: Part I describes the tasks to connect the Lync2013 FE server to the legacy Lync2010 Edge pool. Part II then describes how to deploy a Lync2013 Edge server in parallel with the legacy edge. A separate article will be posted later to discuss how to completely migrate all users to the Lync2013 Pool and decommission the legacy Lync2010 components.
Part I: Connecting the Lync2013 FE Server to the legacy Lync2010 Edge Pool
In order to use the federated route that is being used by Lync2010, Lync2013 must be configured to use this route. This is a simple 2-step process. In the Lync2013 Topology Builder, right click the Site and select "Edit Properties..". In the Edit Properties window, click on the "Federation route" in the left pane. Then select the "Enable SIP federation" checkbox and choose the legacy Lync2010 Edge server from the drop down as show below:

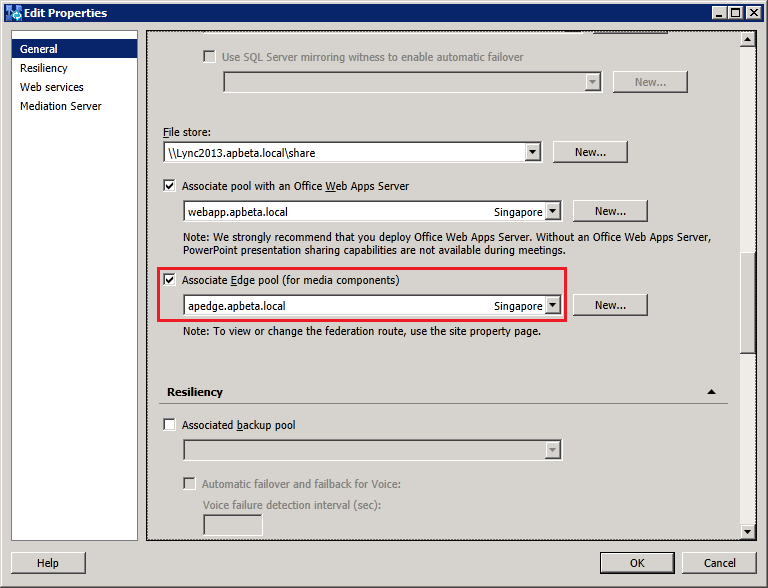
Next, right click the Lync2013 FE node and select "Edit Properties". In the "Edit Properties" select the "Associate Edge pool (for media components)" check box and choose the legacy Edge from the drop down list as shown below:
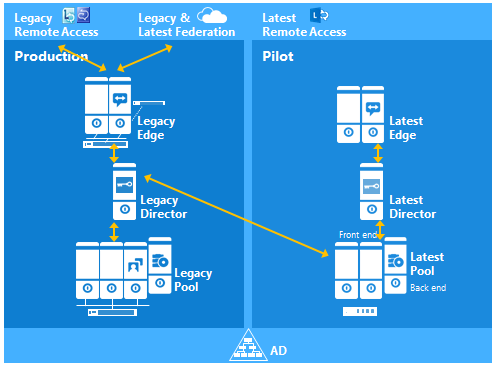
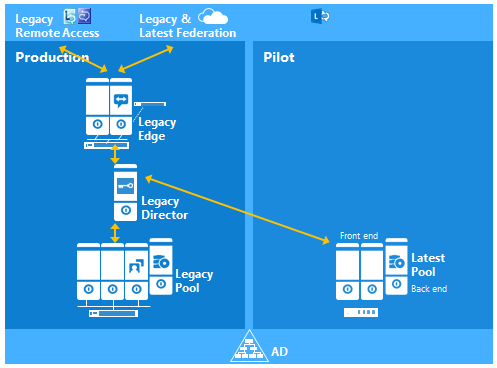
Finally publish the topology and wait several minutes for the topology to be replicated across all servers. Then verify that users homed on the Lync2013 FE can federate with external users via the legacy Edge. At this stage, all remote access and federation capabilities are routed via the legacy Edge (Director shown for illustration only) as shown in the diagram below:
Part II: Deploying Lync2013 Edge
To deploy the Lync2013 Edge in parallel with the legacy environment, there are 5 steps to be performed:
Step 1: Define the new Edge pool in Topology Builder
Step 2: Install Prerequisite software for Lync2013 Edge
Step 3: Deploy the Edge server components
Step 4: Request and Assign Certificates for Edge
Step 5: Route Lync2013 users through the Lync2013 Edge for Remote Access
Step 1: Define the new Edge pool in Topology Builder
Step 2: Install Prerequisite software for Lync2013 Edge
Step 3: Deploy the Edge server components
Step 4: Request and Assign Certificates for Edge
Step 5: Route Lync2013 users through the Lync2013 Edge for Remote Access
1. Define the new Edge pool in Topology Builder
First, create a DNS A record for the Edge internal NIC. In this lab we use edge2013.apbeta.local as the FQDN of the internal NIC and an IP of 10.222.202.94. The 3 external FQDNs for Access, Web Conferencing and AV are access13.apbeta.local, webconf13.apbeta.local and av13.apbeta.local respectively with IP in the ranges 10.250.27.[146-148]/25. We need to input these parameters when preparing the Edge server in the next step.
|
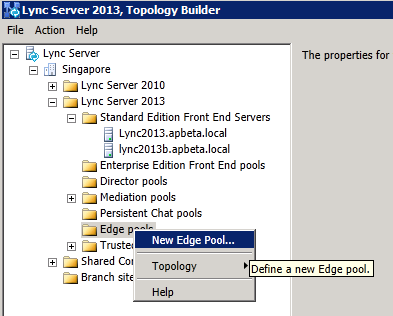
In the Lync2013 Topology Builder, expand the "Lync Server 2013" node and right click on the "Edge Pool" node. Select "New Edge Pool..." to start defining the edge pool properties.
In the "Define New Edge Pool" window, click "Next". |
|
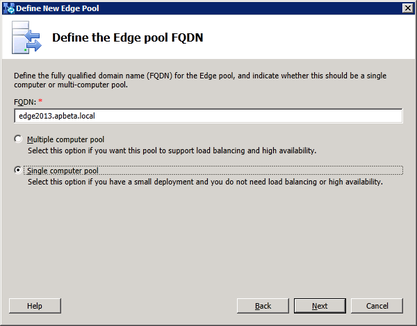
Since we are installing a single Edge server for this lab, select "Single Computer Pool" and enter the internal FQDN of the Edge server then click "Next":
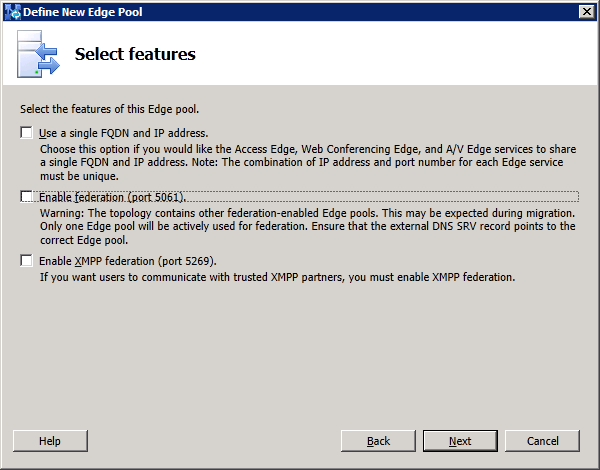
In the "Select Features" window, do not enable Federation or XMPP federation. Federation and XMPP federation are
both currently routed through the legacy Lync Server 2010 Edge Server. These features will be configured in a later phase of migration. For now, just click "Next":
both currently routed through the legacy Lync Server 2010 Edge Server. These features will be configured in a later phase of migration. For now, just click "Next":
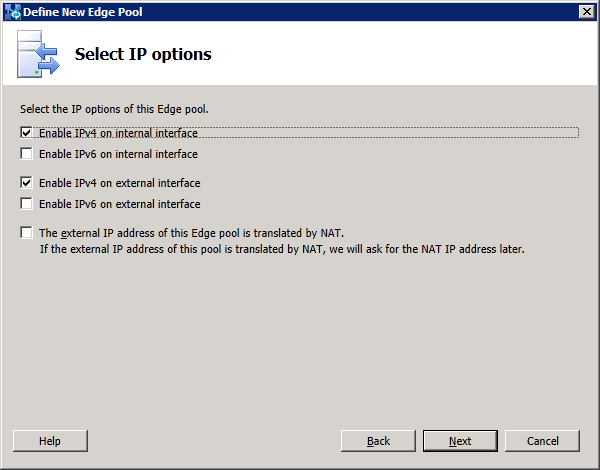
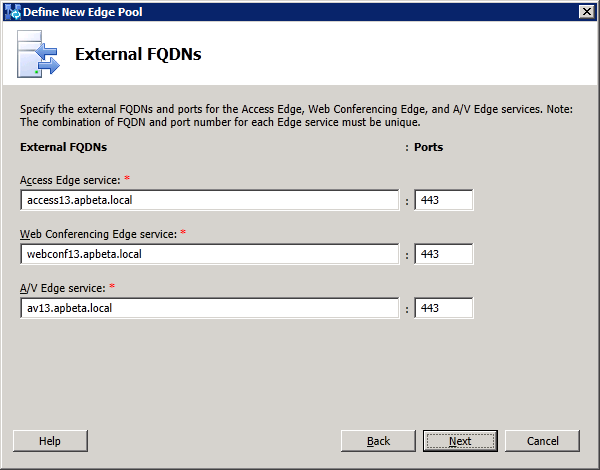
Next, select the appropriate IP options and enter the 3 FQDNs of the external interface as defined earlier:
|
|
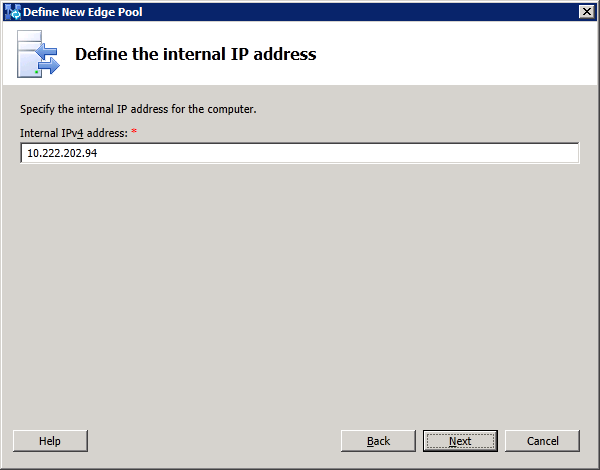
Next, enter the Edge internal IP address and click "Next":
Then enter the Edge external IP addresses and click "Next":

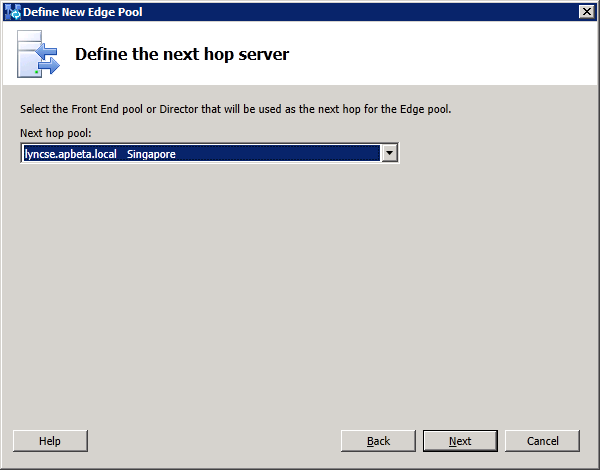
Specify the next hop server to be the legacy Lync2010 FE at this stage. Migration to the new Lync2013 pool will be done later:
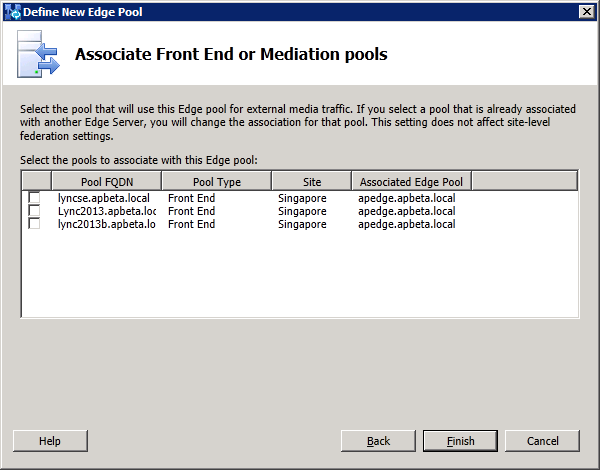
No association of a pool with this Edge pool is selected at this time. External media traffic will continue to route through the legacy Lync2010 Edge. This setting will be configured in a later phase of migration:
Publish the topology and verify successful completion:

2. Install Prerequisite software for Lync2013 Edge
Here we prepare a Hyper-V VM with 2 NIC cards and install Windows Server 2008R2 SP1 Standard Edition Full install. We then configure one NIC card for the Edge internal interface and assign the IP 10.222.202.94/24. We also configure the Primary DNS Suffix of this computer to apbeta.local and do not set a default gateway, leaving the adapter DNS settings empty. Lastly, we create persistent static routes on the internal interface to all internal
networks where Lync clients or servers running Lync Server 2013 reside and edit the HOST file to contain a record for the next hop Lync2013 FE server which was configured as the Edge Server next hop address in Topology Builder.
The other NIC card is for the external interface and we configure 3 IP address 10.250.27.[146-148]/26. The internal and external subnets must not be routable to each other. We also configure the default gateway on the external
interface and would normally point to an external DNS. Since we do not have a DNS server in the DMZ in our lab so we will use host files (shown later).
On the Windows2008R2 SP1 server, do the following in sequence:
1. Run Windows Update to get all the latest hotfixes and patches.
2. Install .NET Framework 4.5 from http://www.microsoft.com/en-us/download/details.aspx?id=30653
3. Enable Windows Powershell Integrated Scripting Envrionment (ISE) from Server Manager->Add Features
4. Install WMF3.0 from http://www.microsoft.com/en-us/download/details.aspx?id=34595 using the correct file. For Windows 2008R2 SP1 it should be Windows6.1-KB2506143-x64.msu
5. Install Windows Identity Foundation from http://go.microsoft.com/fwlink/p/?linkId=204657 using the correct file. For Windows 2008R2 SP1 it should be Windows6.1-KB974405-x64.msu
3: Deploy the Edge server components
Before installing the Edge components, we need to export the topology into a file so we can import into the Edge server. In the Lync2013 Lync Management Shell, run the following cmdlet: "Export-CsConfiguration -FileName c:\config.zip" and copy this file to the Edge server.
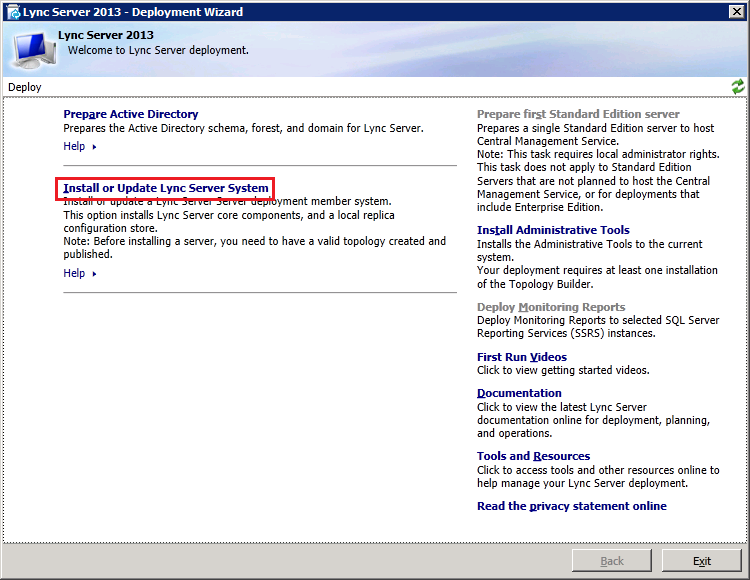
Now insert the Lync2013 Server installation DVD into the VM and double-click the icon to autorun the setup. Click Yes when prompted to install Microsoft Visual C++ Redistributable, In the next dialog box, accept the default Installation Location and click "Install". Accept the terms in the license agreement and click "OK" to proceed. In Deployment Wizard click "Install or Update Lync Server System"
Now insert the Lync2013 Server installation DVD into the VM and double-click the icon to autorun the setup. Click Yes when prompted to install Microsoft Visual C++ Redistributable, In the next dialog box, accept the default Installation Location and click "Install". Accept the terms in the license agreement and click "OK" to proceed. In Deployment Wizard click "Install or Update Lync Server System"
After determining the deployment state, click "Run" in "Step 1. Install Local Configuration Store", click Run

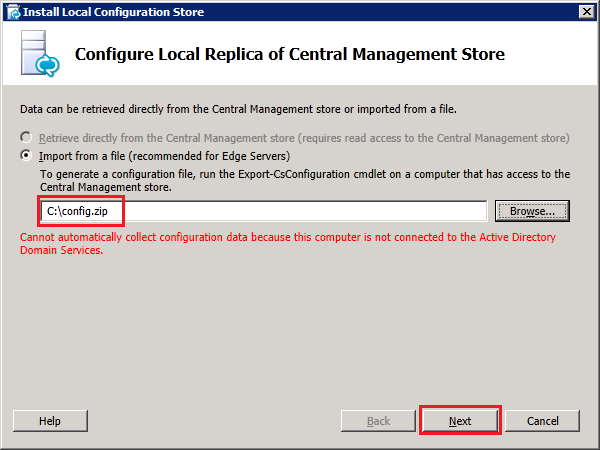
In the Configure Local Replica of Central Management Store dialog box, choose " Import from a file (Recommended for Edge Servers)" and specify the location of the exported topology configuration config.zip file and then click "Next":
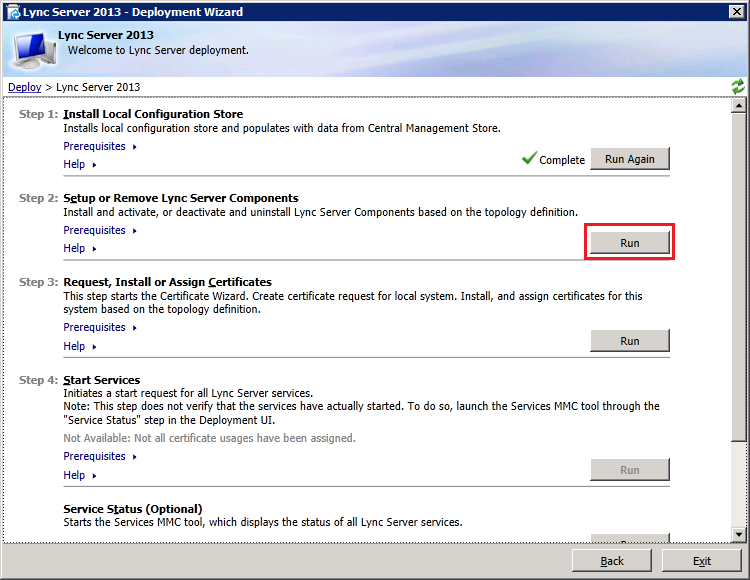
Click "Finish" when the Local Configuration Store installation is completed. Next click in "Run" in "Step 2 Setup or Remove Lync Server Components".
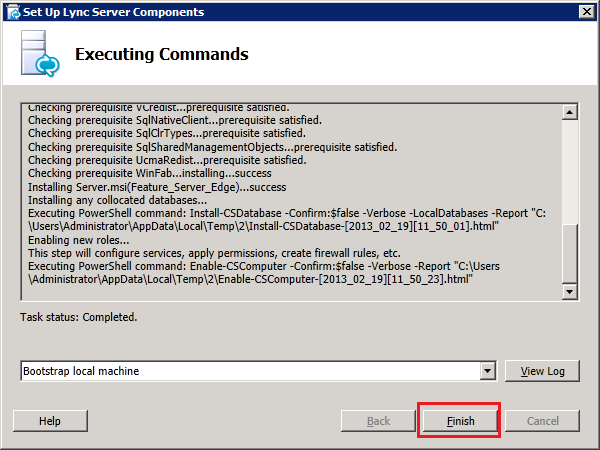
In the "Setup Lync Server Components" wizard, click "Next". Then and allow the wizard to complete. There's no input required in this step as the wizard will read the configuration file and install the necessary components. Click Finish to complete the wizard when finished.
4: Request and Assign Certificates for Edge
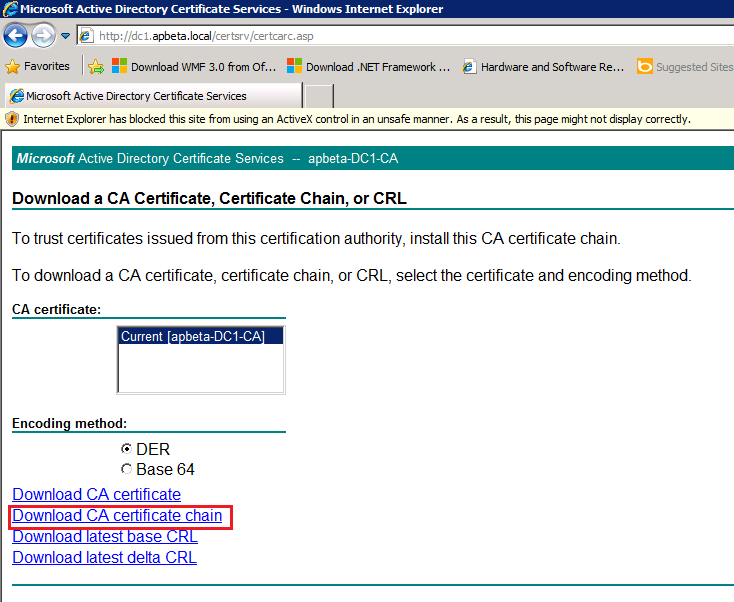
Import the Root CA Chain
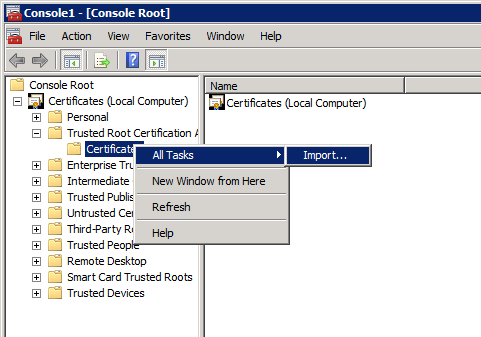
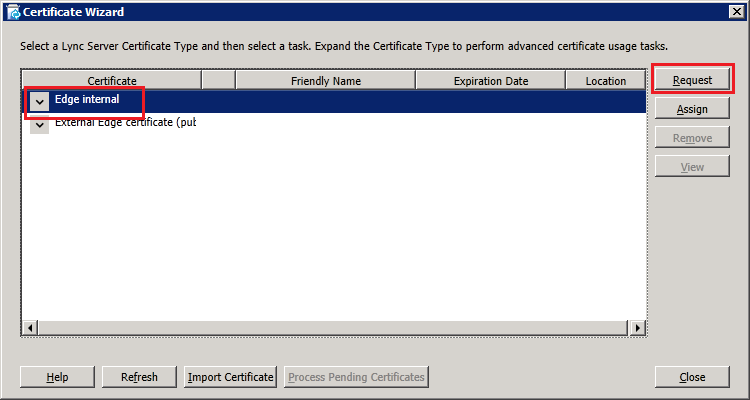
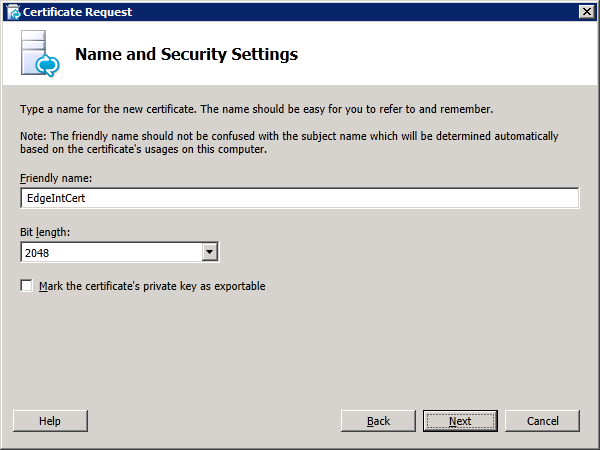
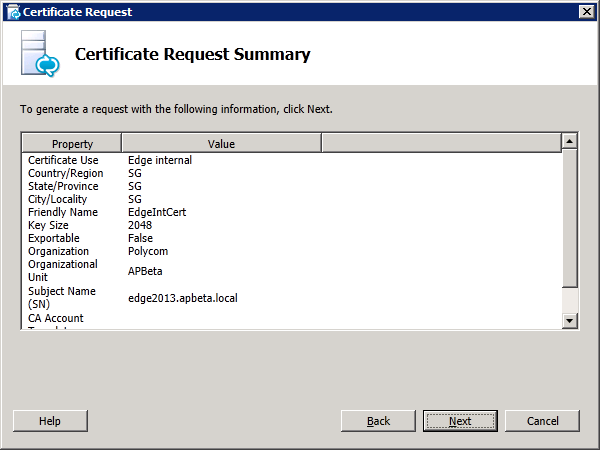
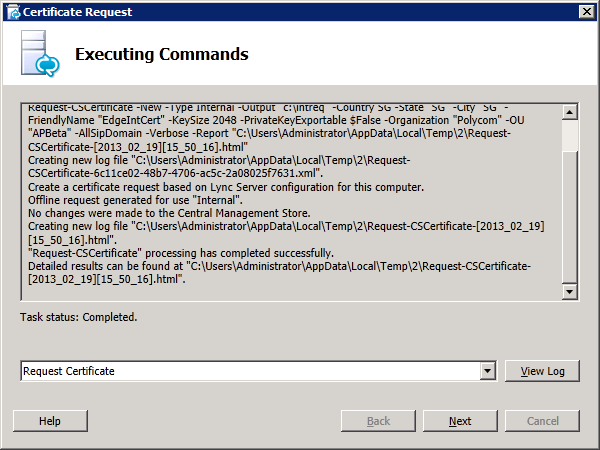
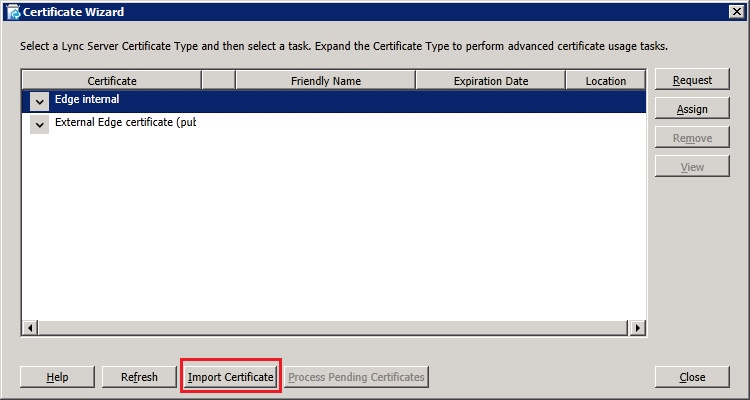
Next, click on "Run" in "Step 3 Request, Install or Assign Certificates" and in the Certificate Wizard, select "Edge Internal" click "Request":
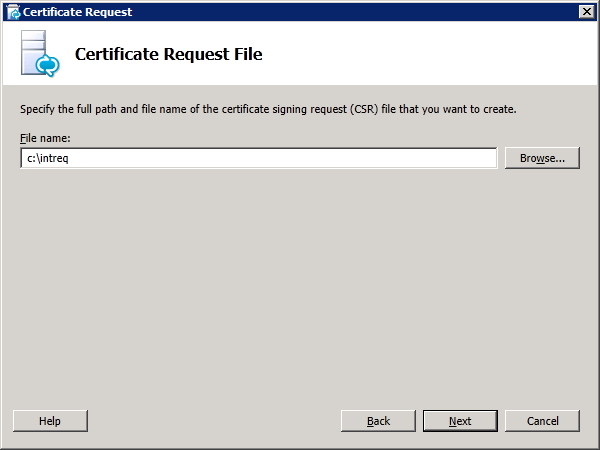
|
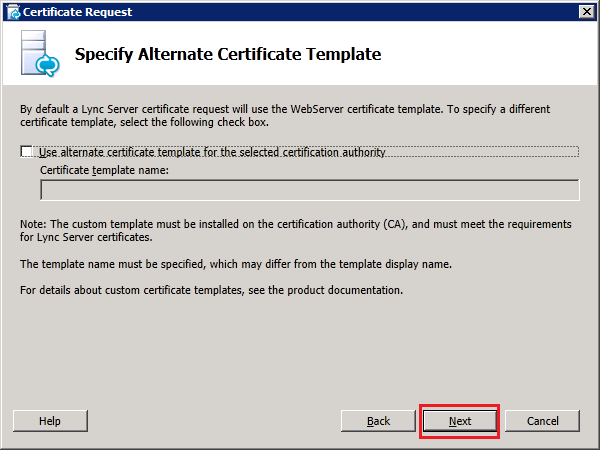
|
|

|
|
|


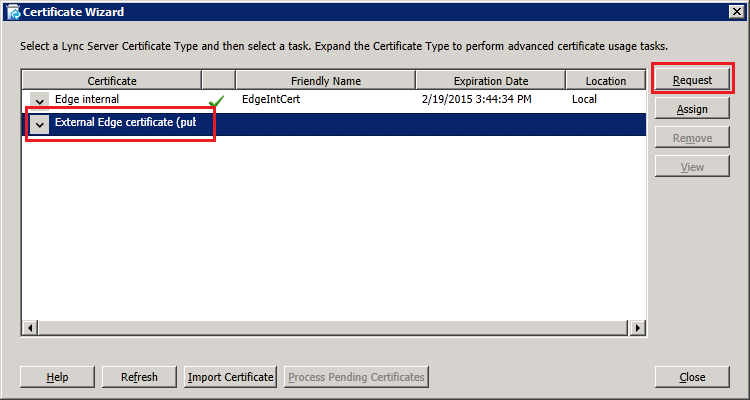
After getting the internal certificate for the Edge, we now focus on the External Edge. The process is similar and not all the steps will be repeated, but only the sifferences will be highlighted. On the Certificate Wizard, select "External Edge certificate" and click "Request":
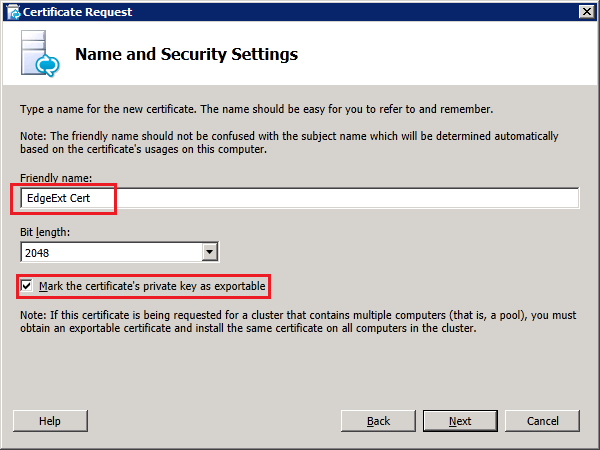
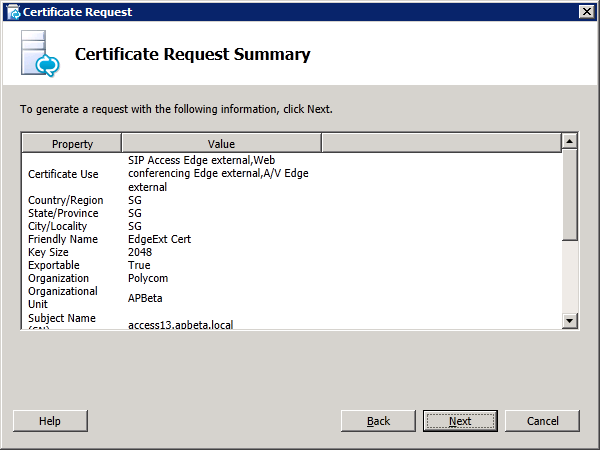
The remaining steps are similar to those for the internal certificate. Of course a different Certificate Request File should be specified as well as a different Friendly Certificate Name. But the Private Key must be marked as exportable as shown below:
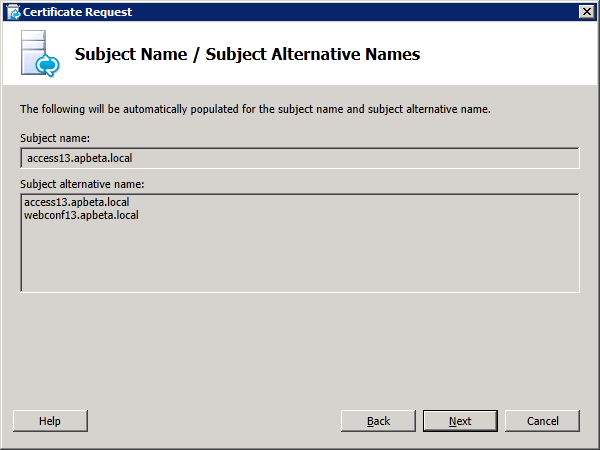
In the Subject Names windows, note that the two SANs are already added automatically:
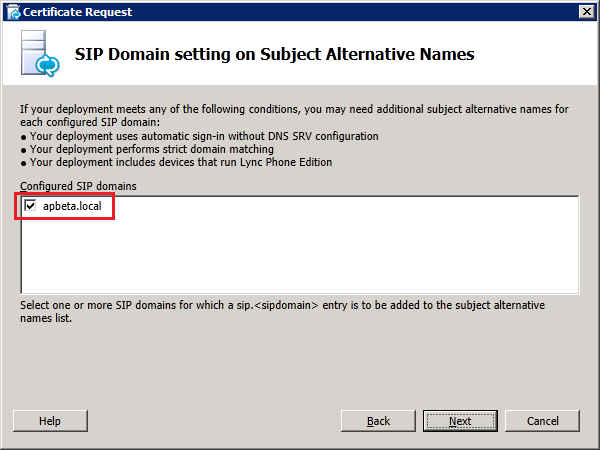
An additional step is required to select the SIP domain to be added to the SAN list:
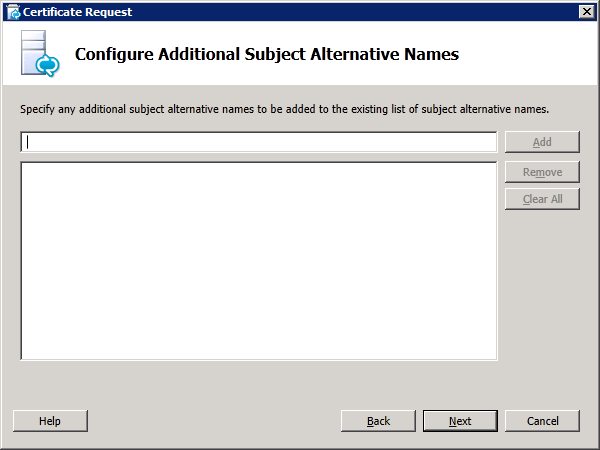
In the next step, the lab does not require any additional SANs. Proceeding with the Request Summary page will allow us to generate the CSR which is saved to a file c:\extreq.req
|
|
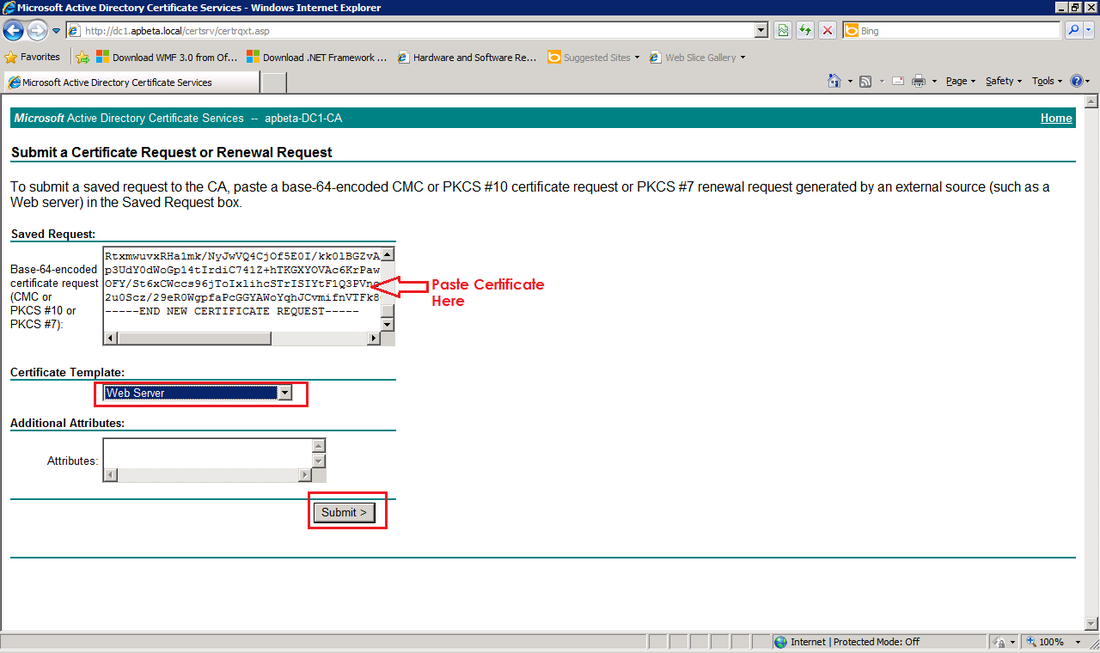
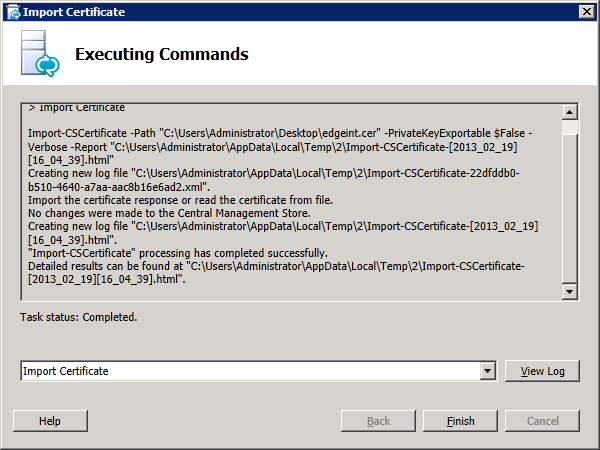
Using the same method as the internal certificate, submit the request to the CA and save the certificate. Then import the certificate using the certificate wizard with the "Certificate file contains private key"checkbox cleared:

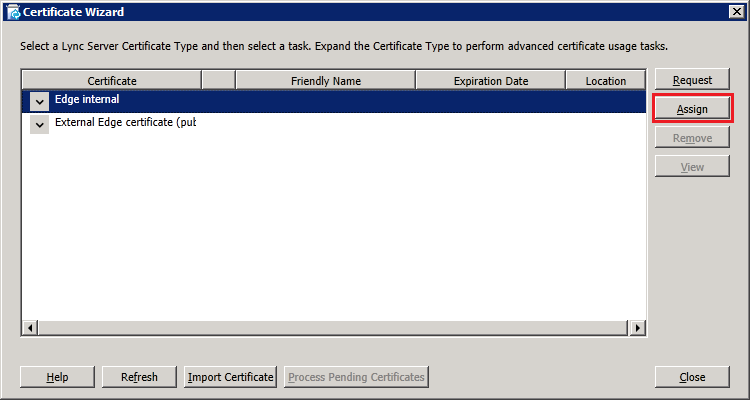
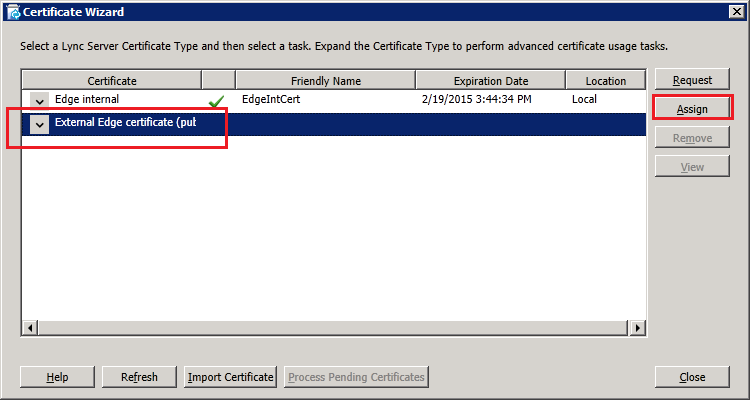
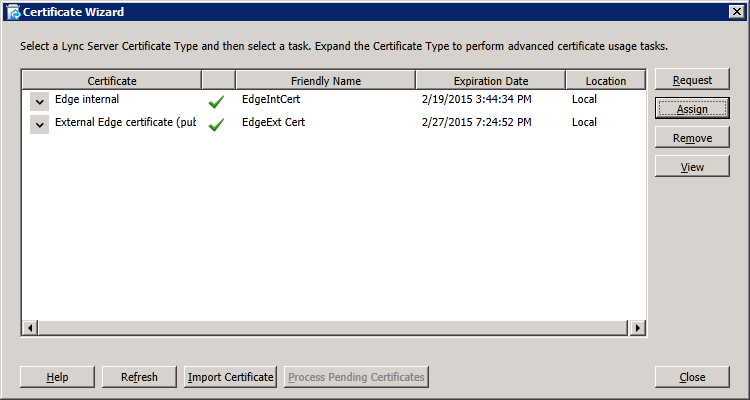
Click next to continue and complete the wizard, verifying that the certificate was imported successfully. Back on the certificate wizard, select "External Edge certificate" and click "Assign":
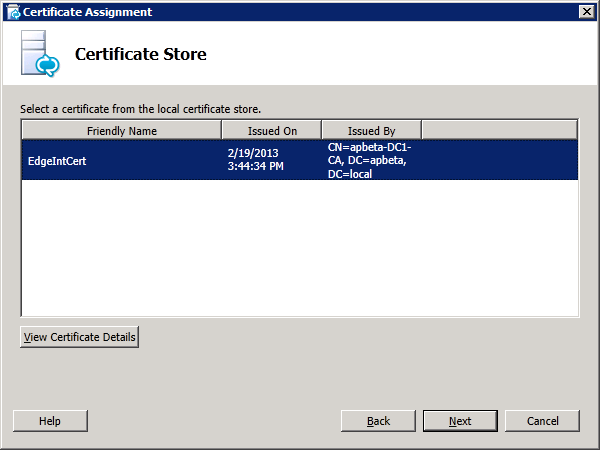
In the "Certificate Assignment" window click "Next". In the "Certificate Store" window, select the external certfiicate and click "Next":
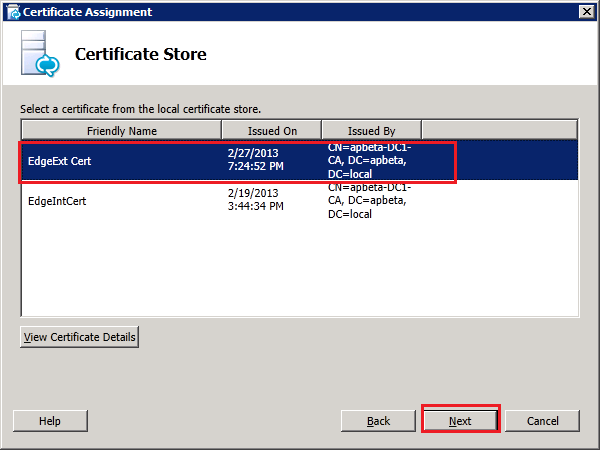
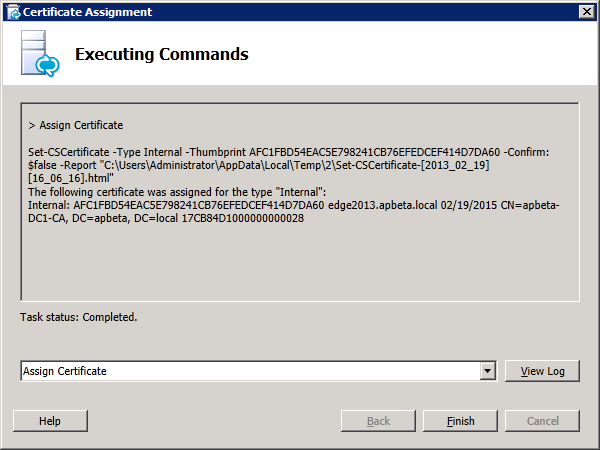
In the "Certificate Assignment Summary" window, click "Next". Then verify successful assignment and click "Finish" to end the wizard. Both internal and external certificates should now have a green tick as shown below:
Finally, we start the services by clicking "Run" at the "Start Services":
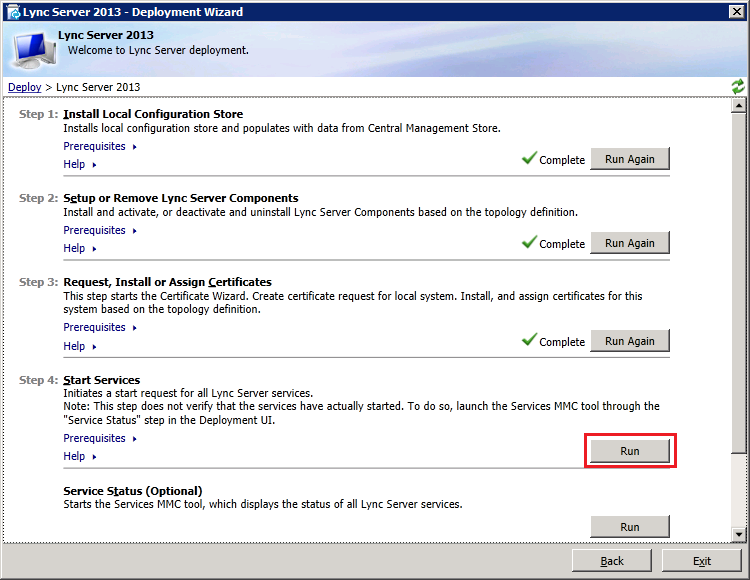
Verify services are started successfuly and click "Finish" to end the wizard. At this stage, we have introduced a Lync2013 Edge into the mixed environment but are still using the legacy Lync2010 edge for all external access and federation services. In a future article, we will migrate the Remote Access and Media Traffic for Lync2013 users to use the Lync2013 Edge services.