

Lync - AsteriskNOW 2.0 Integration Guide 14 Sep 2012
After 2 days of testing and troubleshooting, I finally managed to get my Lync2010 server integrated with AsteriskNow 2.0 as a Direct SIP PBX. Many blogs have been written on this topic but majority were created sometime ago for older versions of Asterisk and used mainly the command line. This article provides guidance for integrating Lync2010 with the latest version of AsteriskNOW 2.0 as of Sep 2012 using the FreePBX GUI admin interface. I'll also provide some troubleshooting tips that I learned along the way.
Note that Asterisk is not offically supported by Microsoft as a Direct-SIP PBX and is not listed in their OIP page http://technet.microsoft.com/en-us/lync/gg131938.aspx. Nevertheless, 'not supported' does not always mean 'not working' and some small-medium business may have done this in their environment using free Asterisk PBX as a gateway to the PSTN. This article serves primarily as a guide to get Lync-Asterisk integration in a lab for testing purposes only and not be used in a real-world deployment.
The high level overview of the steps involved are:
1. Install AsteriskNOW2.0 and create users
2. Install and Configure X-Lite and test call functionality in Asterisk
3. Create the Asterisk SIP Trunk
4. Create the Asterisk Inbound/Outbound Routes
5. Configure Additional Parameters
6. Configure the Dialplan, Voice Route, PSTN Usage and Voice Policy in Lync Server
7. Test calls between Polycom CX600 phone edition Lync and X-Lite client (Asterisk)
This whole process should take 3-4 hours assuming your Lync environment is already up and running. Ready? Lets begin.
Step 1: Install AsteriskNOW2.0 and create users
Asterisk now provides a quickstart guide and download to enable you to install a full Asterisk PBX running on CentOS Linux. I used a Hyper-V virtual machine with 1.5GB RAM and got it up and running in under 30mins. The step-by-step guide is available here and I shall not repeat those steps in this article. Simply follow the guide up to the part where you are able to login to the Asterisk server and open a browser to access the FreePBX Admin page. You don't need to continue the rest of the guide which shows you how to setup the Digium phones. We will be using X-Lite as the softphone for Asterisk so as long as you can get to the page below (the FreePBX default username/password is admin/admin), you're done installing Asterisk:
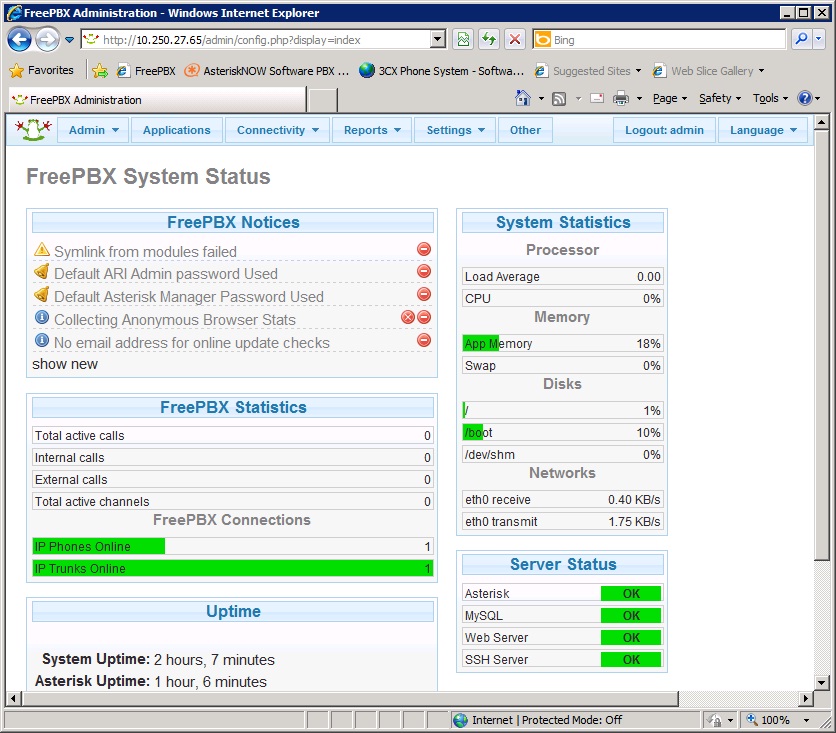
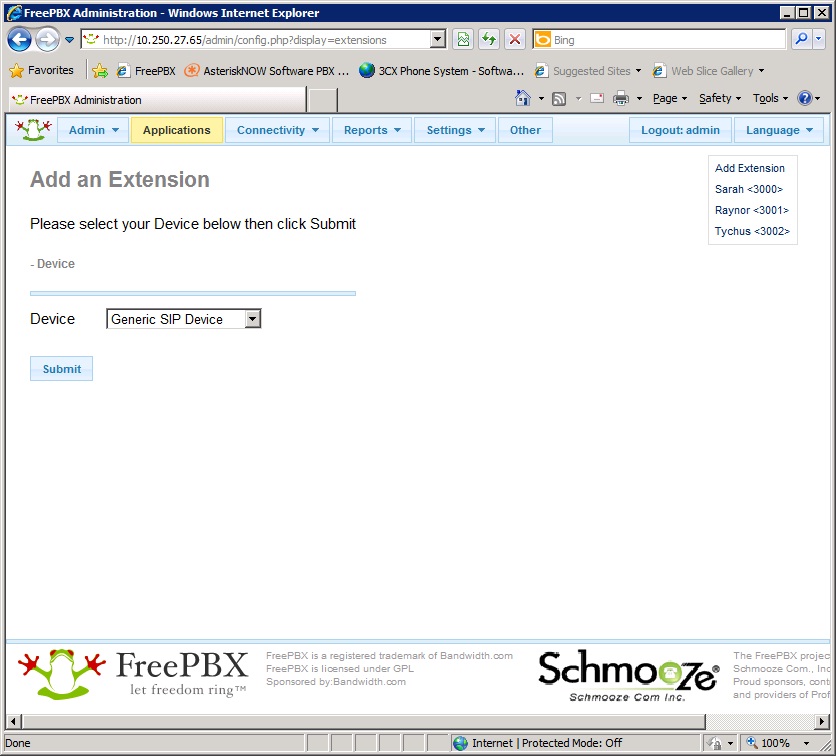
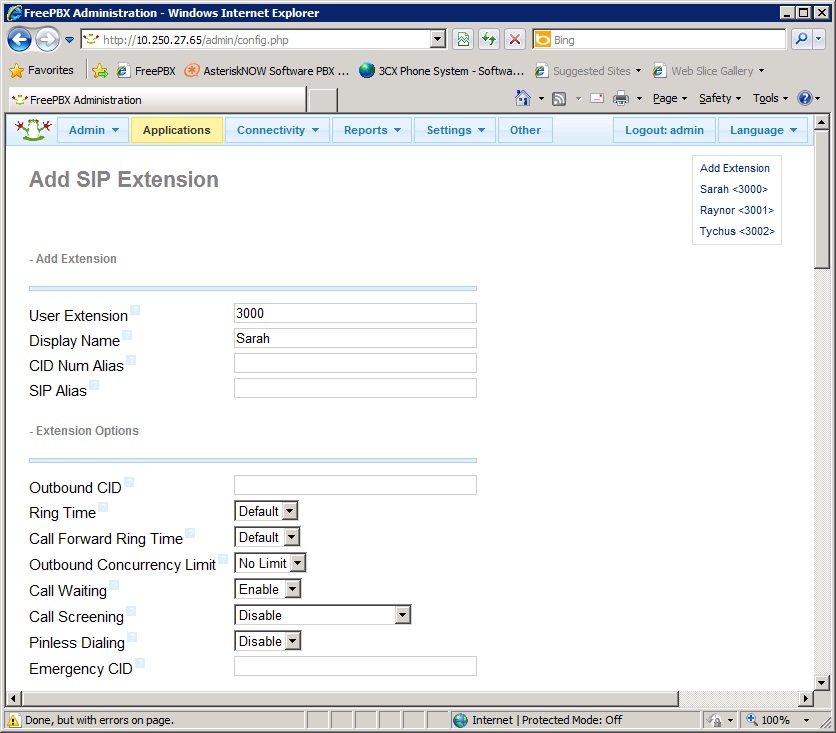
The above page can be found under the top tab menu Reports->FreePBX System Status. You're now ready to create users for Asterisk so that X-Lite can register. In this guide I'm using 4-digit extensions starting with 3xxx for Asterisk and 9xxx for Lync. At the top tab menu, click on Applications and ensure Generic SIP Device is selected in the dropdown box, then click Submit. Then on the Add SIP Extenstion page, enter a suitable extension and display name similar to the picture below:
|
|
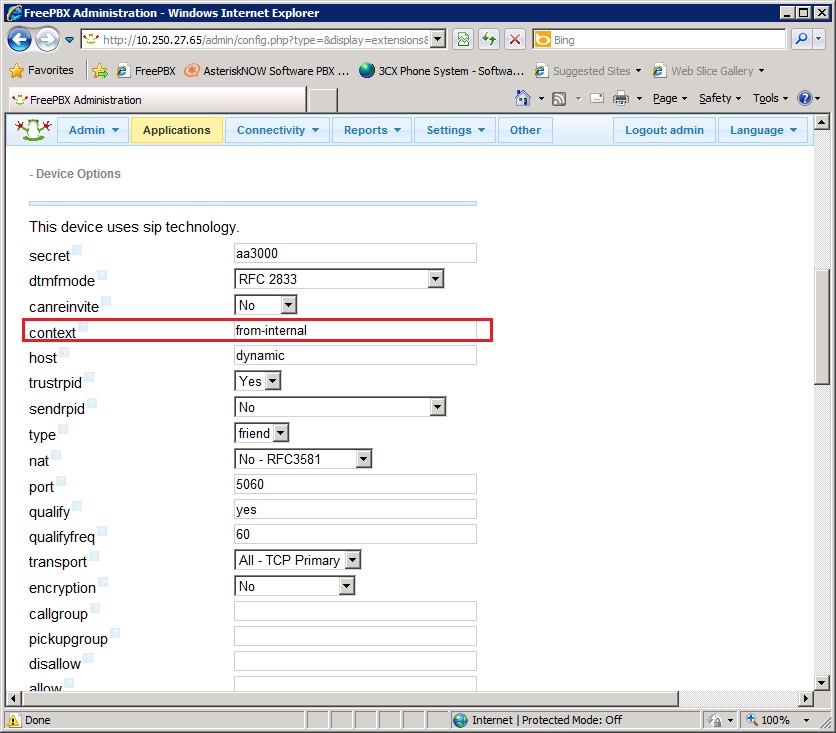
Scroll down and enter a secret for the user which will be used later when registering with X-Lite. Leave the other fields default and click Submit to create the user. Note that in a real production Asterisk environment you will need to popluate the other fields but in this guide we will just enter what's enough to get Lync integration working. Once the user is created it will appear in the top right of the Admin page. Click on the newly created user and scroll down to look for the 'Context' field. It should be automatically populated with "from-internal" and this is important to note when creating the SIP Trunk later.

|
|
Follow the above steps to create a 2nd user. Once done, we are ready to proceed to install and register X-Lite in the next step
Step 2: Install and Configure X-Lite and test call functionality
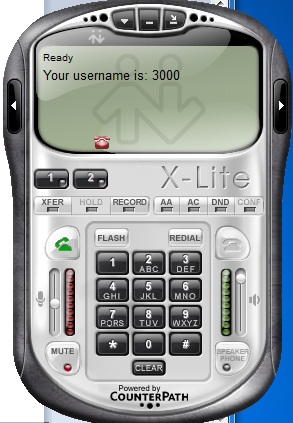
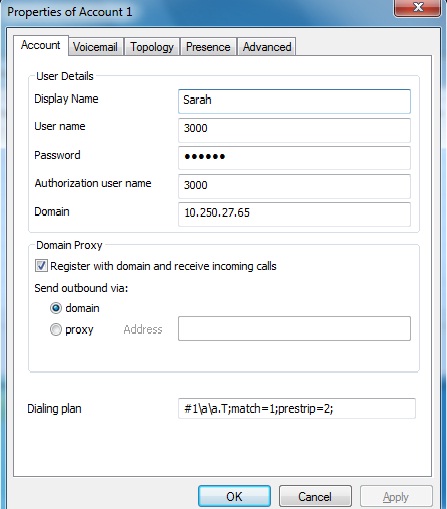
Dowload and install X-Lite from http://www.counterpath.com/x-lite-download.html. I'm using an older version of X-Lite v3.0 so your X-Lite client may look different from the screenshots below. Go to the Menu and select SIP Account Settings... and create a new SIP account. Enter a Display Name for the Asterisk user created in Step 1 followed by the User name which should be the user Extension and the password field will be the secret entered earlier. The Domain field should be the IP address of the Asterisk server. Select the checkbox to register with domain as shown below:
|
|
Next install X-Lite on a different PC and configure it to use the 2nd Asterisk user created in Step 1. Once that is done, test calling between these 2 users. It's important to verify this and make sure that Asterisk is working properly before attempting Lync integration. Once you have verified, proceed to Step 3.
Step 3: Create the Asterisk SIP Trunk to Lync
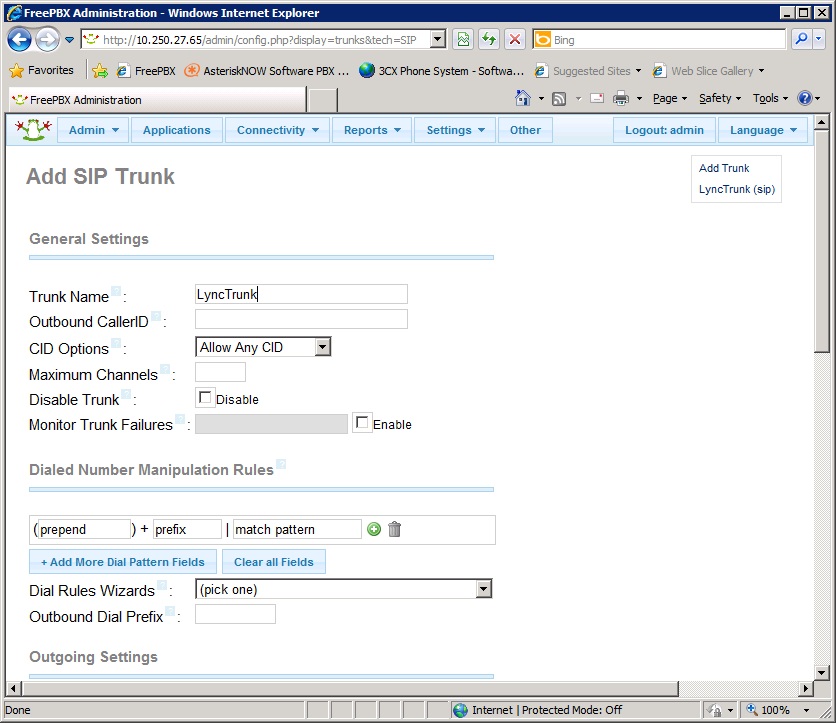
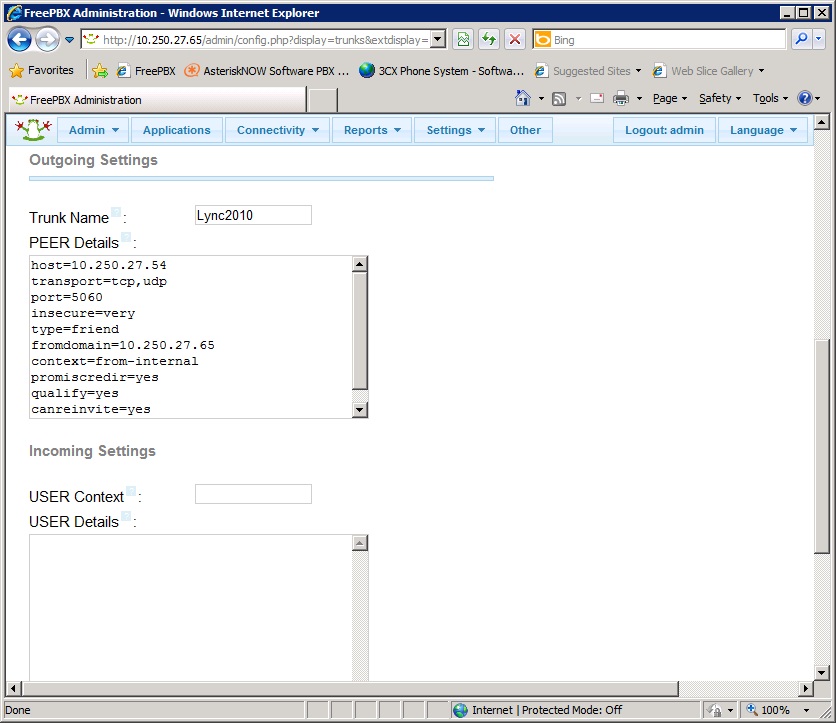
On the top tab menu of FreePBX Admin page, click Connectivity->Trunks ,then click Add SIP Trunk. On the Add SIP Trunk page, enter a suitable Trunk Name and scroll down till you see Outgoing Settings section. Here's the critical section where you need to enter a couple of parameters in the PEER Details box to make the trunk work with Lync. These are shown in the screenshots below followed by a brief explanation of some of the key parameters
|
|
|
host=10.250.27.54
transport=tcp,udp port=5060 insecure=very fromdomain=10.250.27.65 context=from-internal promiscredir=yes qualify=yes canreinvite=yes |
Enter the IP address of the Lync Mediation Server
Transport can be just tcp or tcp,udp. Lync will use tcp TCP Port number that hte Mediation server is listening on. Note that the default port no is 5068 but you can change this to 5060. This port is already open by default in Asterisk. If you decide to stay on 5068 then you need open this port on the Asterisk server. Consult this page on how to do this. Must be set to the IP address of the Asterisk server Must match the context of the users created in Step 1 mentioned earlier |
Next, ensure that in the Incoming Settings section, the USER context and USER details fields are left blank. Then click Submit Changes and Apply Config. Note that I have left the dialed number manipulation rules empty here because we will create them in the Inbound/Outbound Routes in the next step.
Step 4: Create the Inbound/Outbound Routes
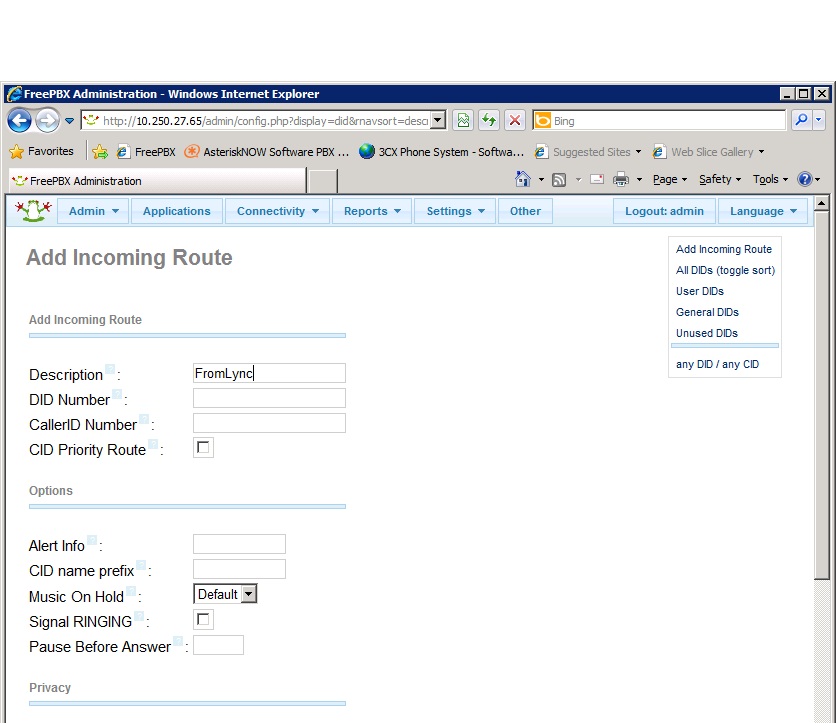
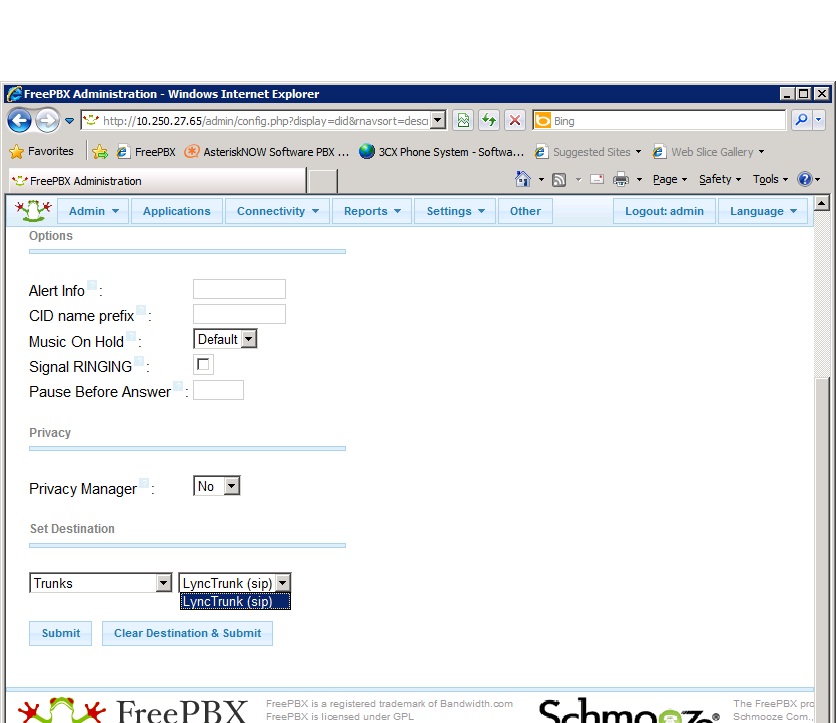
Let's create the Inbound route from Lync first. At the FreePBX Admin top menu bar, select Connectivity->Inbound Routes. In the Add Incoming Route page, give the route a description and leave the DID Number and CallerID Number fields blank to apply this route to all DID/CID numbers. Note that in a actual Asterisk deployment you would need to enter the correct values according to your route design. Then scroll down and choose Trunks in the Set Destination section and select the Lync Trunk created in Step 3 in the dropdown. Leave all other fields default. Then click Submit to create the inbound route:
|
|
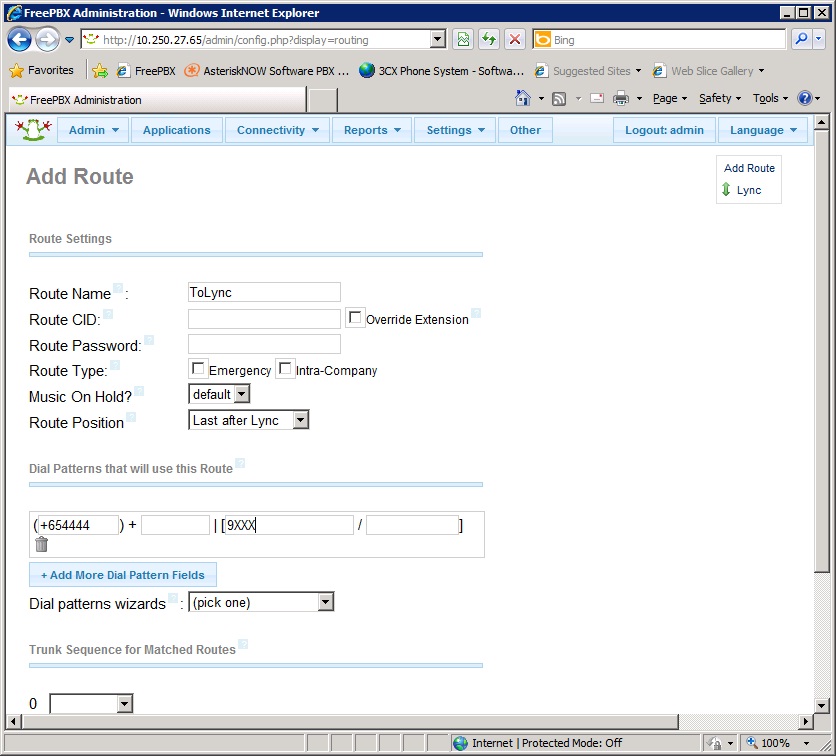
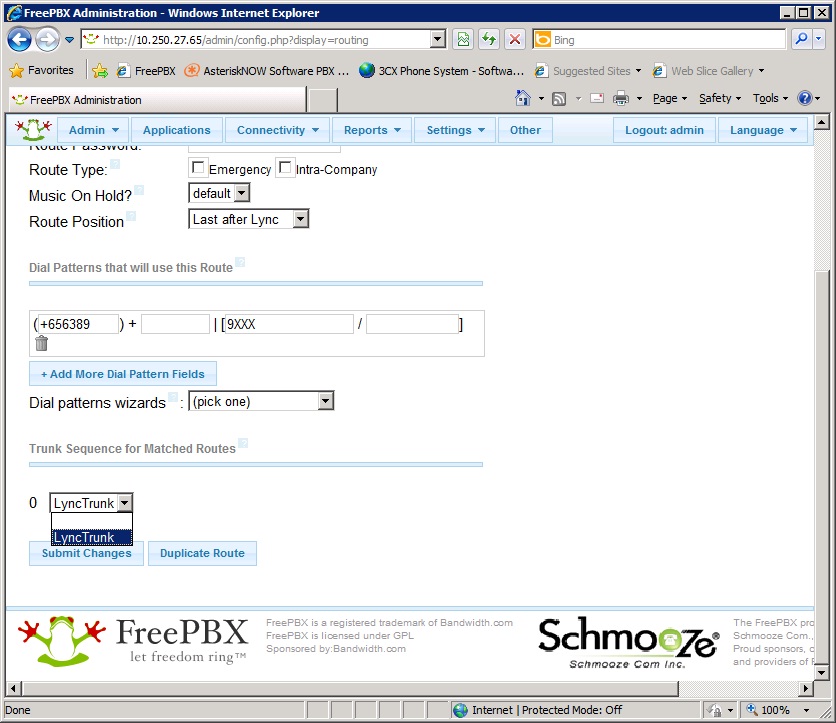
To create the outbound route, click on Connectivity->Outbound Routes and in the Add Route page, give it a suitable name and in the Dial Patterns section, enter the fields similar to that shown in the picture below. The first box enclosed in brackets ( )is what Aterisk will prepend to before sending the call to Lync and the fields in the square brackets [ ] enter the dialed digits that will used this route. Since we are using 4-digit extensions in Lync starting with 9XXX we will enter that. The full Lync TEL URI for user is in E.164 format so you will need to enter the front portion of the TEL URI including the plus (+) sign in the first bracketed field eg. +654444. When a Asterisk user dials 9000 for example, then the full number sent to Lync will be +6544449000. Then scroll down and in the Trunk Sequence section, select from the dropdown the Trunk created in Step 3. Then click Submit Changes to create the route.
|
|
Step 5: Configure Additional Parameters
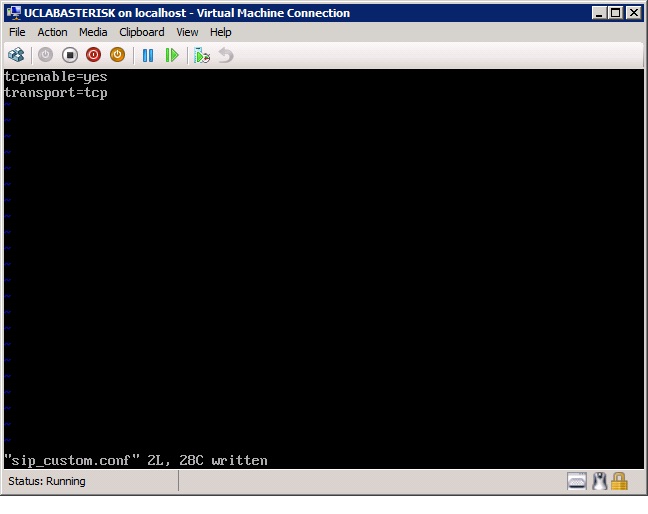
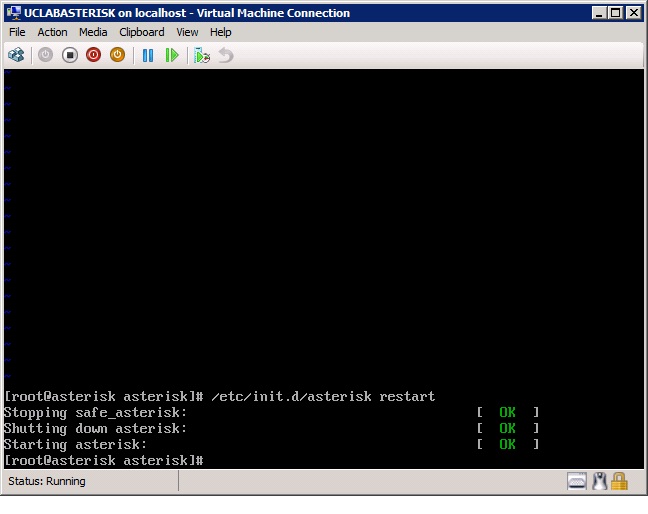
There are 2 additional parameters required on Asterisk which unfortunately cannot be changed using the FreePBX Admin GUI. These parameters are required in order to for Asterisk to communicate with Lync using TCP. Many blogs recommend the use of WinSCP but I prefer to login directly onto the CentOS console and configure the parameters. First, open a console window in Hyper-V to the asterisk server and login as root. We will use the VI editor to edit the parameters file so run the command "vi /etc/asterisk/sip_custom.conf". this will open the file and you should see a blank file. Hit the "i" key to enter input mode and type in the two lines as shown below. Then type ":w" to save the file and then ":q" to quit VI editor. Next restart Asterisk by running the command "/etc/init.d/asterisk restart".
|
|
That's all that's needed on the Asterisk side. Next we will configure the Lync server. We will revisit the CentOS console later for troubleshooting
Step 6: Configure Dialplan, Voice Route, PSTN Usage and Voice Policy in Lync Server
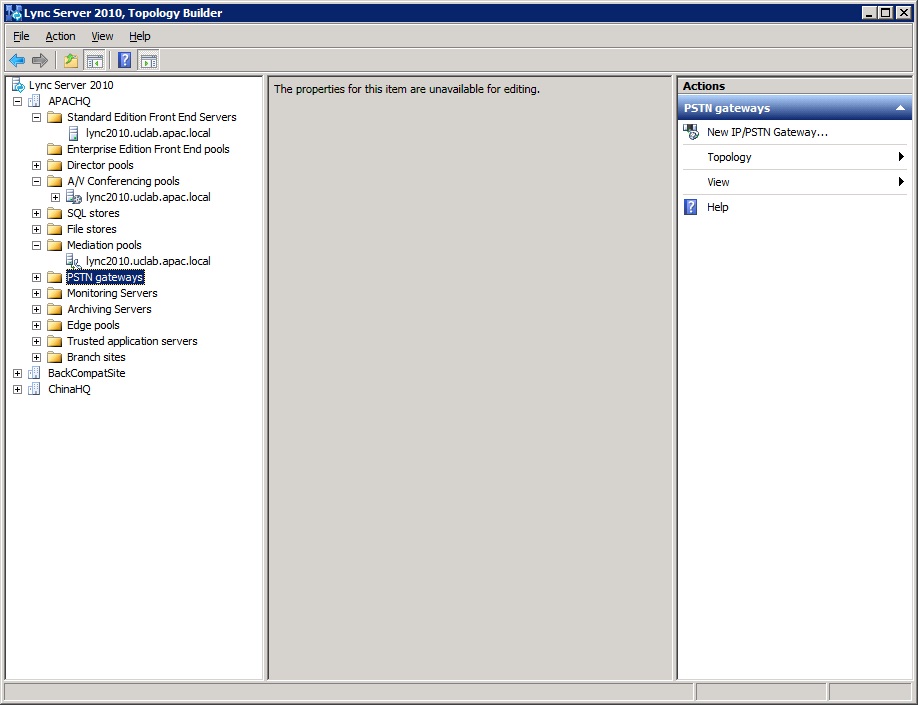
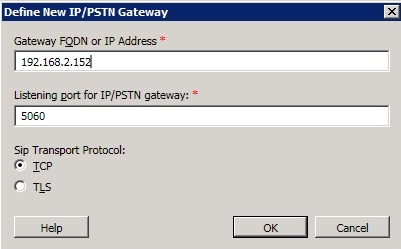
First, create a new PSTN gateway for Asterisk. In the Lync Topology Builder, select the PSTN Gateways node on the left and click New PSTN Gateway.... Enter the IP address of the Asterisk server and specify 5060 as the listening port and TCP for the Sip Transport Protocol. Then click OK to create the gateway.
|
|
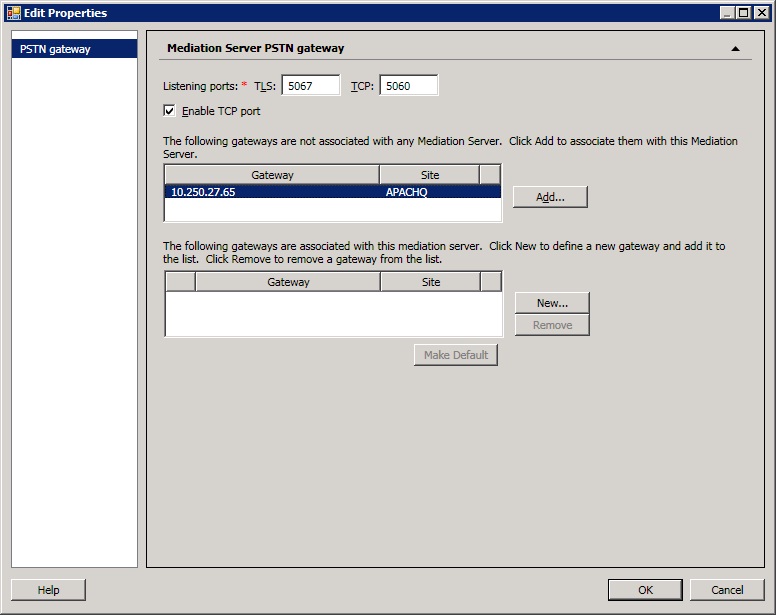
Next associate the PSTN gateway with your Mediation Server. On the Topology Builder, expand Mediation Pools and select your mediation server then click Edit Properties. On the Mediation Server PSTN Gateway properties page, change the TCP listening port to 5060 and then select the PSTN gateway created earler and click Add to associate it. The gateway will appear in the lower box. Then click OK.
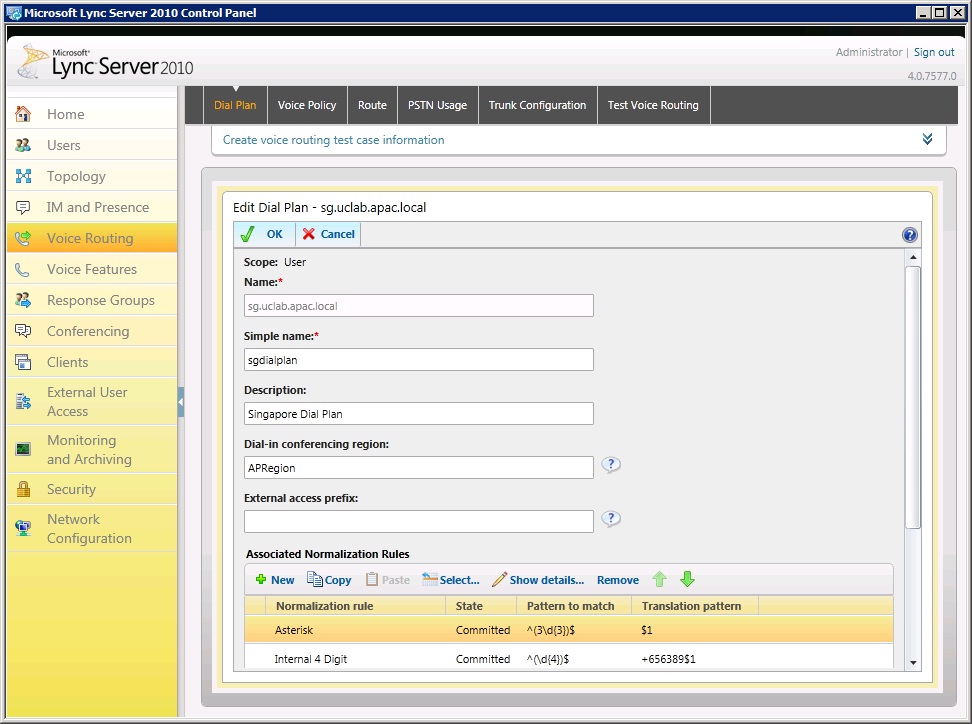
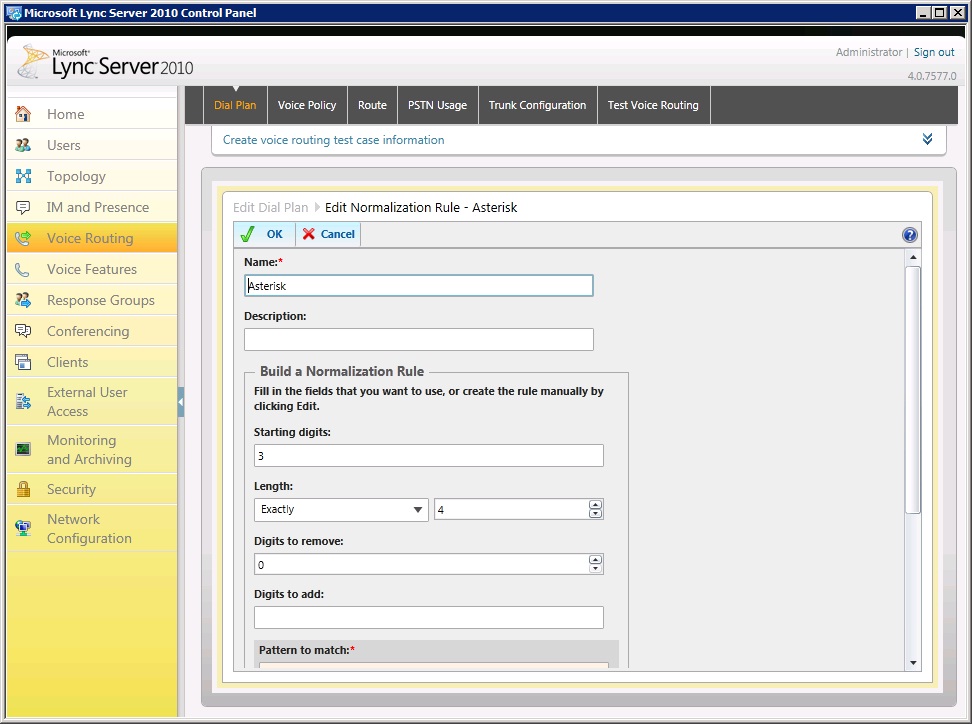
Next, edit your existing dialplan to create a new normalization rule for Asterisk extensions using the Lync Control Panel. This may or may not be necessary in your Lync environment depending on how you set up your dialplan. On my server, I created a new normalization rule for users dialing 3XXX which basically does nothing to change the dialstring. This is because in Asterisk my extensions are all 3XXX and E.164 format is not being used. So just create a new normalization rule for 4-digit numbers starting with 3 with a translation pattern of $1 which basically does nothing.
|
|
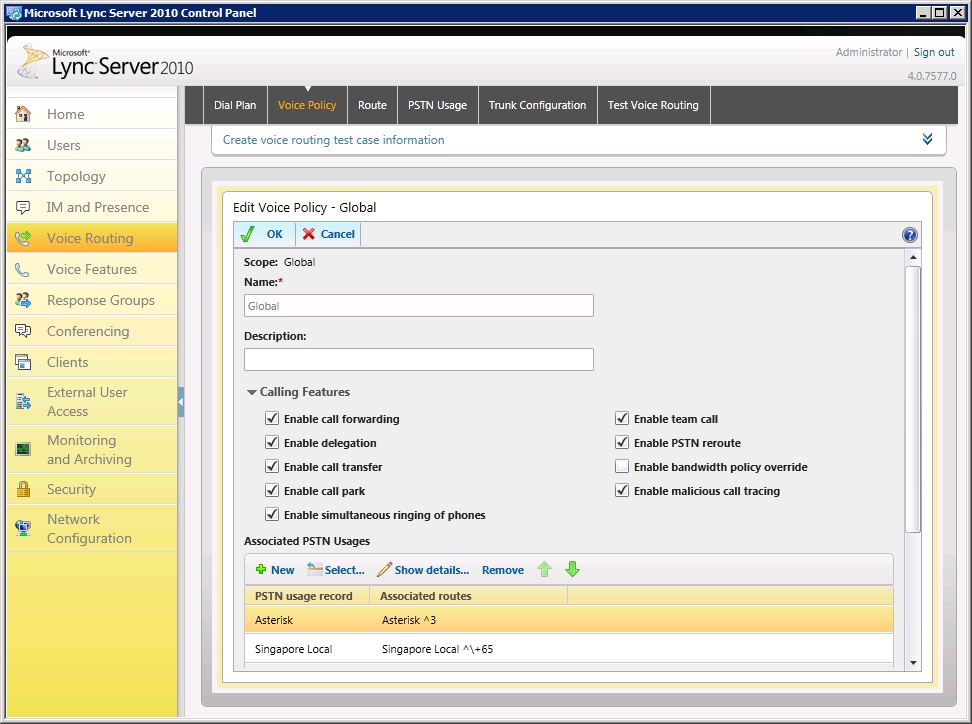
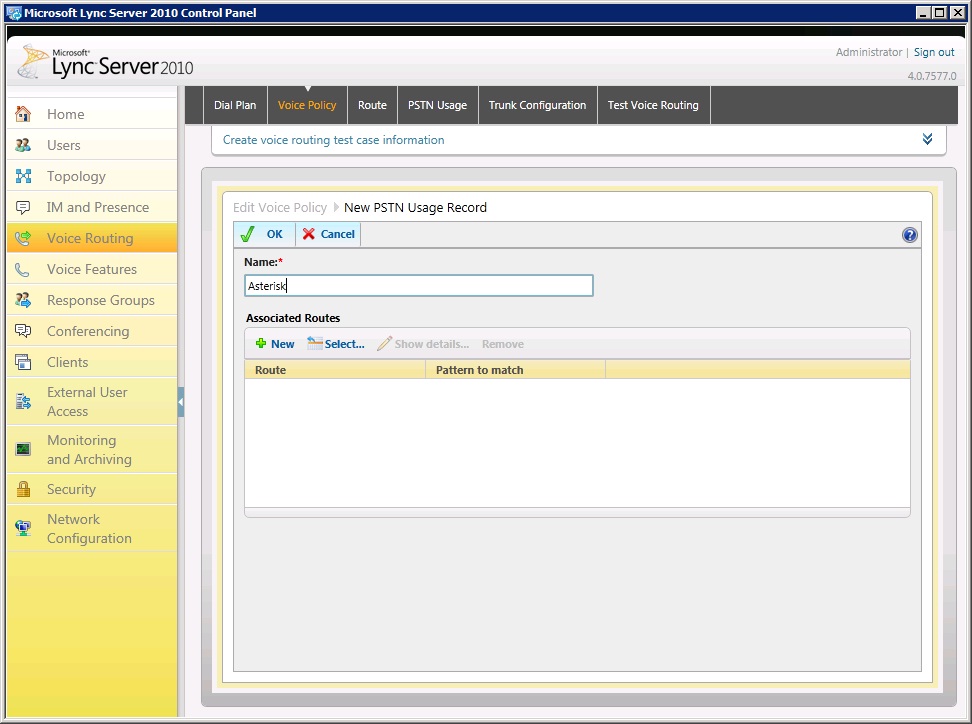
Next, use the Control Panel to edit your Voice Policy to add a new PSTN Usage. In my server I'm using the Global policy and I just add a new PSTN Usage called Asterisk:
|
|
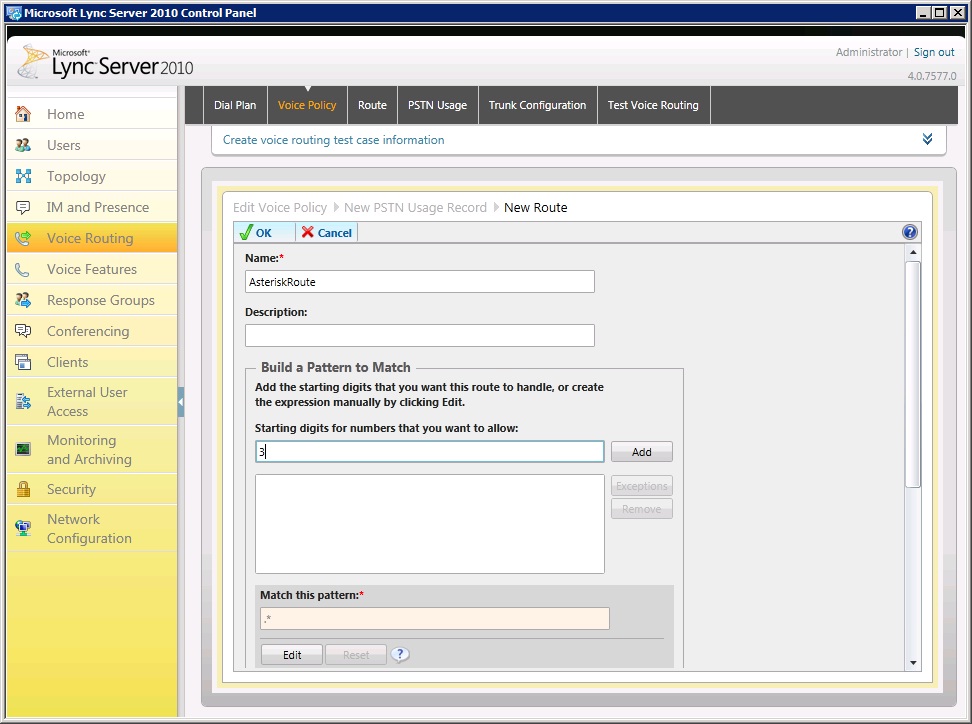
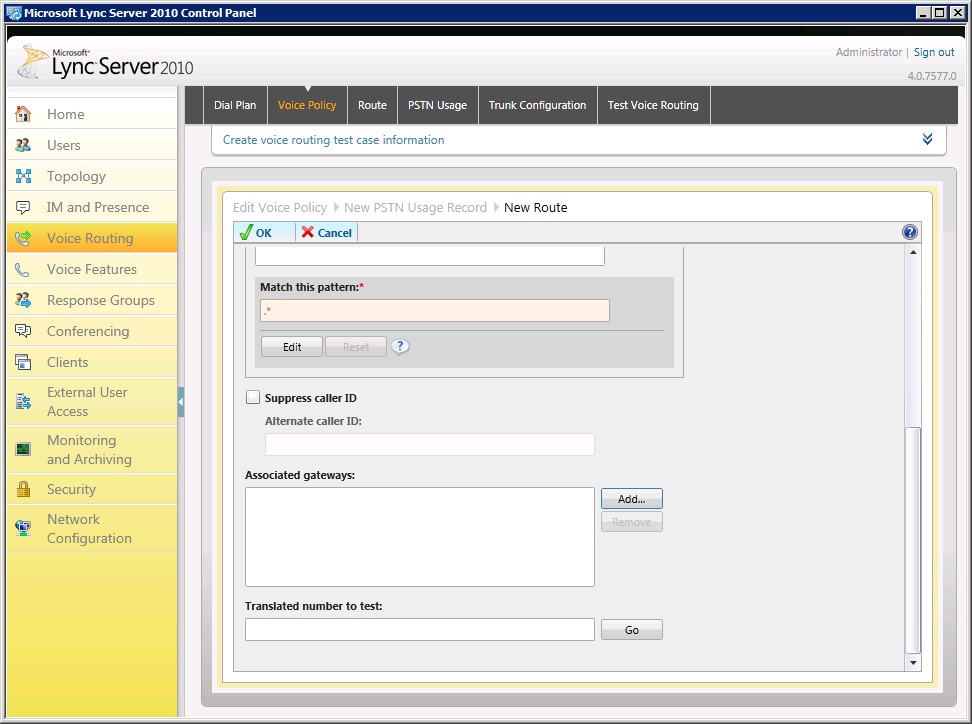
In the New PSTN Usage Record page, under Associated Routes, click New and in the New Route page, give the route a name, then enter 3 in the starting digit box and click Add. In your environment, you would enter the starting digit(s) for your Asterisk extensions. then scroll down and under the Associated Gateways, clidk Add and select the PSTN Gateway created earlier in this step.
|
|
Finally click OK 3 times to return to the Control Panel and your Lync server is all set to communicate with Asterisk!
Step 7: Test calls between Polycom CX600 phone edition Lync and X-Lite client (Asterisk)
If you've followed this guide until this point, give yourself a pat on the back for being so patient and determined! We're now ready to test calls between the 2 systems. In my Lync, I have a Polycom CX600 registered with a Lync user extension 9228 and we should be able to make calls from this phone to the 2 Asterisk users created ealier by simply dialing 3000 or 3001. You should see the X-Lite client receive the popup incoming call alert and try out the sound quality between these two clients. Conversely, dialing the Lync user extension from X-Lite will cause the CX600 to ring and you can answer the call.
Should things not go as smoothly as above, you may check the status of the SIP Peer in Asterisk. On the Asterisk console, login as root and on the run the command "asterisk -r". At the Asterisk CLI prompt, run the command "sip show peers". You should see the Lync mediation server listed as a peer listening on port 5060 with an "OK" status.
Should things not go as smoothly as above, you may check the status of the SIP Peer in Asterisk. On the Asterisk console, login as root and on the run the command "asterisk -r". At the Asterisk CLI prompt, run the command "sip show peers". You should see the Lync mediation server listed as a peer listening on port 5060 with an "OK" status.
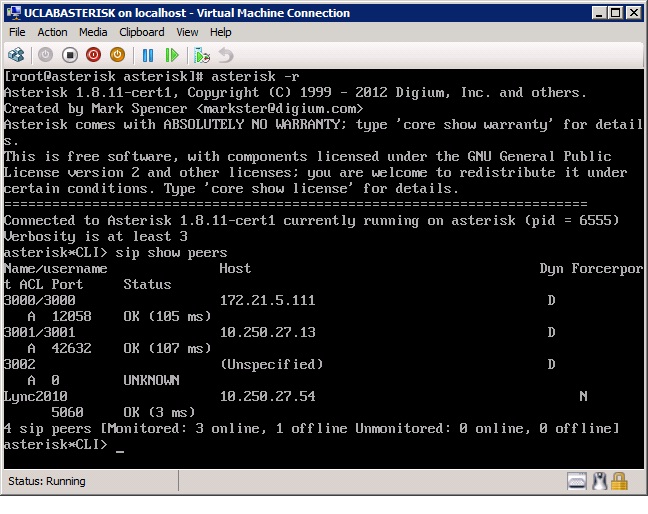
If the status is not "OK", go back and check the configuration again to make sure the port numbers are correct and that none of the essential parameters in the earlier steps are left out. You may also use the Lync Logging Tool to check the SIP Trace and see what could be causing the issue. Last but not least, you might have opted to use 5068 for the TCP listening port on the Mediation Server and have created a rule to allow this port. If you suspect that firewall rule is incorrect and the port is not opened, temporarily disable the firewall on Asterisk by running the command "service iptables stop".
That's all for this article and I hope it was a worthwhile effort to create it. As always, comments and feedback are welcome at http://www.ucprimer.com/comments-discussions--feedback.html
That's all for this article and I hope it was a worthwhile effort to create it. As always, comments and feedback are welcome at http://www.ucprimer.com/comments-discussions--feedback.html
References
Below are references to blog sites which helped me to get the integration working. Many thanks to the authors:
http://memphistech.net/?p=245
http://savithomas.blogspot.com/2011/07/connecting-lync-server-2010-with.html
http://blog.metasplo.it/2011/11/integrating-lync-2010-and-asterisk.html
http://memphistech.net/?p=245
http://savithomas.blogspot.com/2011/07/connecting-lync-server-2010-with.html
http://blog.metasplo.it/2011/11/integrating-lync-2010-and-asterisk.html