Integrating Exchange 2010 OWA with Lync Walkthrough
3 Sep 2012
Unlike OCS2007R2, Lync2010 has no Communicator Web Access (CWA) component which was used in to provide IM and Presence functionality via the web browser. Fortunately, users can still get this functionality in Exchange2010 Outlook Web Access (OWA). However, this is not enabled by default and needs to be configured. This article provides a step-by-step guide to setting up Lync integration with OWA. The high level steps are:
1. Install and configure the required components on the Exchange CAS Server
2. Configure the required components on the Exchange CAS Server
3. Create the trusts between Lync and Exchange
4. Test Lync integration in OWA
In this walkthrough, I have the Mailbox, CAS, HUB and UM roles installed on the same Exchange2010 Standard Edition server. If you have separate or multiple CAS servers or if you have UM installed on a non-CAS server, then the steps will differ slightly and you cannot follow this walkthrough as-is.
Step 1: Install and configure required components on the Exchange CAS Server
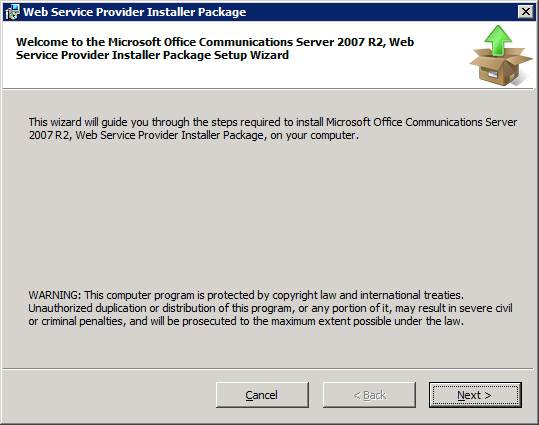
The CAS server needs the Microsoft Office Communications Server 2007 R2 Web Service Provider component, which provides the basic IM and Presence integration with OWA. Download this from http://www.microsoft.com/en-us/download/details.aspx?displaylang=en&id=2310. Once downloaded, start the installation by double clicking on the file CWAOWASSPMain.msi to begin the wizard. On the first page, click Next and then accept the license agreement:
Accept the default installation location and click Next and then Next again to start the installation. Then click Close to complete the installation. the default location will be at C:\Web Service Provider Installer Package. Open a folder at this location to view the files. If your Exchange server is already setup with all the roles mentioned, then the VisualC++2008 redistributable package and UCMA API 2.0 Redist will already be installed in your server. If not, then then double-click the vcredist_x64.exe and UCMARedist.msi files to install these 2 components.
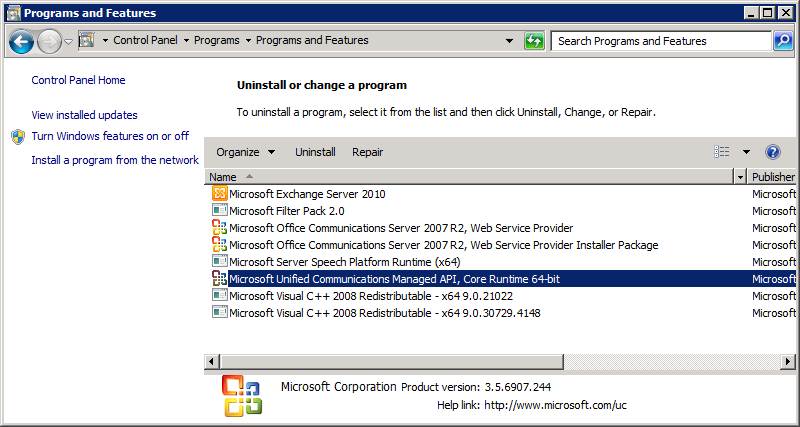
A hotfix KB2647091 for UCMA API 2.0 Redist is now required. Download from http://www.microsoft.com/en-us/download/details.aspx?id=7557 and install the hotfix to proceed. Note that the hotfix installs silently and does not indicate that it has completed. To verify, open Control Panel->Uninstall a Program and then select on the UCMA API Runtime and check that the version number is 3.5.6907.244 or higher:
A hotfix KB2647091 for UCMA API 2.0 Redist is now required. Download from http://www.microsoft.com/en-us/download/details.aspx?id=7557 and install the hotfix to proceed. Note that the hotfix installs silently and does not indicate that it has completed. To verify, open Control Panel->Uninstall a Program and then select on the UCMA API Runtime and check that the version number is 3.5.6907.244 or higher:
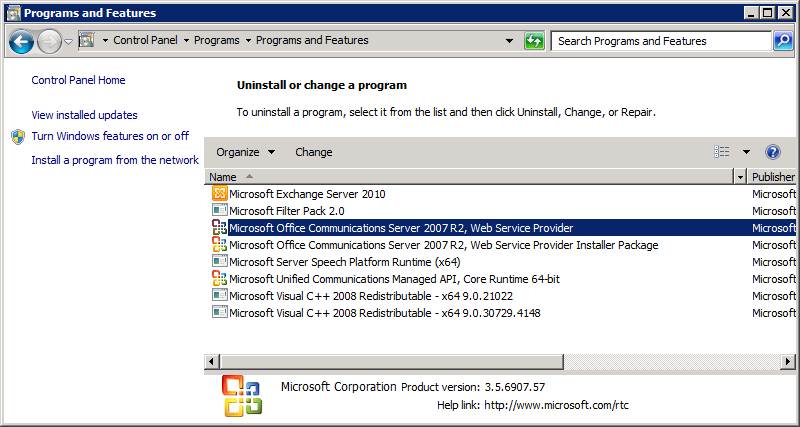
Next we are ready to install the Web Components for Lync integration. Double click on the CWAOWASSP.msi file to begin. This is again a silent install so open the Control Panel again to check that the component has been installed successfully:
Next, a hotfix is also required for the OCS2007R2 Web Service Provider (KB981260) which can be downloaded from http://www.microsoft.com/en-us/download/details.aspx?id=797. Install this on the server to upgrade the version to 6907.202. Again, use the Control Panel to verify that the installation is successful because if the silent install.
Step 2: Configure the required components on the Exchange CAS Server
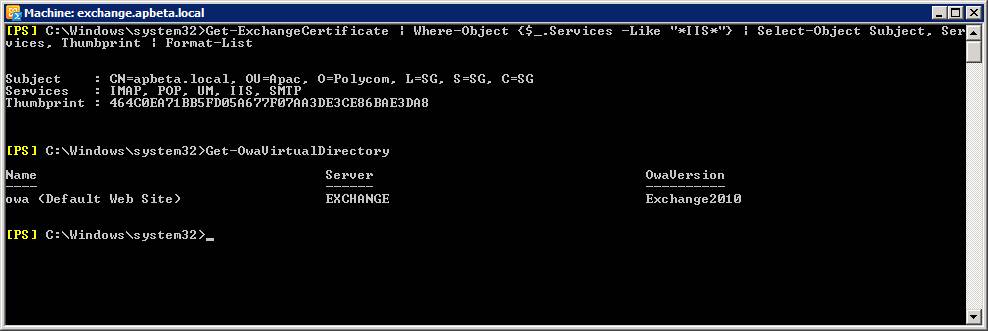
First, get the certificate thumbprint of the Exchange certificates that IIS is using. This is done by running the following command in the Exchange Management Shell:
Get-ExchangeCertificate | Where-Object {$_.Services -Like "*IIS*"} | Select-Object Subject, Ser
vices, Thumbprint | Format-List
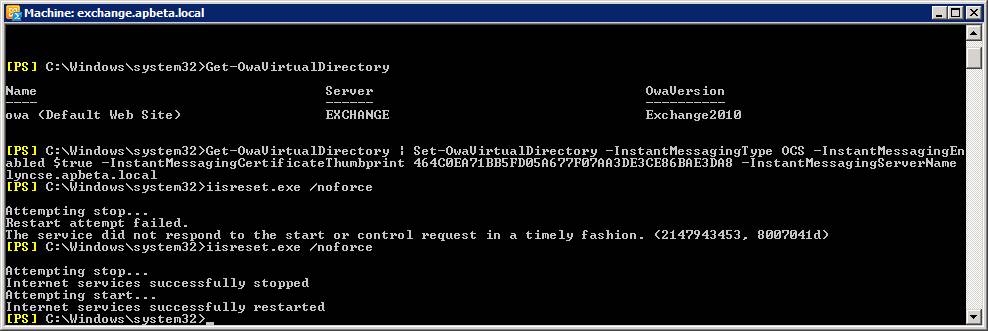
Also obtain the OWA virtual directories by running:
Get-OwaVirtualDirectory
Get-ExchangeCertificate | Where-Object {$_.Services -Like "*IIS*"} | Select-Object Subject, Ser
vices, Thumbprint | Format-List
Also obtain the OWA virtual directories by running:
Get-OwaVirtualDirectory
Next, run the following command to configure the virtual directory for Lync integration.
Get-OwaVirtualDirectory | Set-OwaVirtualDirectory -InstantMessagingType OCS -InstantMessagingEn
abled $true -InstantMessagingCertificateThumbprint 464C0EA71BB5FD05A677F07AA3DE3CE86BAE3DA8 -InstantMessagingServerName lyncse.apbeta.local
Remember to replace the certificate thumbprint with the one you obtained earlier and the FQDN of your Lync Front End server.
And finally, run IISRESET /noforce to restart IIS (may need to run twice)
Step 3: Create the trusts between Lync and Exchange
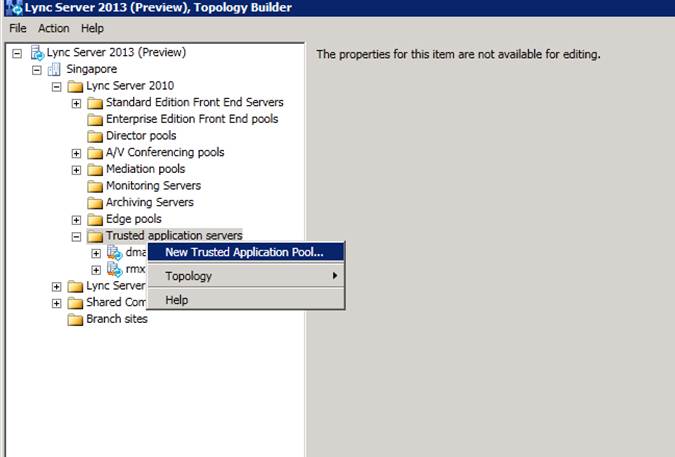
To begin, open Topology Builder on the Lync server and choose to download the existing topology.As you can see below, I have Lync2013 Preview installed side-by-side with Lync2010 so I have to use the Lync2013 version of Topology Builder. If you don't have Lync2013 installed, then just use the Lync2010 Topology builder. Choose a location to save the file. Next, right-click on the Trusted Application Servers node and select New Trusted Application Pool:
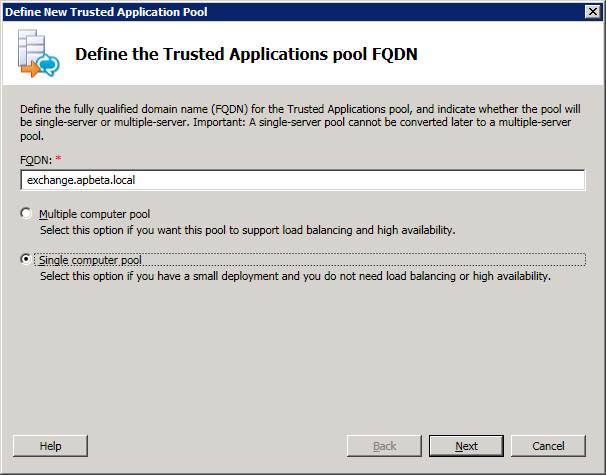
In the Define New Trusted Application Pool wizard, enter the FQDN of your Exchange CAS server and select Single Computer Pool, then click Next:
Then select the appropriate next hop pool, which should be the Lync2010 Front End server and click Finish to complete the wizard:
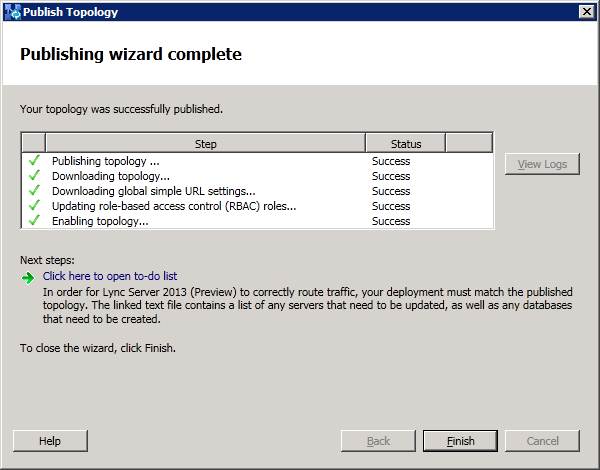
Next, publish the topology using by selecting Topology->Publish... from the Actions Pane of Topology Builder. in the wizard that appears, click Next. Let the wizard complete the steps and then click Finish to close:
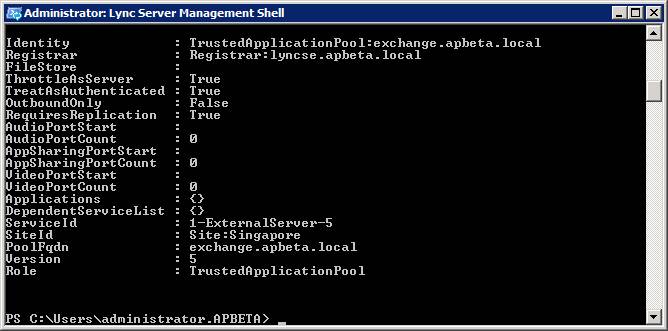
Yo check that the topology was published successfully, run the get-CsTrustedApplicationPool cmdlet in the Lync Management Shell and view the newly created Exchange server in the pool:
Step 4: Test Lync integration with OWA
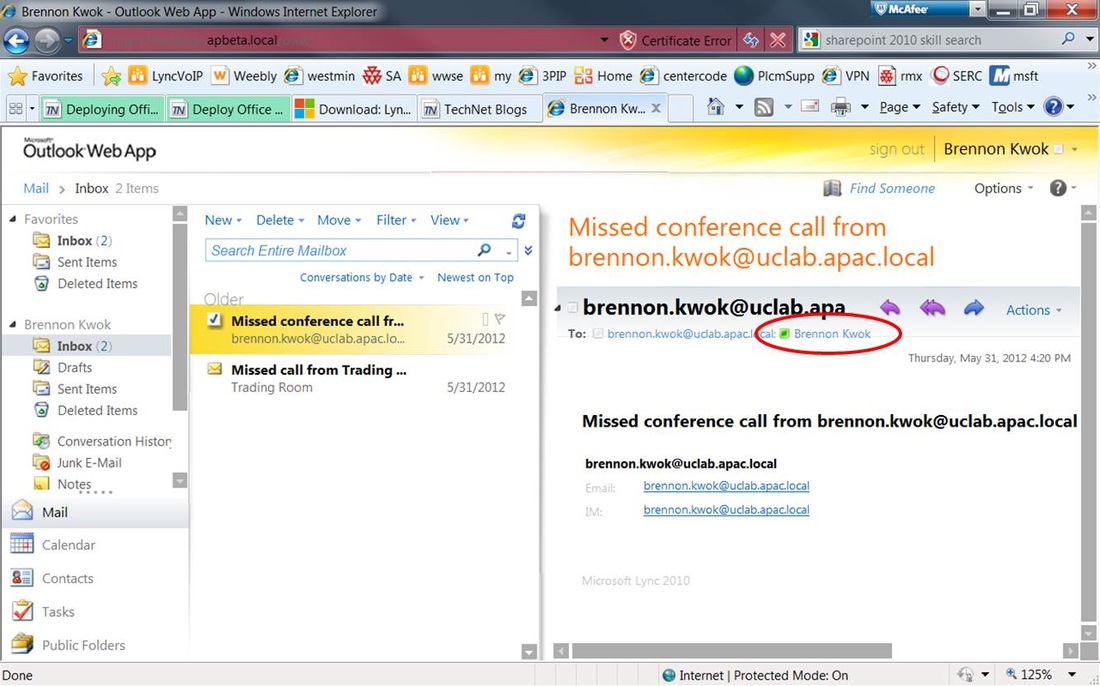
All the necessary integration steps are completed and its now time to test the functionality. Open a browser and login to OWA. You should now see presence in OWA as shown below:
Clicking on the Presence icon will allow you to initiate communcations with the contact such as IM and Audio/Video conferencing. That's all for this article and hope this has been helpful. As always, comments and feedback are welcome at http://www.ucprimer.com/comments-discussions--feedback.html


