
 | As mentioned in an earlier blog article, Microsoft Teams is not only a great team collaboration application with built-in intelligent communications, its also a powerful extensible platform that allows applications to be embedded within teams channels that make collaboration even richer and customizable. As of today, Microsoft Teams already contains hundreds of 3rd party apps published in the Teams store which users can easily install and add to their channels so that everyone in the team can leverage and use. It's also very simple to publish custom built apps and make it available in Teams. This blog posts walks through the steps publishing of a chat bot that can help answer user questions about the upcoming Microsoft Build Conference 2019 from May 6-8 at the Washington State Convention Center, Seattle WA. No coding is required to build this bot and in addition to MS Teams, we can even connect the bot to other additional chat services such as Telegram, Skype and Facebook Messenger |
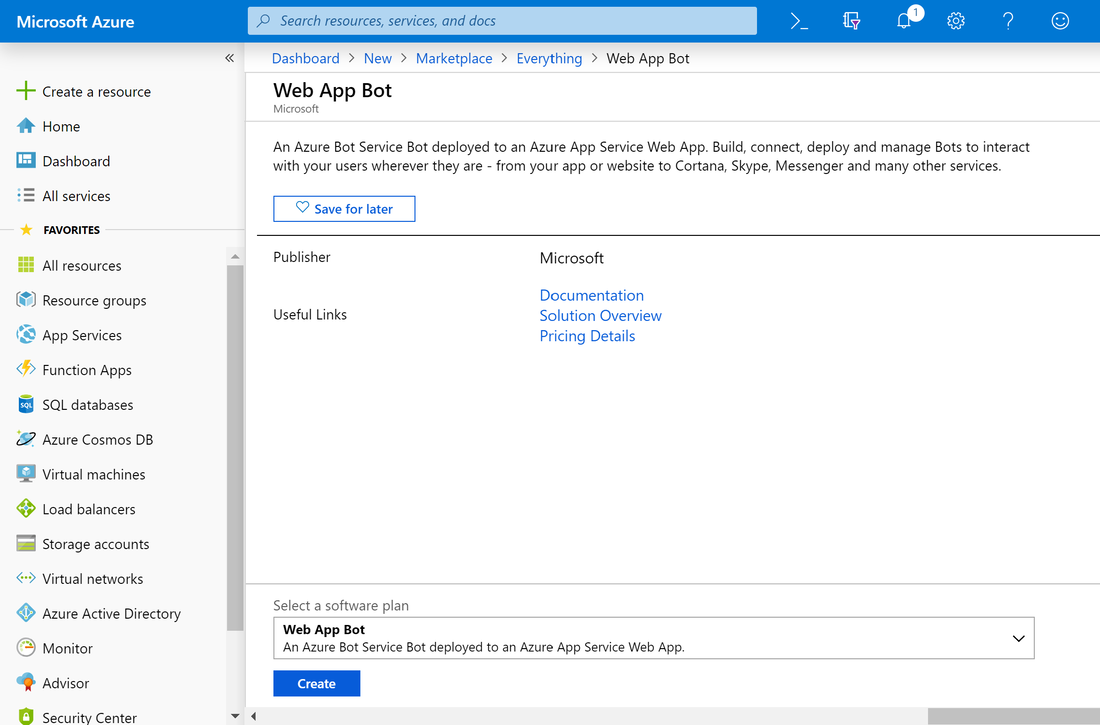
For this walkthrough we first need to have an Azure subscription and licenses to run MS Teams. Free trial Azure subscriptions are available at https://azure.microsoft.com/en-us/free/. To begin, we first login to the Azure portal and on the dashboard create a new "Web App Bot" resource. This will bring up the following screen as shown below:
To proceed, we simply click on the "Create" and which will allow us to fill in some details of our Web App Bot:
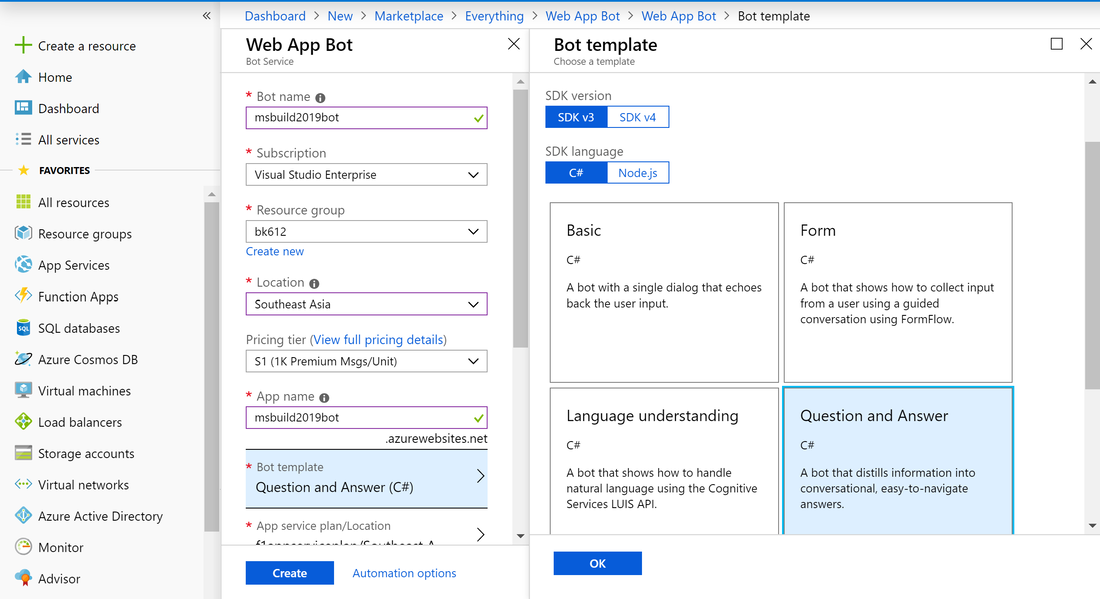
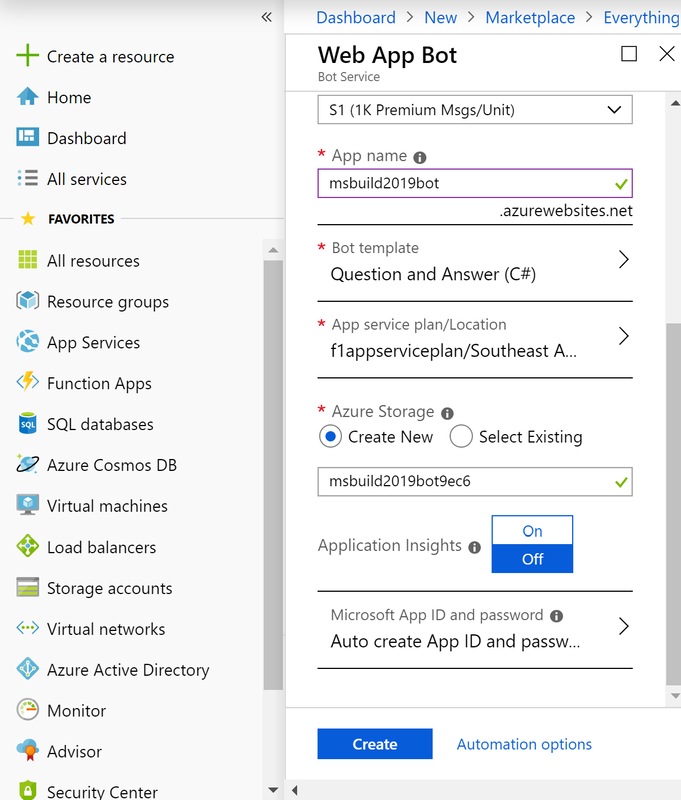
As shown above, for this walkthough we'll use the name 'msbuild2019bot' which fortunately is still available at the time of this writing, choose the correct Subscription, use an existing resource group 'bk612' (or we can also create a new resource group), select the location closest to us (in this case SouthEast Asia), use the S1 Pricing tier (or we can also use the F0 tier) and the App name will automatically be chosen for us. The important parameter here is in the Bot template section where we need to select the "SDK v3" version and the "Question and Answer" archetype. Further down we can choose an existing "App service plan/Location" (or we can create a new one) and create new Azure Storage for our bot with the auto-created name, turn off Application Insights for now, and lastly choose to auto-create the Microsoft App ID and password. This is shown below:
 | With this, we can proceed to click the "Create" button to let Azure create our bot which will take some time. Azure will first validate our parameters to make sure everything is correct and then proceed to create the bot. This can be seen in the notifications area in of the Azure Portal: 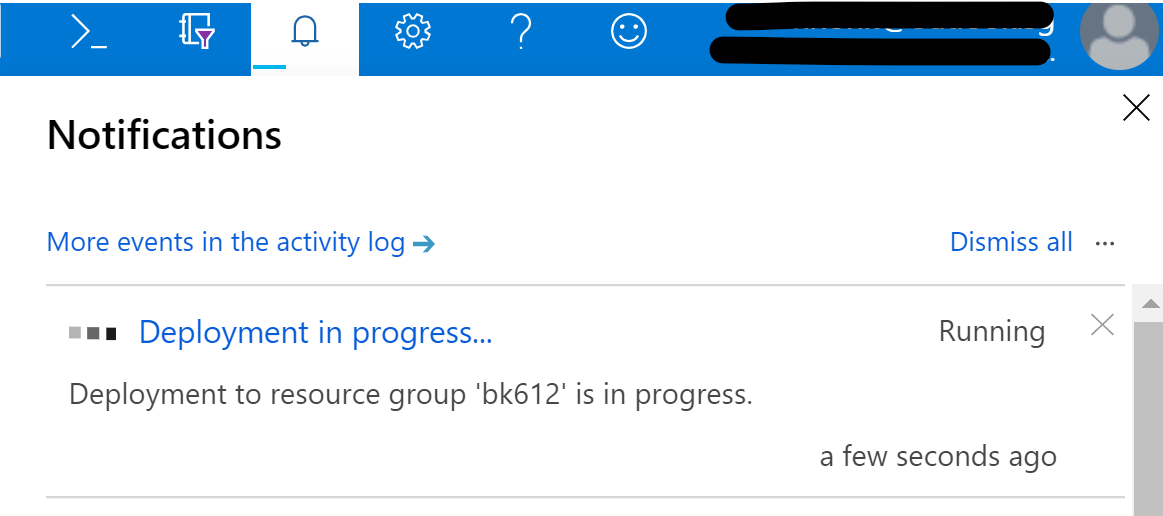 |
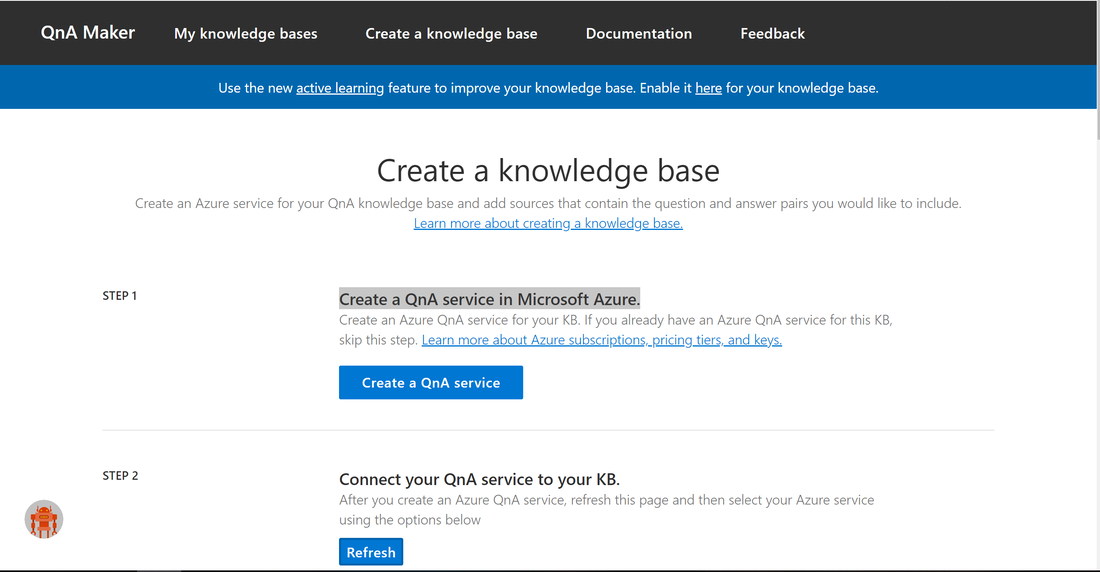
While waiting for our bot to be created, we can head over to the QnAMaker at https://www.qnamaker.ai/ to build the knowledge base for our bot. When logging in, we use the same Microsoft account that we used for Azure and proceed to click on the "Create knowledge base" tab on the top. Since we're doing this for the first time, QnAMaker requires us to first create a QnA Service in Azure as shown below:
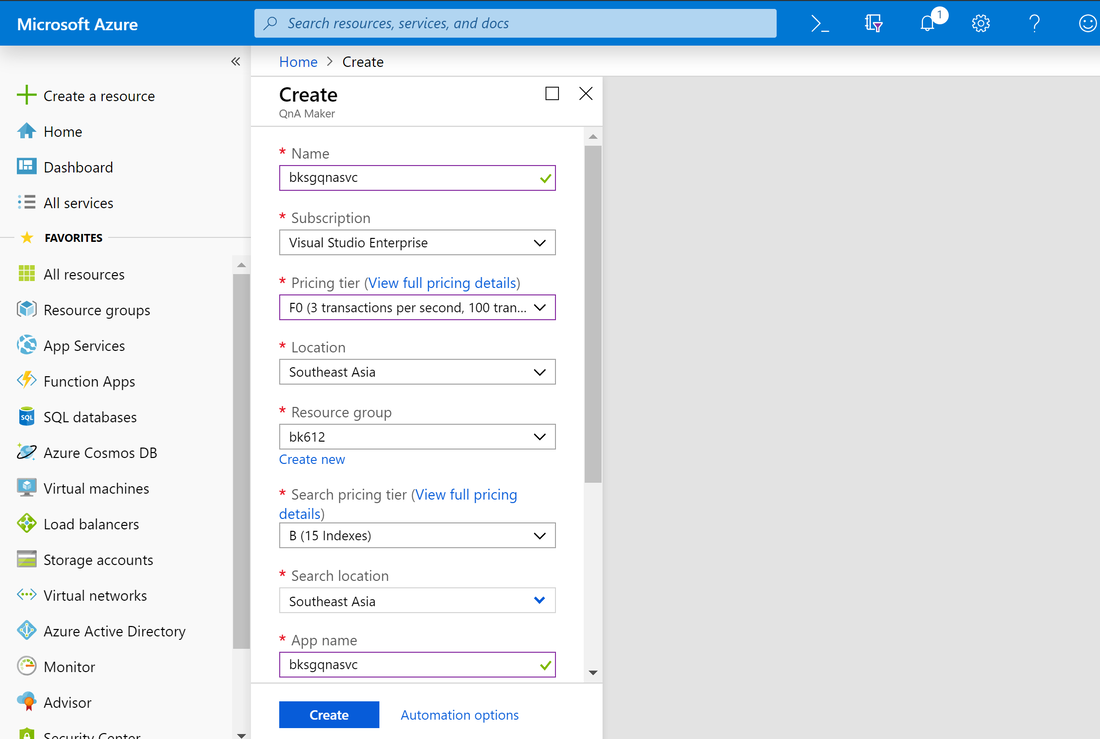
To proceed we click on the "Create a QnA service" button which will pop out another window in Azure portal that allows to define the QnA service. Here we can specify some parameters including the name 'bksgqnasvc' which is not already being used, select the F0 pricing tier which can be modified later if we want, next we leave the Location and Resource group parameters as defaults but we select the Search Pricing tier of B (15 indexes) since this will allow us to build more knowledge bases in the future for other bots. Finally we click on the "Create" button as shown below and Azure will go ahead and deploy the service for us which make take several minutes.
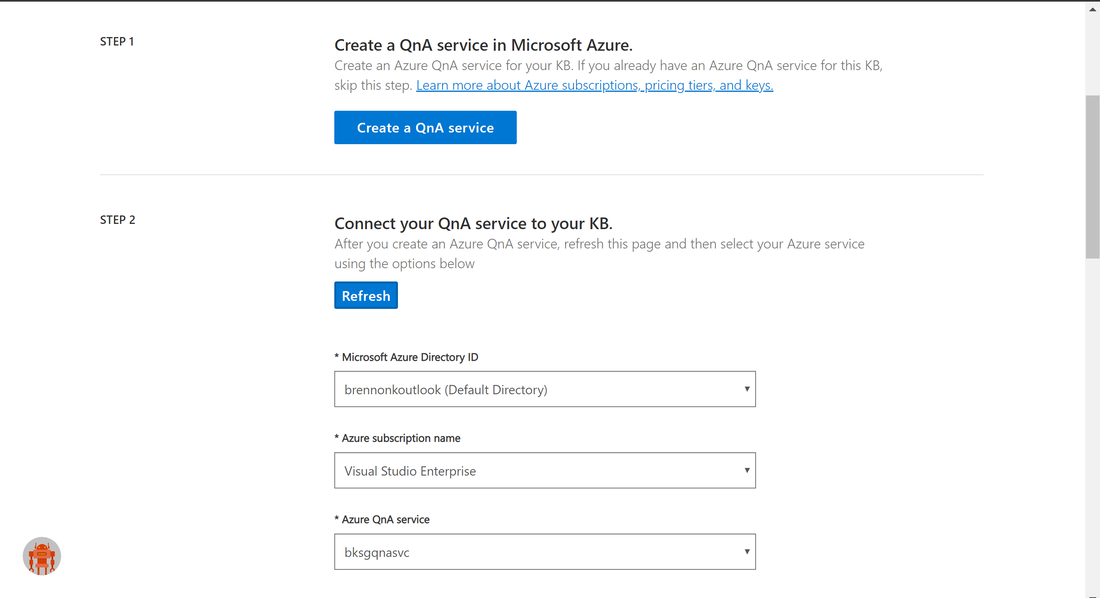
Once Azure has finished creating our QnA Service, we can head back to http and hit the "Refresh" button. This will allow us to select the Azure tenant, subscription and QnA service for us to build the knowledge base as shown below:
Next, we can proceed to specify a name and build the knowledge base and the QnA Maker allows us to do this very easily by adding web URLs that contain question and answers. It also allows us to add this information manually but for this walkthrough, Microsoft also provides a MS Build 2019 FAQ URL at https://www.microsoft.com/en-us/build/faq that we can simply add:
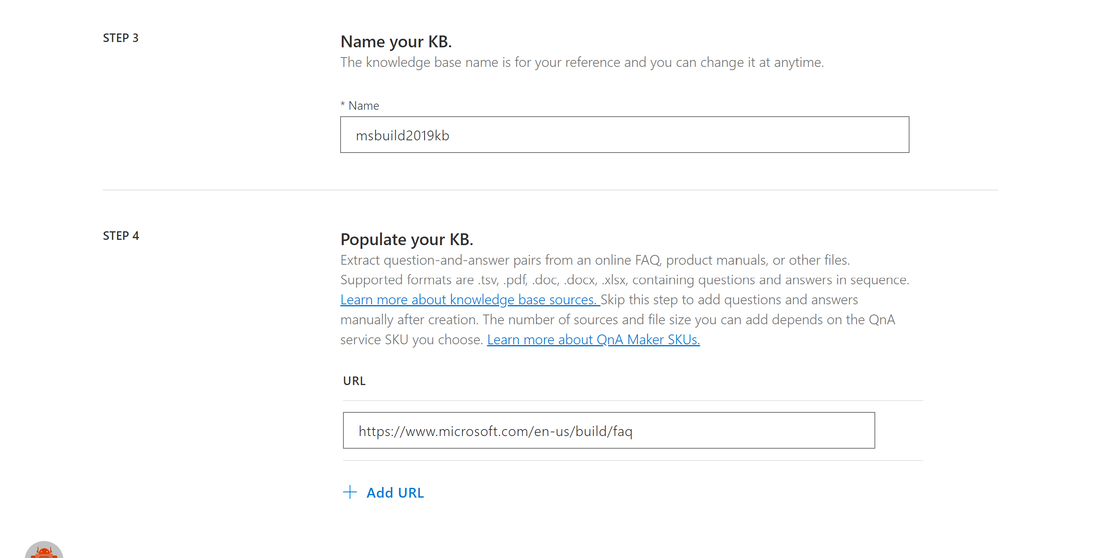
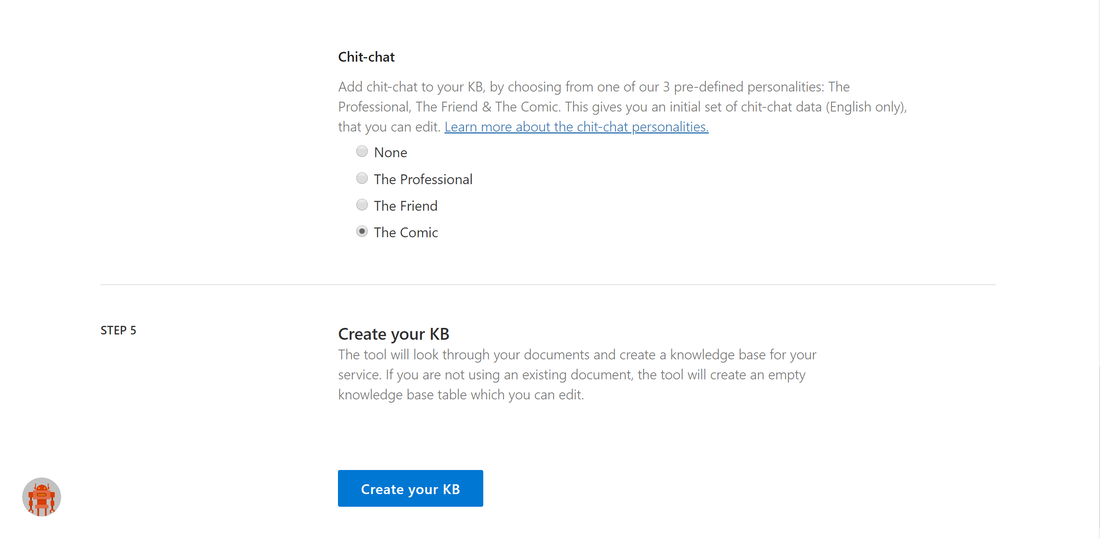
We can also specify the personality of our bot and finally click on the button to Create the KB:
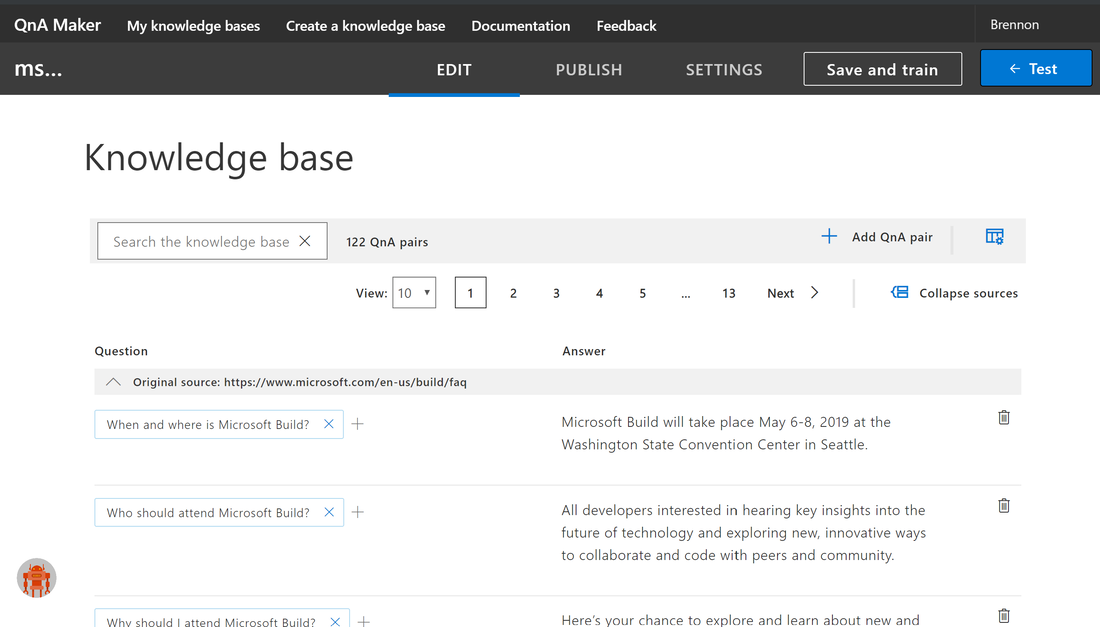
QnA Maker will parse the URL that we provided and start building the knowledge base. Once completed it will display a list of all the questions and answers that it parsed from the URL:
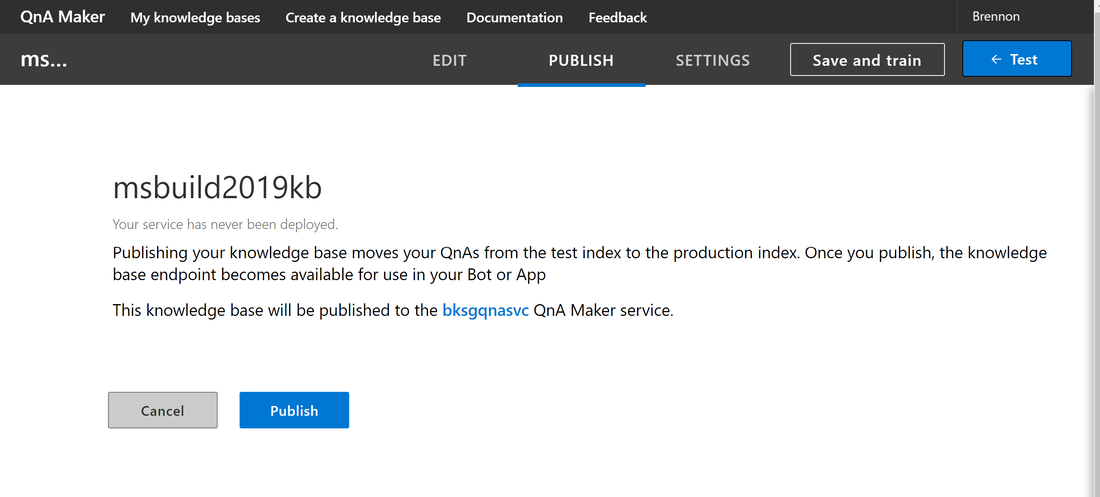
Finally we can select the "Publish" tab and click the Publish Button to publish our knowledge base:
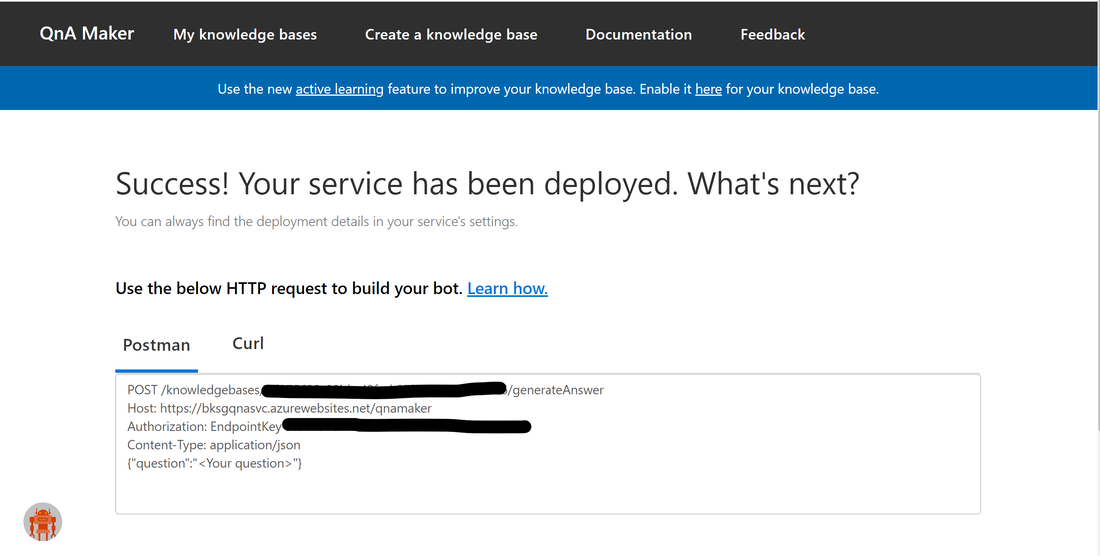
When successful, QnA Maker will provide some important information such as the first line containing the Knowledge base ID, followed by the host URL and Authorization key that we'll need to use for our bot. Its best to copy this information to a text file for use later:
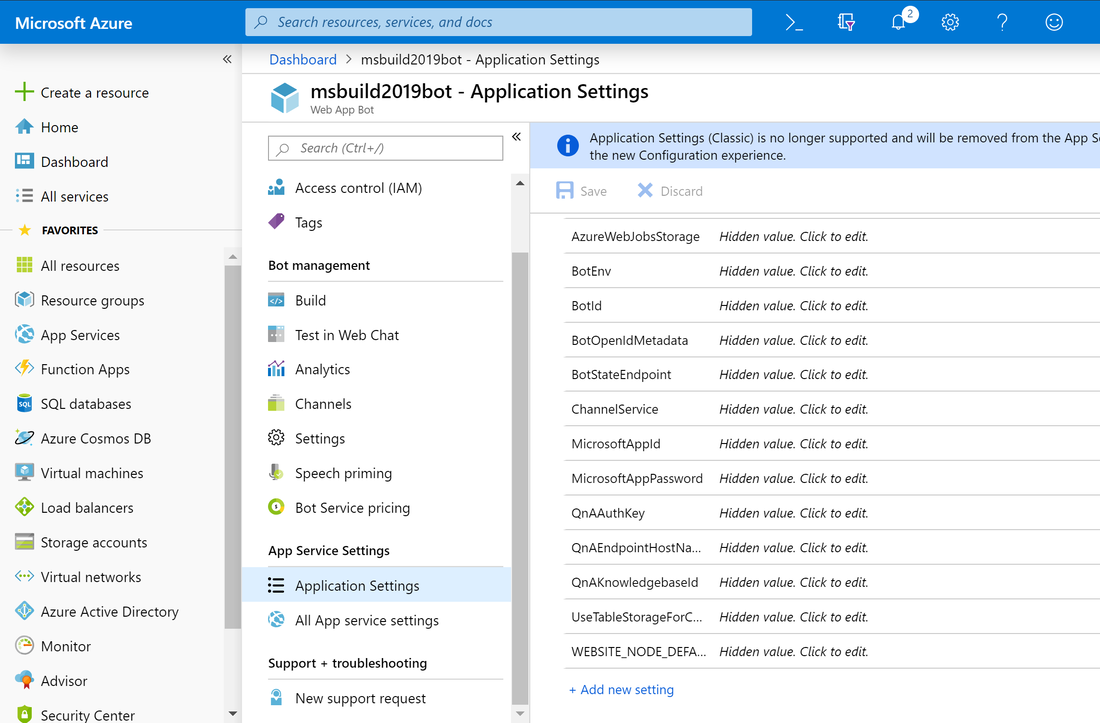
Next we head back to Azure portal and navigate to the Application Settings for our Bot. Here we can find three parameters that we need to enter from the infomration that we got from the previous step. On the "QnAAuthKey" we need to enter the authorization key, "QnAEndpointHostName" is our host URL and the "QnAKnowledgebaseId" is our Knowledgebase ID. After entering these 3 parameters we can click the save button and our bot is now connected to the QnA service with the correct knowledge base:
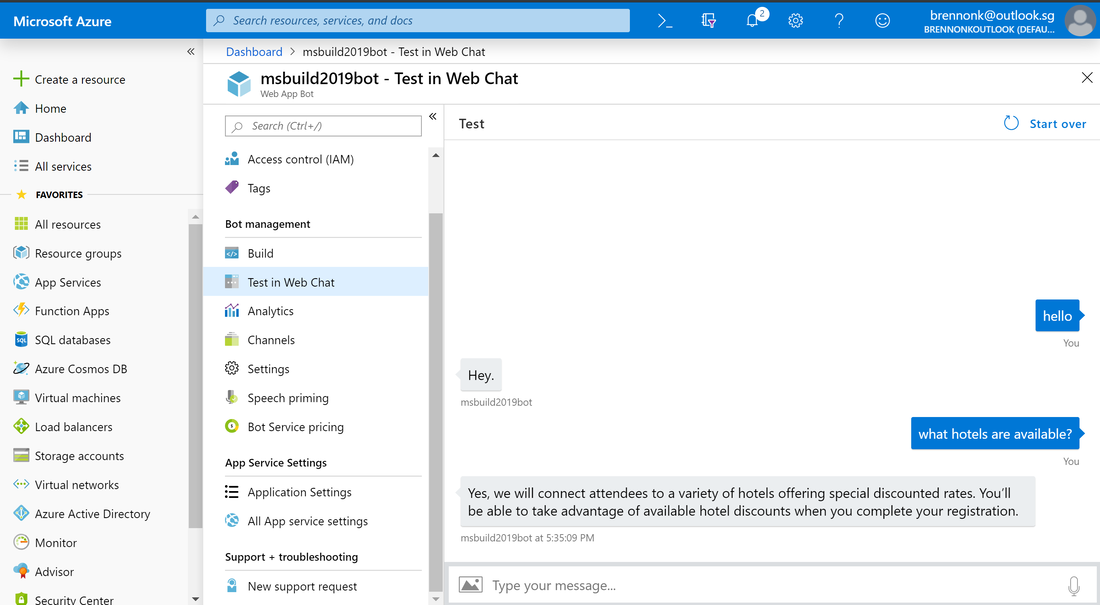
To test our newly created bot, we can click on the "Test in Web Chat" menu in the properties pane which will allow us to chat with the bot directly and see the results. This is a very useful and easy way to make sure our bot is working properly before we proceed to connect the bot to chat channels such as MS Teams:
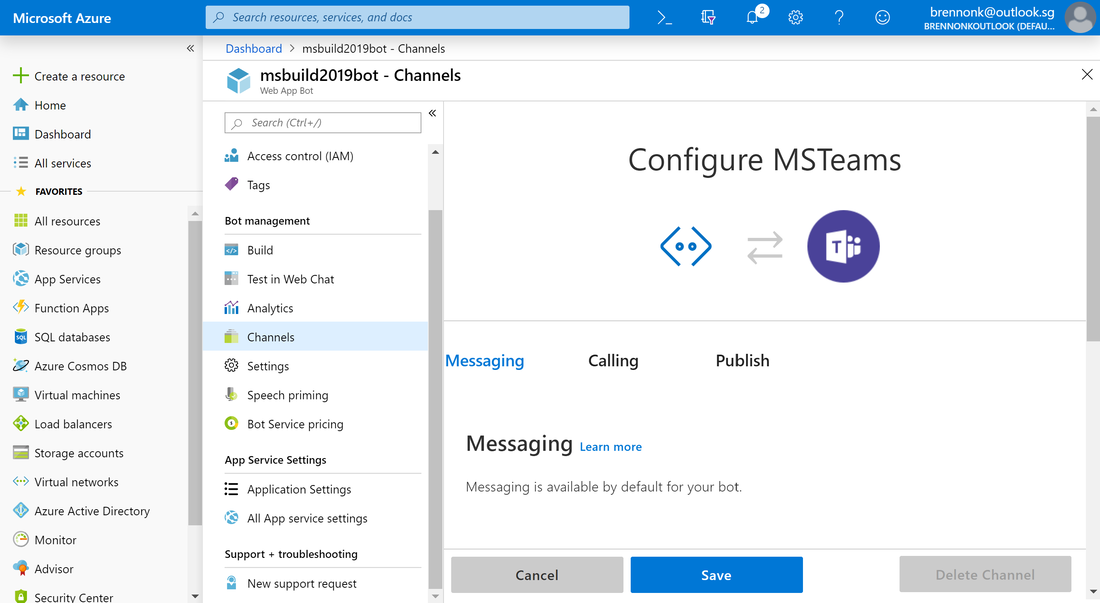
Now that our bot is working we can proceed to connect with MS Teams by selecting the "Channels" properties tab. From here we select the MS Teams icon in the "Add a features channel" section:
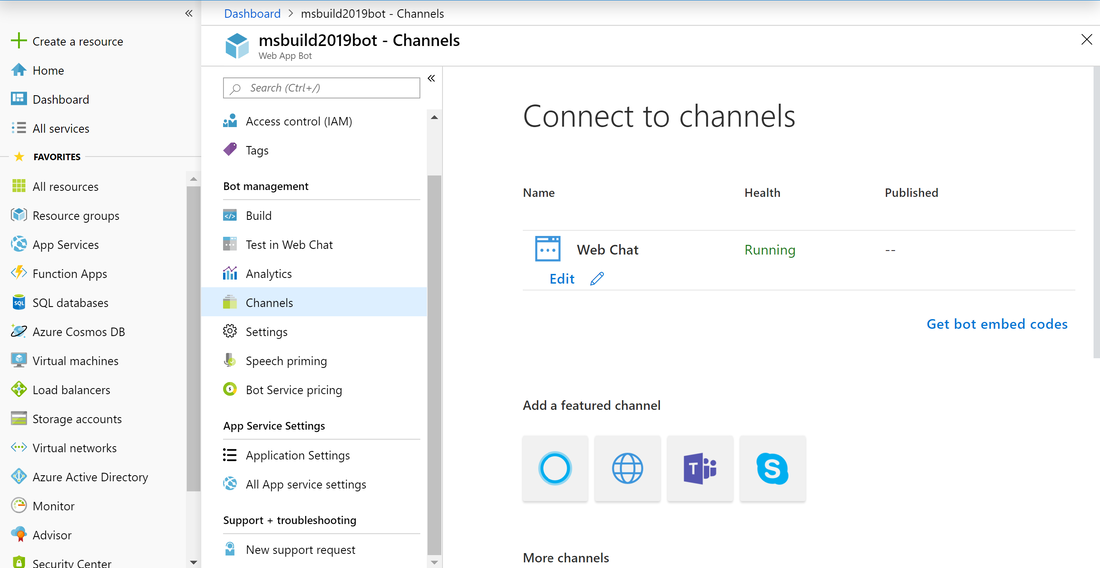
Next we just save our channel and we should see it running:
 | 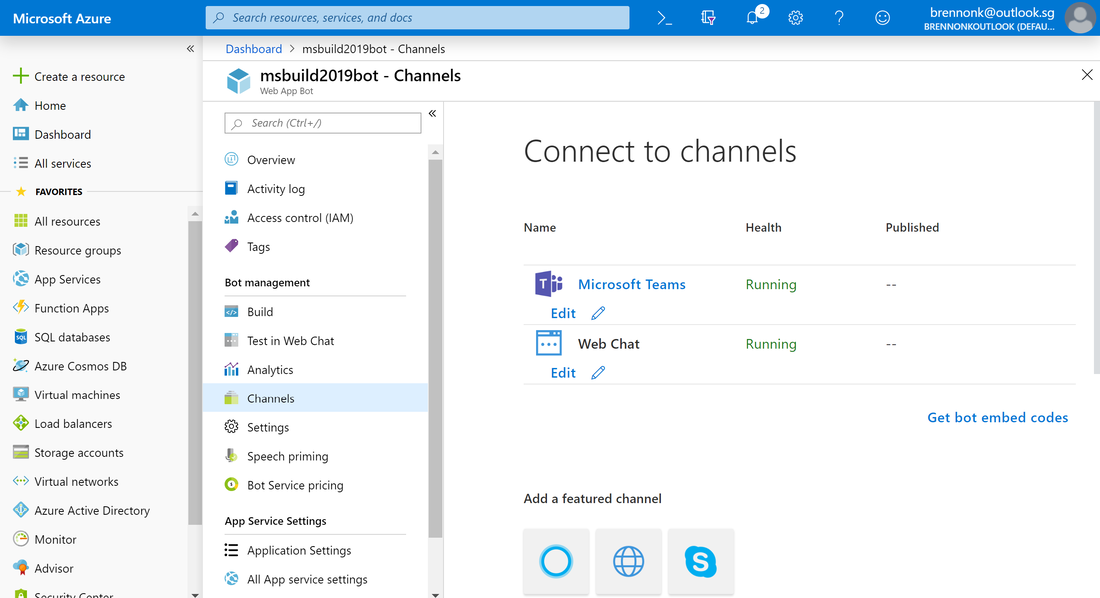 |
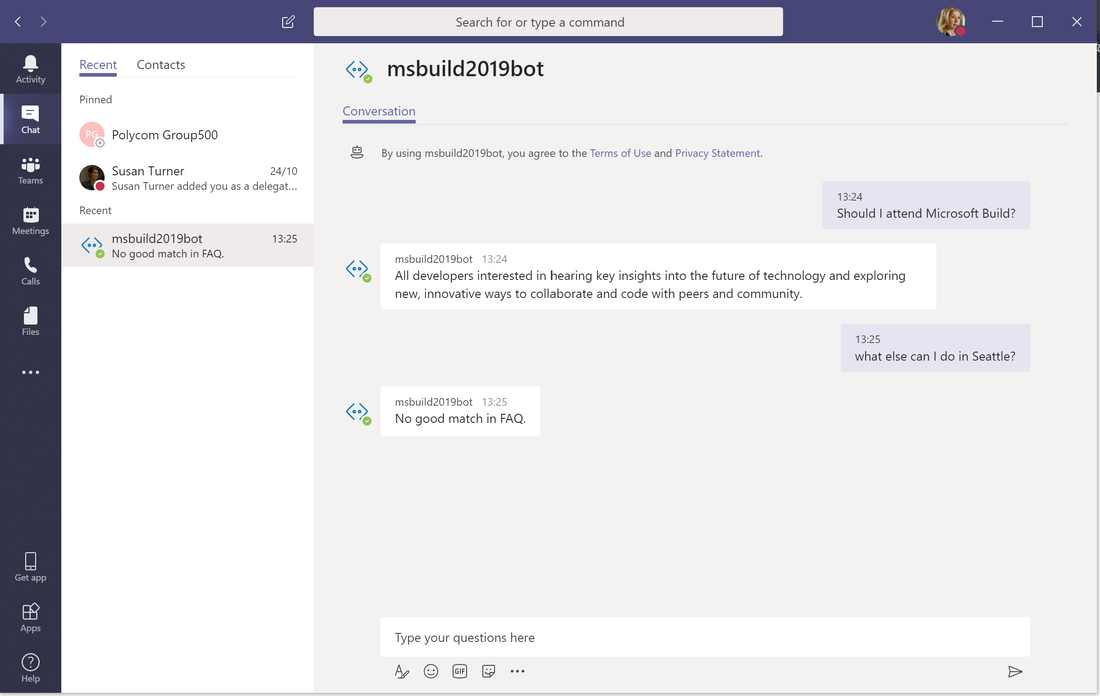
To test this bot in Teams immediately, we can simply click on the Microsoft Teams link in the channels and it will automatically launch MS Teams and allow us to chat with our bot as shown below
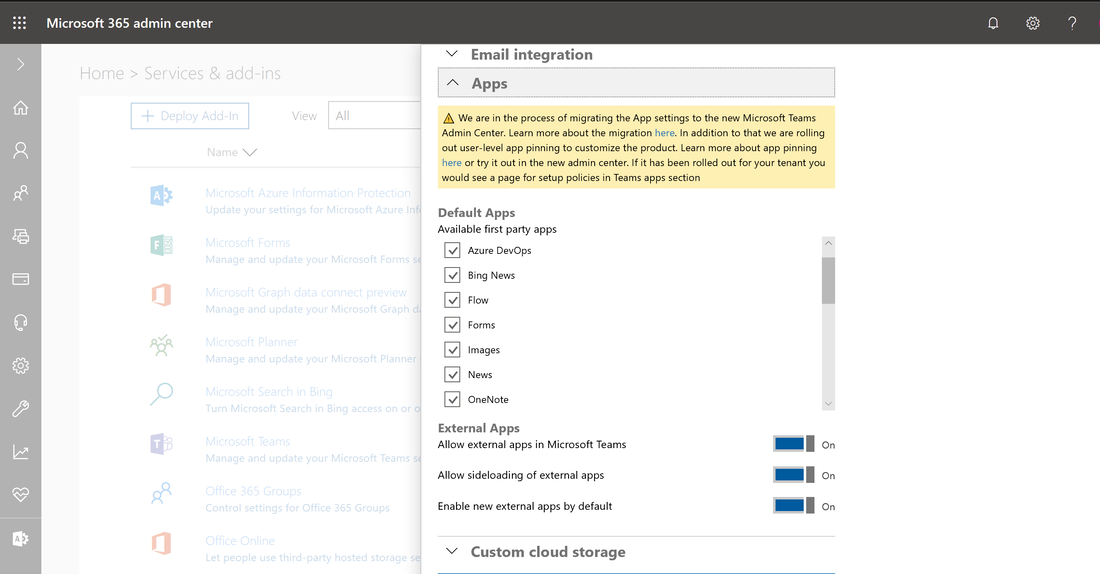
Note that if this fails, it may be due to side loading of external apps is not enabled in which case we can head over to the Microsoft 365 admin portal and enable the necessary setting as shown below:
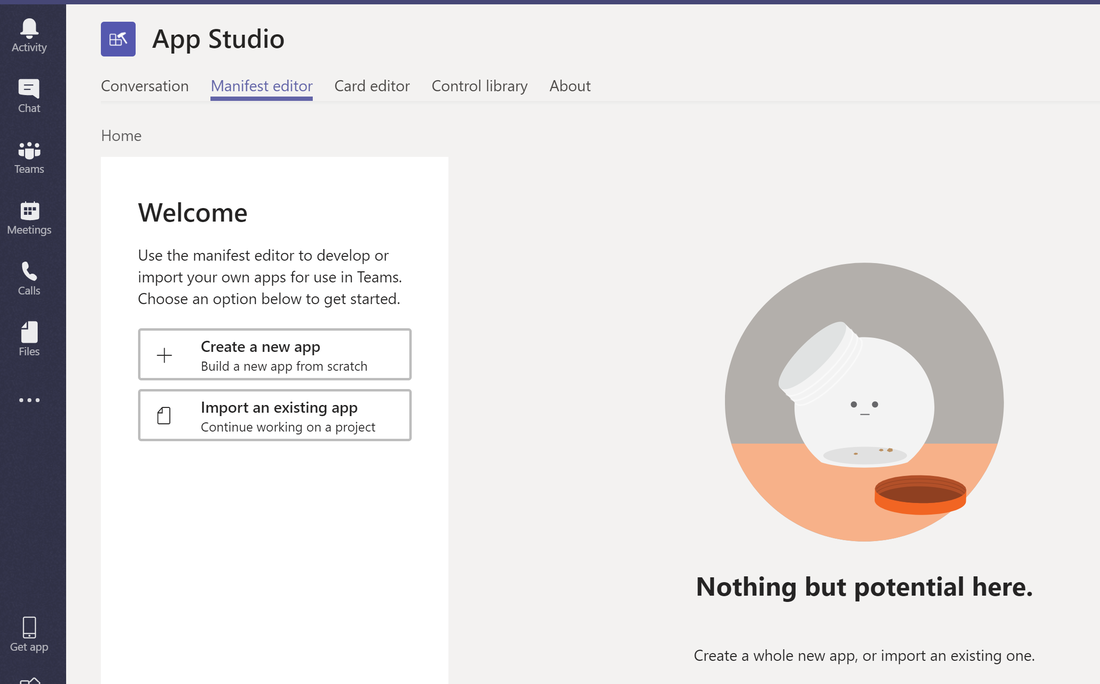
To make our newly created Bot to other Teams users, we can head over to the Teams application and start App Studio (download from the Teams Apps store if not already done so). In App Studio we select "Manifest editor" and click on "Create a new app"
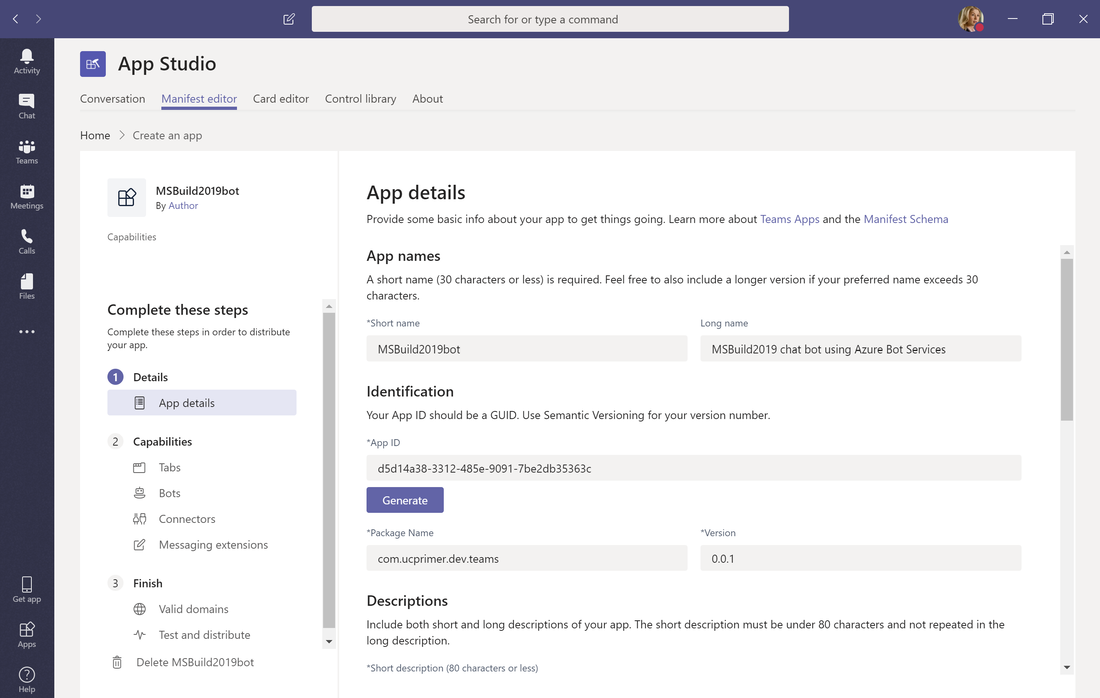
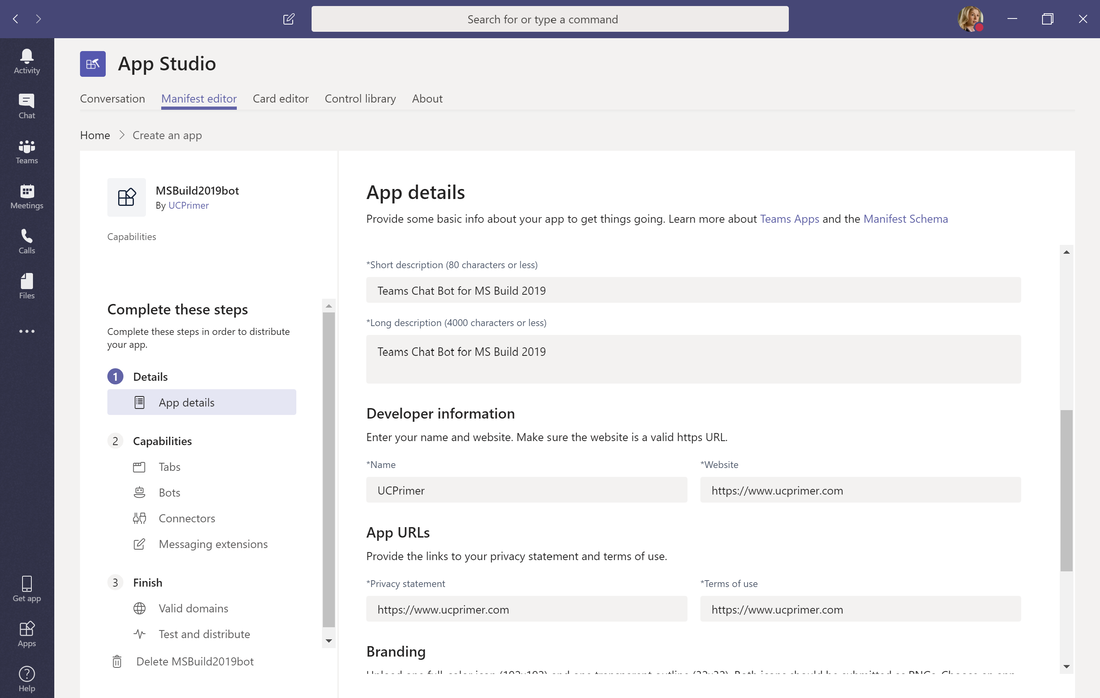
This allows us to create a JSON manifest for our bot so that it can be loaded by other Teams users. Most of the fields in the App Details section are pretty self-explanatory except for the ID which can just click on the "Generate" button to create a new random ID
 |  |
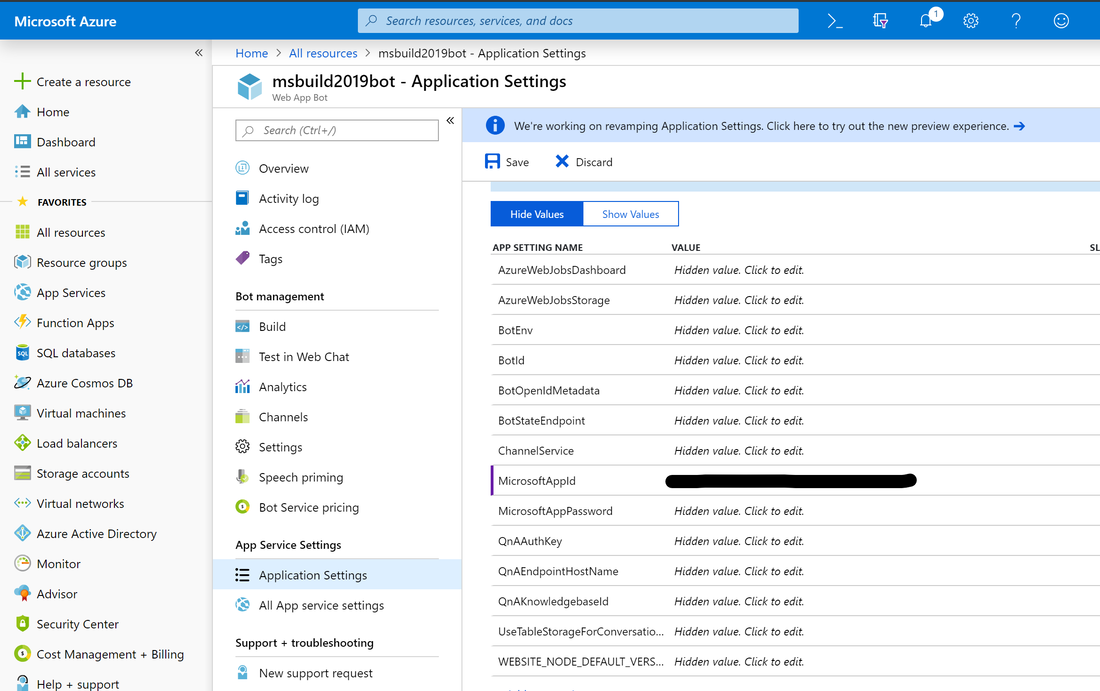
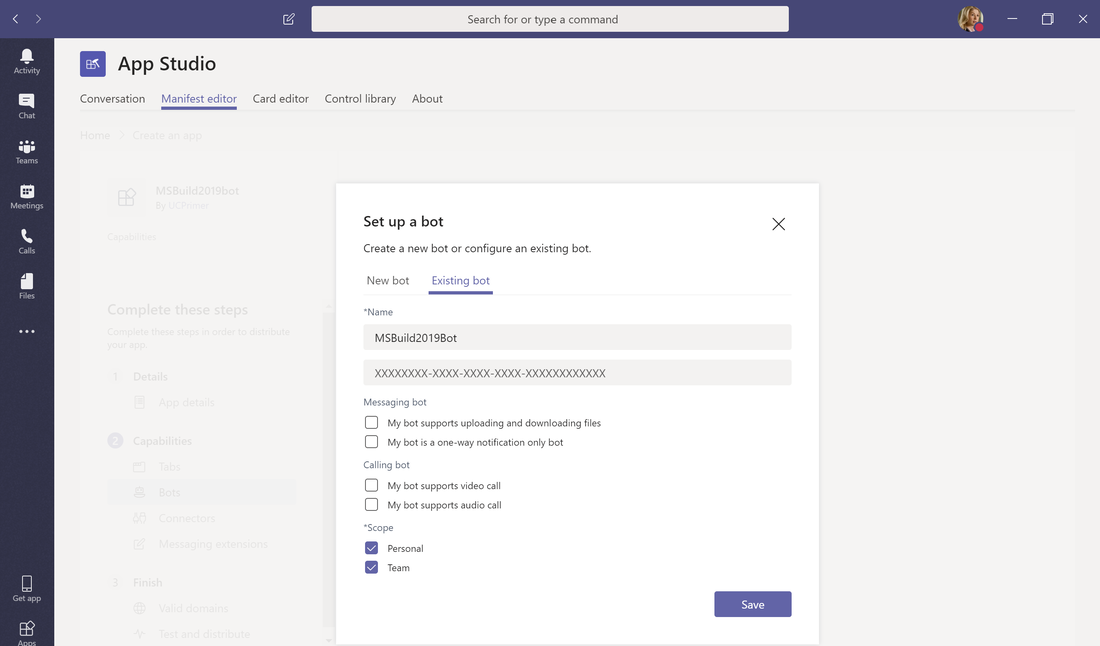
In the "Capabilities" section is where we define out bot details. Select "Bots" on the left, followed by "Setup" and then "Existing Bot" and we can enter the correct parameters. The only important field here is the "Name" which we can be anything we want, followed by the MS App ID which we need to get from the Application Settings of our Bot in Azure portal:
We need to copy this App ID and enter it into the manifest in the 2nd text box field. We'll select both Personal and Team Scope and then click Save to complete:
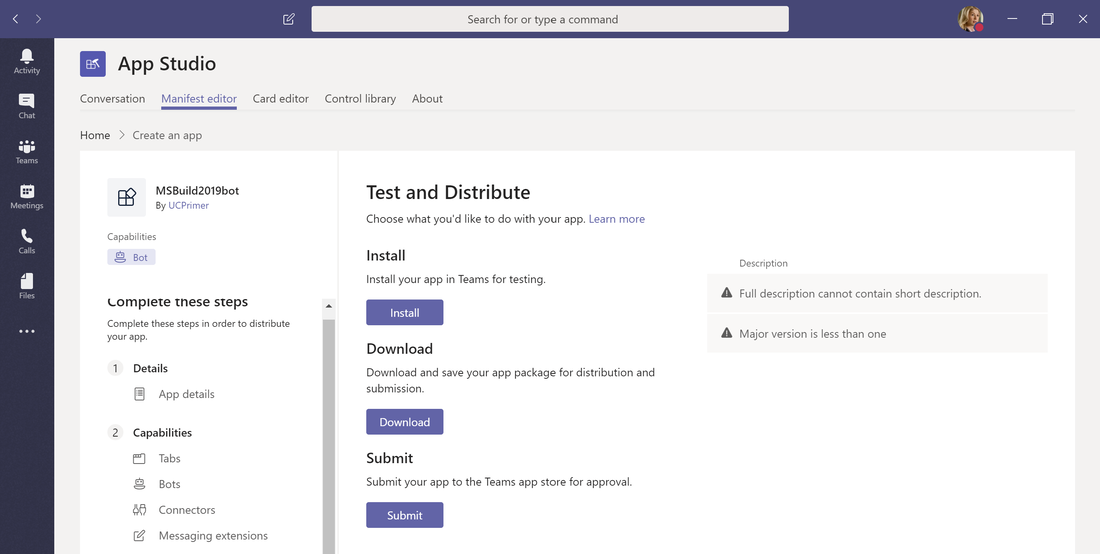
The final step is to distribute our bot and under the "Finish" section we select "Test and distribute" where we can directly install the bot into Teams or download and save the app package for distribution:
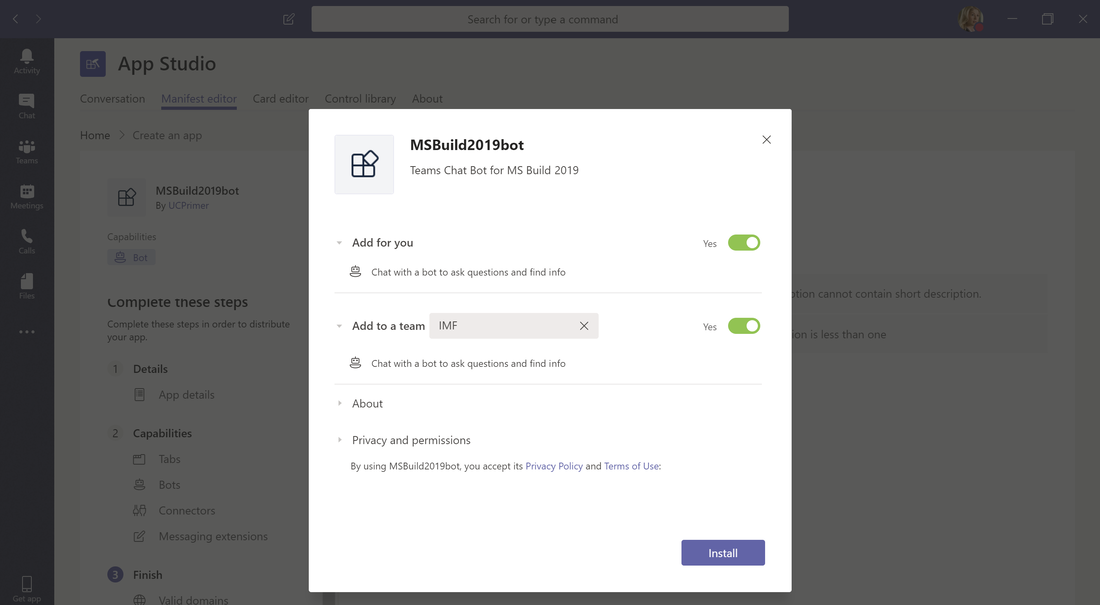
Clicking on the "Install" button allows us to add the bot to my own account or to a Team within MS Teams:
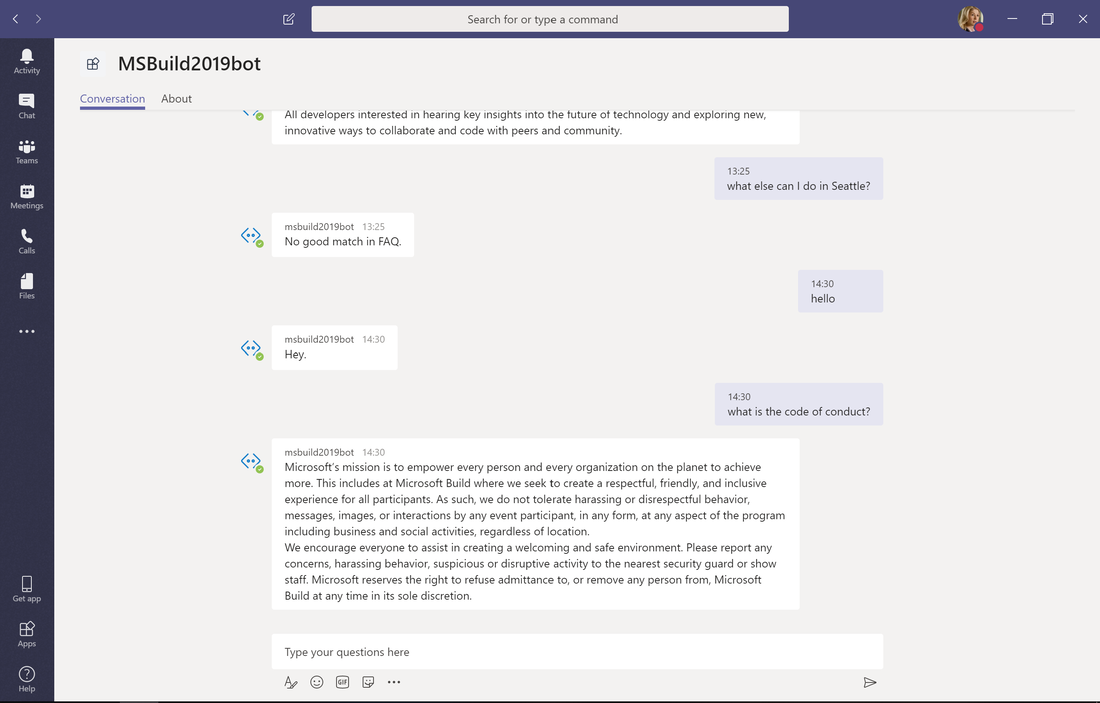
Now that we've added the bot to MS Teams we can chat with it:
We can also download and save the package as a zip file which we can distribute to other uses to upload as a custom app in the Store tab in MS Teams.This concludes the walkthrough of this blog post.


 RSS Feed