
 | This article describes the process to re-purpose Poly CCX 400/500 from Zoom phones to Teams phones. Poly CCX 400/500 phones are flexible and can be used as generic SIP phones, Zoom phones or native Teams phones. For organizations that are using these phones as Zoom devices and are intending to migrate to Teams phones, there is no need to buy new phones. Simply re-purpose the phones following the the steps in this article |
Overview
CCX 400/500 Phones that are being used as Zoom phones have the following configuration settings:
The following steps can be used to achieve the above objective:
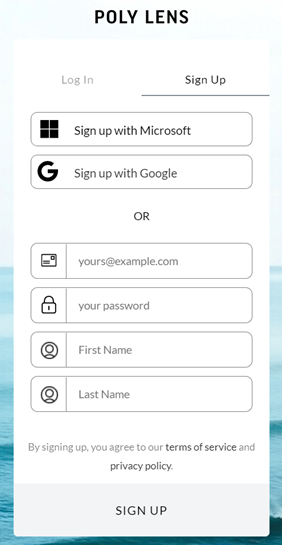
Step 1: Signing up for free Poly Lens management service at the Lens Portal
Navigate to https://lens.poly.com and click on “Sign Up”:
CCX 400/500 Phones that are being used as Zoom phones have the following configuration settings:
- Base Profile: Generic
- Provisioning Server: https://provpp.zoom.us/api/v2/pbx/provisioning/Polycom/
- Base Profile: Teams
- Provisioning Server: <Lens provisioning URL for tenant>
The following steps can be used to achieve the above objective:
- If not already done so, sign-up for the free Poly Lens management service at the Lens Portal https://lens.poly.com using a O365 account with either global admin or Teams admin roles
- Obtain the Poly Lens Device provisioning URL from the Lens portal. This will use used later
- Set the provisioning server URL for the phones with the address obtained in Step 2
- Factory reset the Phones (Optional)
- From the Lens Portal, select the phone(s) and change the “Provider” to Teams
- Phones will reboot as native Teams phones and ready for sign-in using Teams account
Step 1: Signing up for free Poly Lens management service at the Lens Portal
Navigate to https://lens.poly.com and click on “Sign Up”:
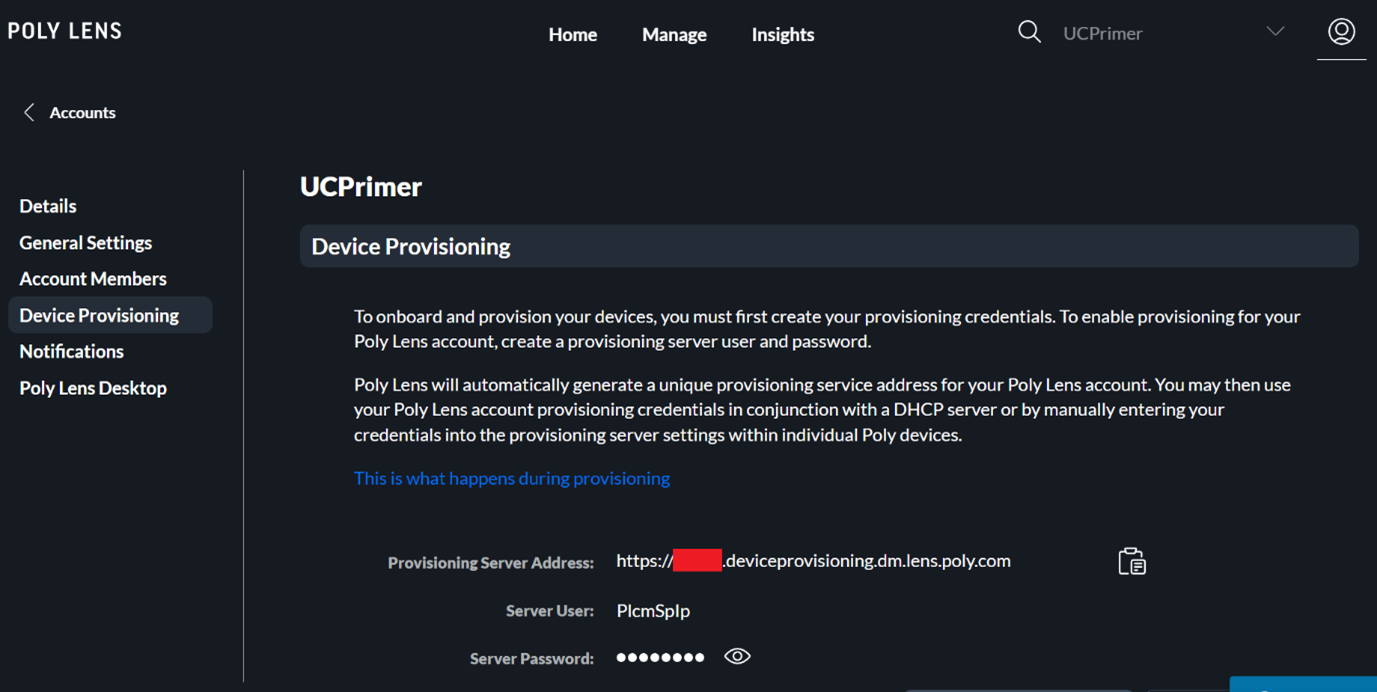
Step 2: Obtain the Poly Lens Device provisioning URL from the Lens portal.
This can be found at Account->Device Provisioning:
Step 2: Obtain the Poly Lens Device provisioning URL from the Lens portal.
This can be found at Account->Device Provisioning:
Step 3: Set the provisioning server URL for the phones with the address obtained in Step 2
On the phone, the provisioning server can be configured by 2 methods.
- Using the Phone’s admin Web UI (individual provisioning)
- Using DHCP Options (group provisioning)
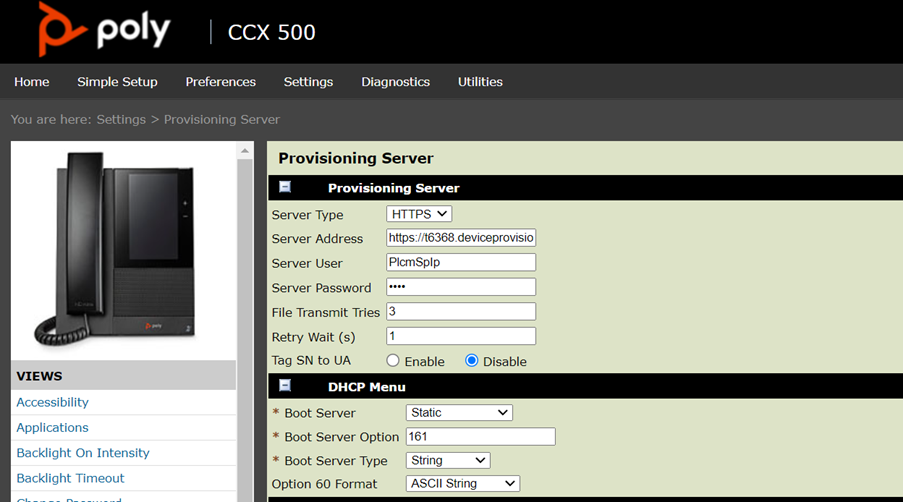
The click save and let the phone reboot.
For group provisioning, configure the phones via DHCP Auto Discovery
The following parameters are set by the Lens provisioning service.
Enable Automatic Provisional Polling prov.polling.enabled 1
Provisional Polling Mode prov.polling.mode random
Relative Period Between Polling Requests prov.polling.period 86400
Polling Start Time prov.polling.time 03:00
Polling End Time prov.polling.timeRandomEnd 05:00
Enable REST API Interface apps.restapi.enabled 1
Enable HTTP Server httpd.enabled 1
Enable Web Admin Portal httpd.cfg.enabled 1
Screen Capture up.screenCapture.enabled 1
Enable Poly Lens feature.lens.enabled 1
Enable Legacy Polycom Cloud feature.pcc.enabled 0
Enable ObiTalk Cloud feature.obitalk.enabled 0
Enable Lens Reporting (for VVX) feature.da.enabled 1
Lens Cloud Environment pcc.url 0ne00092668
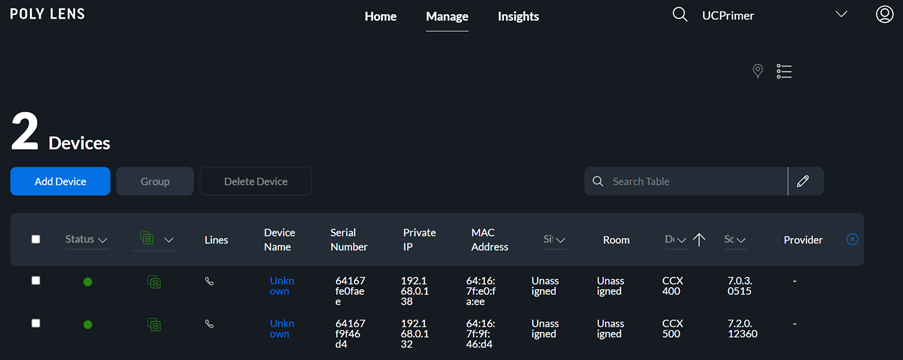
Once provisioned in Lens successfully, the phones will appear in the Lens inventory list:
For group provisioning, configure the phones via DHCP Auto Discovery
- DHCP Option Format: https://<ServerUser>:<Password>@<ProvisioningServerAddressURL>. Eg https://PlcmSpIp:PlcmSpIp@t####.deviceprovisioning.dm.lens.poly.com (address obtained in Step 2)
- Network environment will vary based on your deployment, however, Options 66, 160, or 161 may commonly be used.
The following parameters are set by the Lens provisioning service.
Enable Automatic Provisional Polling prov.polling.enabled 1
Provisional Polling Mode prov.polling.mode random
Relative Period Between Polling Requests prov.polling.period 86400
Polling Start Time prov.polling.time 03:00
Polling End Time prov.polling.timeRandomEnd 05:00
Enable REST API Interface apps.restapi.enabled 1
Enable HTTP Server httpd.enabled 1
Enable Web Admin Portal httpd.cfg.enabled 1
Screen Capture up.screenCapture.enabled 1
Enable Poly Lens feature.lens.enabled 1
Enable Legacy Polycom Cloud feature.pcc.enabled 0
Enable ObiTalk Cloud feature.obitalk.enabled 0
Enable Lens Reporting (for VVX) feature.da.enabled 1
Lens Cloud Environment pcc.url 0ne00092668
Once provisioned in Lens successfully, the phones will appear in the Lens inventory list:
| Step 4: Factory reset the CCX phones (Optional) 4.1 This can be done individually from the phone’s web admin UI or on the phone itself:
|  |
After reboot,
- Navigate to Status then Network.
- Navigate to TCP/IP Parameters and make note of the phone's IP address next to IPv4 Addr.
- Open a web browser on a computer that's connected to the same network as the phone.
- Enter https:// followed by the phone's IP address.
- Note: If your browser displays a security warning, click the option to continue.
- Log in to the web interface as admin.
- In the top navigation menu, click Utilities then Phone Backup & Restore.
- Click Global Settings section to expand it.
- Click Restore.

10. Click Yes to confirm.
Note: The default admin password is 456. If you do not know the password, contact your administrator
Note: The default admin password is 456. If you do not know the password, contact your administrator
| Alternatively, reset to factory default using the phone's interface:
3. Navigate to Reset to Defaults then Reset To Factory. 4. Press Yes to complete factory reset. The phone will restart automatically. Note: Unless DHCP Auto discovery is configured, the phones will lose the Provisioning Server settings after the factory reset and will need to be manually added as per Step 3. Hence, it is advisable only to perform factory reset when using DHCP Auto Discovery | 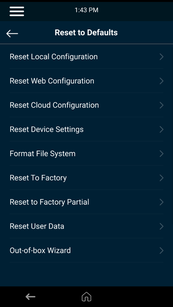 |
Step 5: From the Lens Portal, change the Provider to Teams
Navigate to Manage -> Device Groups then create a new group:
Navigate to Manage -> Device Groups then create a new group:
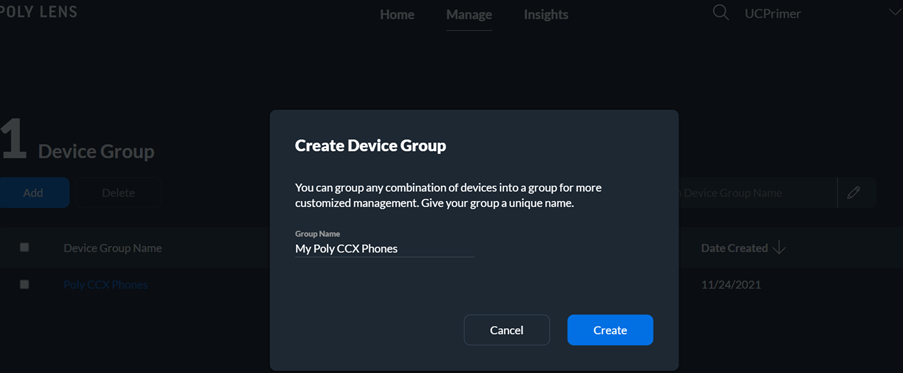
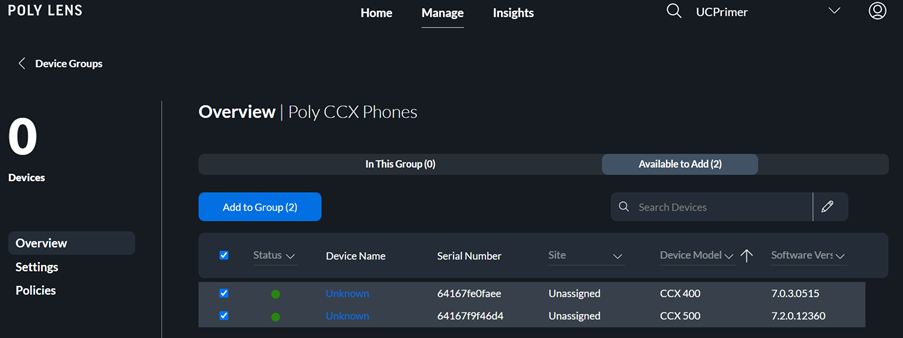
Then click on the newly created Group and select the “Available to Add” tab and add all required devices into the group:
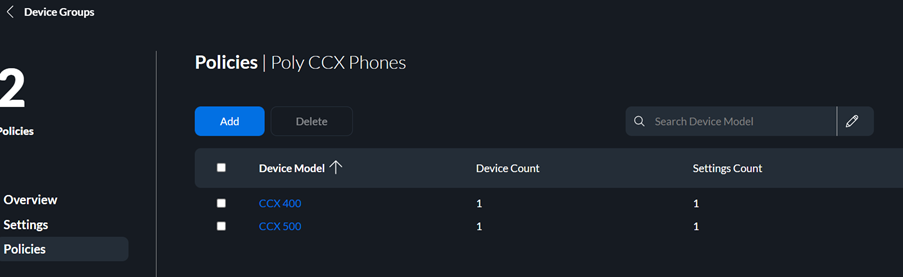
Next navigate to “Policies” and you should see the different models of phones in this group. Select a model of phone to create a policy for that phone model (eg. CCX400):
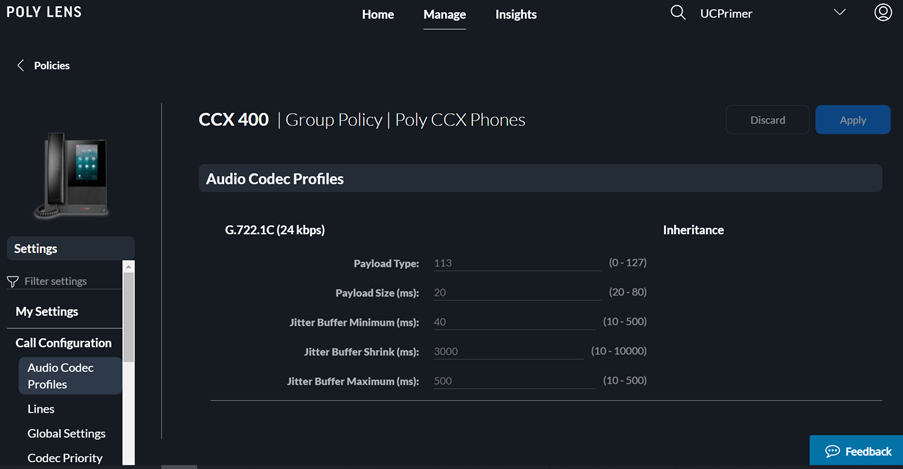
On the left Settings pane, scroll down and select General Settings -> Provider then Select “Teams” and click Apply:

Repeat the same process to create a Policy for the other models eg CCX 500. Once completed you should see the policies created for each device model with the Settings Count at least 1:
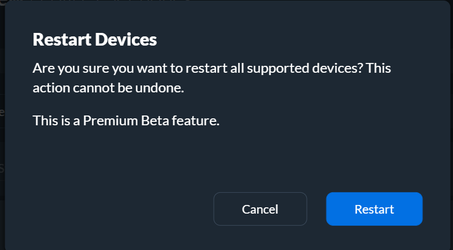
Next, return to the Group’s Overview page, select all the necessary phone models and click “Reboot Devices”
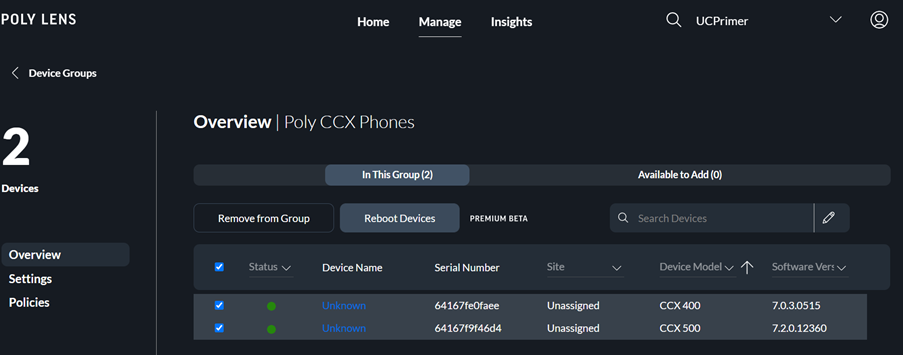
Click “Restart” (note the Premium Beta feature)
Step 6: After rebooting, the phones should display the Teams home page allowing user to sign-in:
| The re-purposing process is now complete. Sign into Teams on the phone using a web browser or on the device itself | 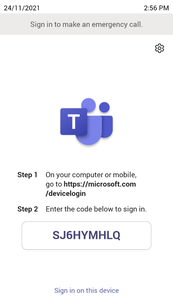 |


 RSS Feed