
 | This article is intended for readers who are looking for guidance on how to deploy Lync 2013 Hybrid Split Domain with shared SIP address space. It documents the steps necessary to move from a fully on-premise Lync2013 deployment to a hybrid Office365 Lync split-domain deployment where some users are homed on-premise while some are homed on-line. Hopefully this serves as a useful reference to compliment the documentation already provided by TechNet. Do note that this is a very long article! |
The starting point for this article is an already fully functional Lync2013 on-premise deployment complete with Edge server deployed with
federation enabled and all modalities working properly. All the necessary external and internal DNS records are already in-place and public SSL certificates are already assigned to the Lync Edge services and Reverse Proxy services. At the same time, an enterprise Office365 tenant to build the split domain topology on must also be available. In this setup an O365 E3 tenant is used for the hybrid deployment. Readers who do not have a tenant can sign up for a 30-day E3 trial here. Note also that the desired shared SIP address space must be a publicly verifiable domain therefore domain suffixes such as ".local" will not work. Ownership of the SIP domain is also required along with the ability to create public DNS records and purchasing of public SSL certificates. With all these in place, a quick overview of the steps involved is summarized below:
federation enabled and all modalities working properly. All the necessary external and internal DNS records are already in-place and public SSL certificates are already assigned to the Lync Edge services and Reverse Proxy services. At the same time, an enterprise Office365 tenant to build the split domain topology on must also be available. In this setup an O365 E3 tenant is used for the hybrid deployment. Readers who do not have a tenant can sign up for a 30-day E3 trial here. Note also that the desired shared SIP address space must be a publicly verifiable domain therefore domain suffixes such as ".local" will not work. Ownership of the SIP domain is also required along with the ability to create public DNS records and purchasing of public SSL certificates. With all these in place, a quick overview of the steps involved is summarized below:
- Add your domain and verify ownership
- Install and Configure Active Directory synchronization
- Install and Configure Active Directory Federation Services (AD FS)
- Install and Configure Active Directory Federation Services Proxy (AD FS Proxy)
- Configure Single Sign-on (SSO) with ADFS
- Configure federation of Lync Server 2013 with Lync Online
- Move user to Lync Online and test calls between Lync Online and Lync Onprem
1. Add your domain and verify ownership
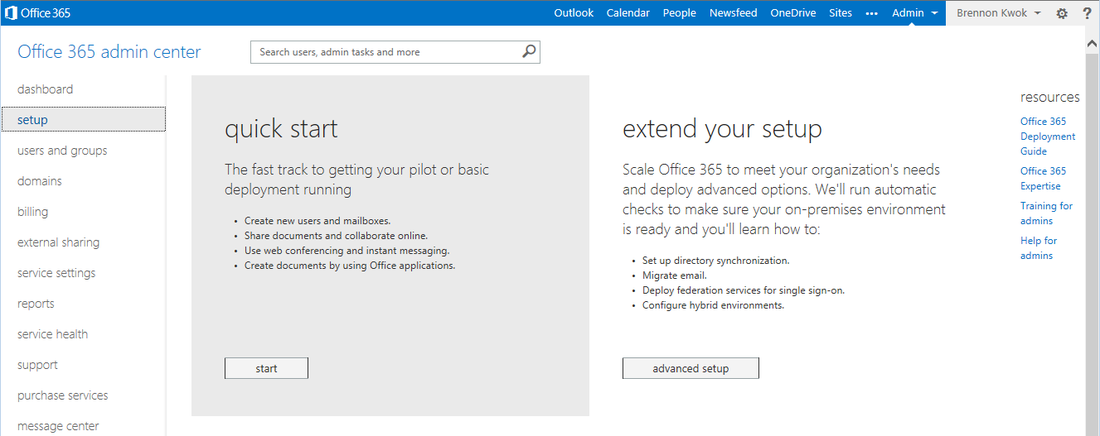
With an O365 E3 tenant account setup with the default options, the Online Lync SIP address and AD UPN suffix will be like mydomain.onmicrosoft.com. It is also good to test logins to this account using Lync and Exchange to make sure everything is working. The first tenant online user is typically also the administrator this account will be used for administration and setup of the hybrid environment. At this stage, there is no need to create any additional users on the tenant as user accounts will be synchronized from your Onprem AD later in step 2. The Onprem Lync SIP address and AD UPN desired will be something like mydomain.com, and this will be the shared SIP address space. We now need to add this "vanity" domain to the online tenant so that online users will also use the shared SIP address space. On the O365 admin center home page, click the "setup" tab and then "Start":
With an O365 E3 tenant account setup with the default options, the Online Lync SIP address and AD UPN suffix will be like mydomain.onmicrosoft.com. It is also good to test logins to this account using Lync and Exchange to make sure everything is working. The first tenant online user is typically also the administrator this account will be used for administration and setup of the hybrid environment. At this stage, there is no need to create any additional users on the tenant as user accounts will be synchronized from your Onprem AD later in step 2. The Onprem Lync SIP address and AD UPN desired will be something like mydomain.com, and this will be the shared SIP address space. We now need to add this "vanity" domain to the online tenant so that online users will also use the shared SIP address space. On the O365 admin center home page, click the "setup" tab and then "Start":
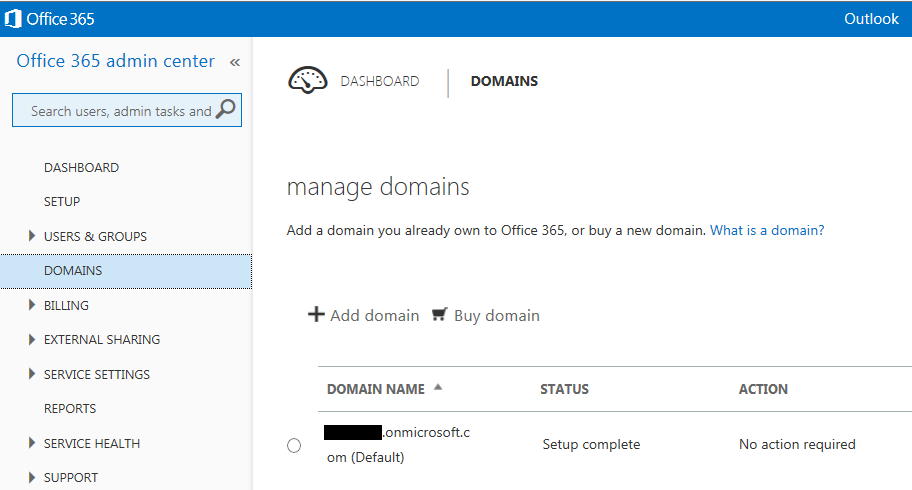
Here we can see the default domain "mydomain.onmicrosoft.com". Click on "Add domain" to begin:
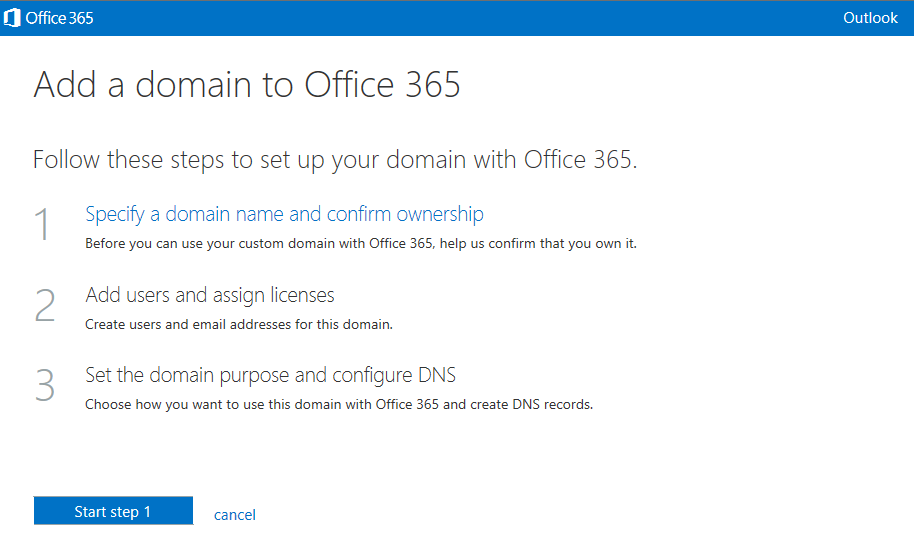
In the next screen click on "Start step 1":
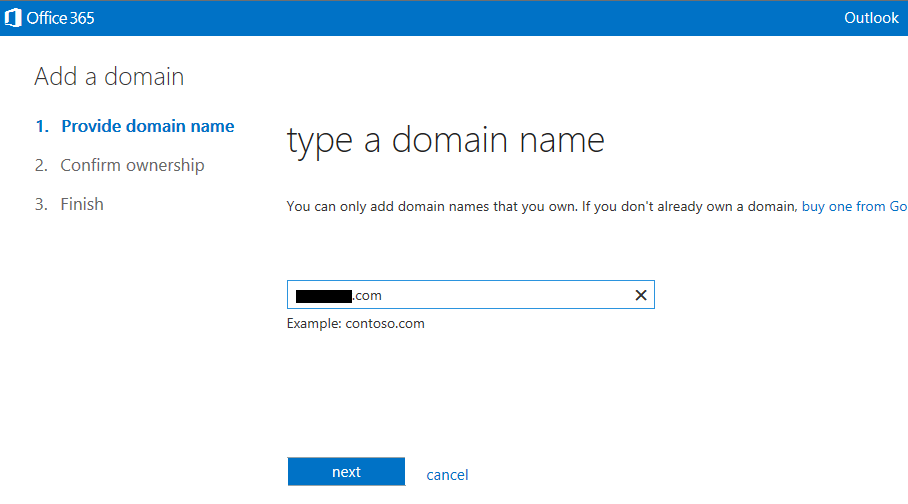
Enter the desired SIP domain which in this case is the Onprem AD UPN domain and Lync SIP domain suffix "mydomain.com"
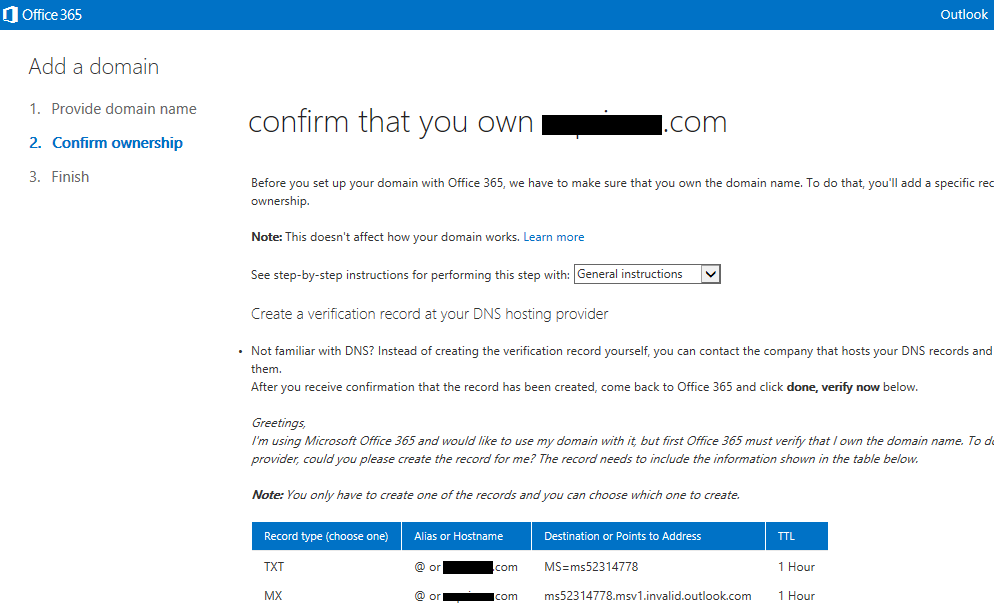
In the next screen we need to create the DNS record as specified in order to confirm domain ownership. At this point go to your DNS provider and create either the MX or TXT record. In this lab the TXT record was created, then wait a few minutes before clicking on the "done, verify now" button:
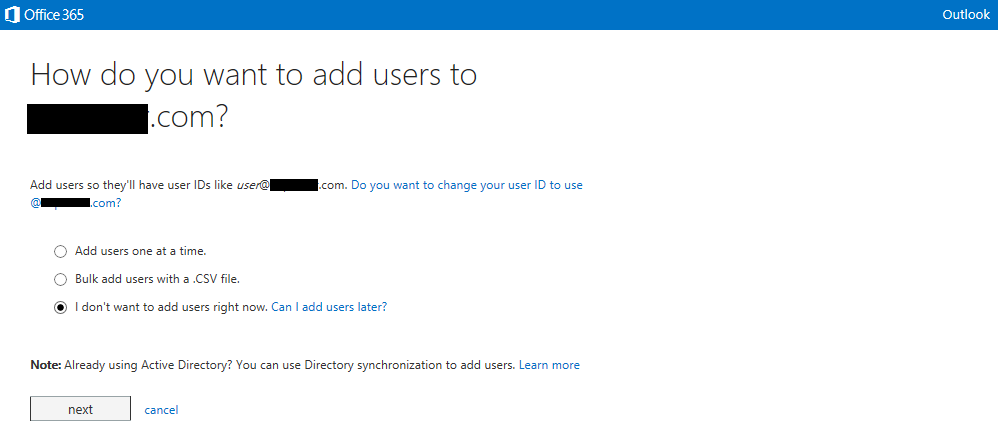
In the next screen we choose not to add users right now as these users will be synchronized from the Onprem AD later:
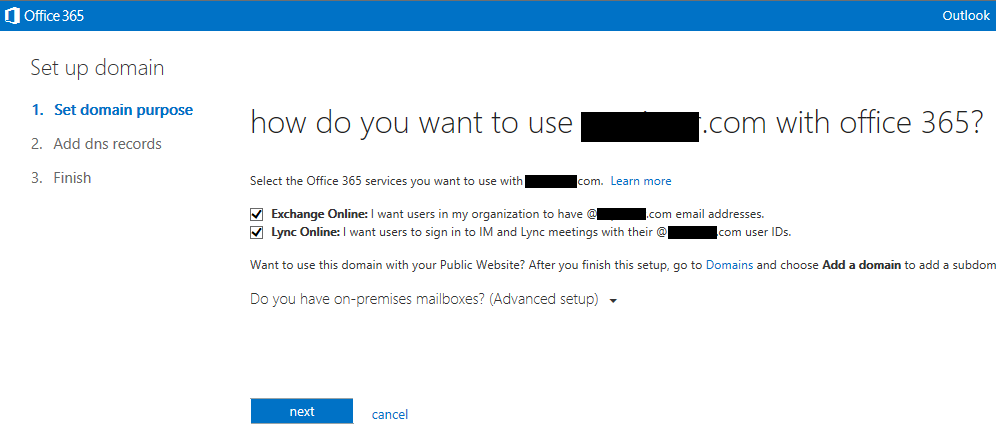
In the next window we select both check boxes for Exchange Online and Lync Online. Note there there is no Onprem Exchange server in this setup and all user mailboxes will be hosted on O365:
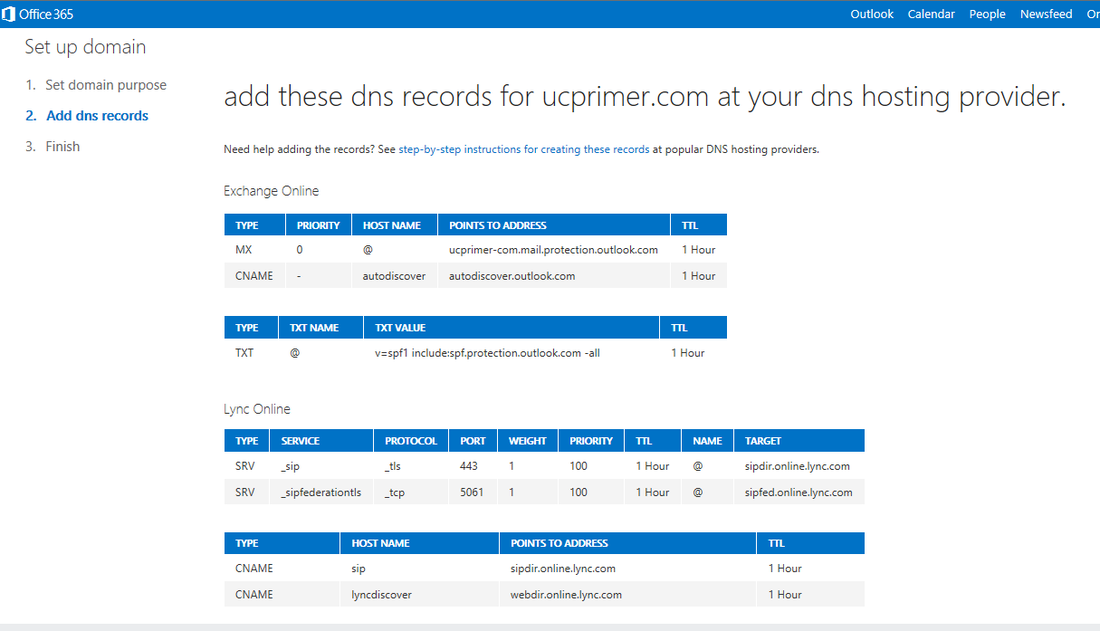
We now need to add the necessary public DNS records as shown below and then click "Done, go check" in order to proceed. Note that we actually should not change the records for Lync Online as shown below since we already have an Onprem Lync deployment. In a Lync Hybrid setup, the public CNAME and SRV records for Lync should point to the Onprem Edge server's access FQDN. So after verifying these records, we should change the DNS records back to point to the Onprem Edge server.
If the AD UPN is using a non publicly routable domain suffix like the AD used in the lab, eg "mydomain.local", then we need to add an alternative UPN suffix to the AD and configure users to use this UPN instead. O365 Directory Sync will not work properly with AD UPN suffixes like ".local" etc.. In this case we just use the same mydomain.com Shared SIP Address space for the alternative UPN. We add this using the AD Domains and Trusts:
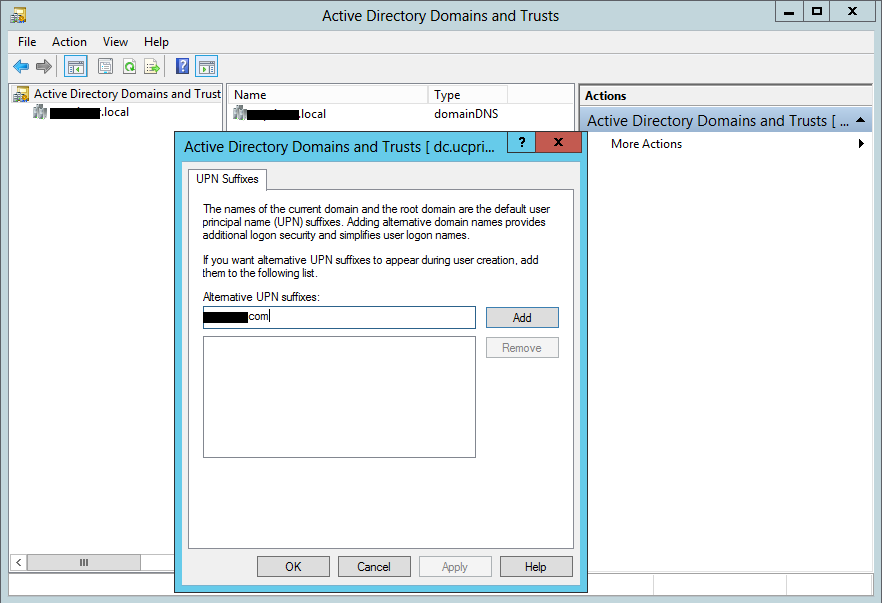
For any existing accounts that were created before this alternative UPN was added, we need to go back to the account properties for the user and change the UPN to use the new alternative suffix. Once this is done we can proceed with the next step of directory synchronization with O365 Azure AD
2. Install and Configure Active Directory synchronization
When setting up hybrid environment, Directory Synchronization or DirSync is mandatory, while there are two options for access control: Password Sync and Single Sign-on. For simplicity Password Sync can be used along with DirSync but this means that although user's password hash will be synchronized from On-prem AD to Azure AD, the user must login again to O365 in addition to the On-prem AD. SSO with DirSync requires a more complex setup involving ADFS and is shown later in this walk-thru. To begin, on the O365 admin center click on "Users & Groups" then click "Set up" for AD synchronization:
When setting up hybrid environment, Directory Synchronization or DirSync is mandatory, while there are two options for access control: Password Sync and Single Sign-on. For simplicity Password Sync can be used along with DirSync but this means that although user's password hash will be synchronized from On-prem AD to Azure AD, the user must login again to O365 in addition to the On-prem AD. SSO with DirSync requires a more complex setup involving ADFS and is shown later in this walk-thru. To begin, on the O365 admin center click on "Users & Groups" then click "Set up" for AD synchronization:
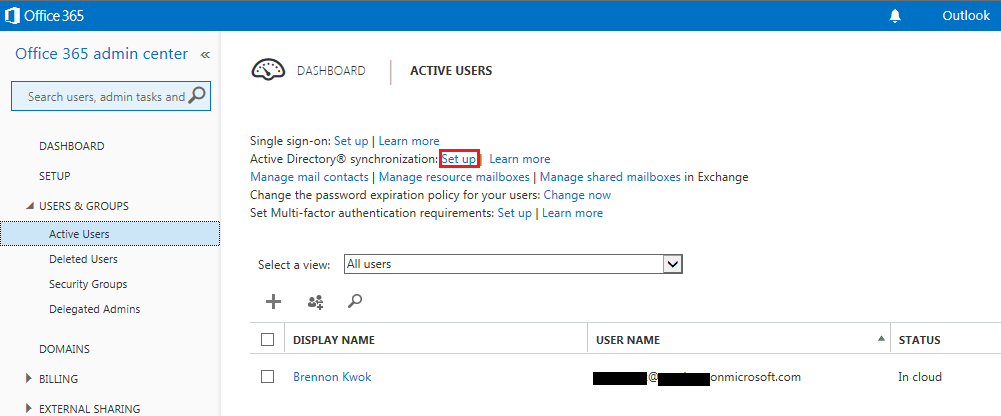
In the next window, we click on the "Activate" button to activate dirsync between your Onprem AD and O365's Azure AD cloud. After that download the Directory Sync Tool and copy the installer file to your AD domain controller:

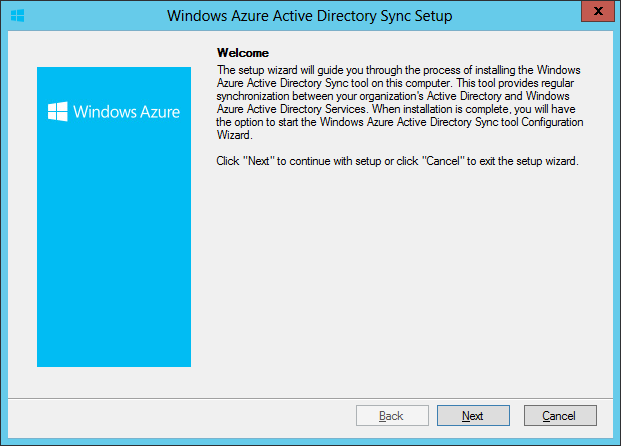
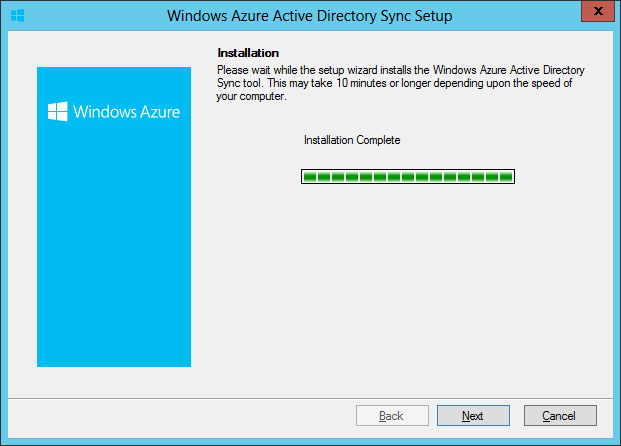
We start the DirSync tool installer on the domain controller and click Next to proceed:
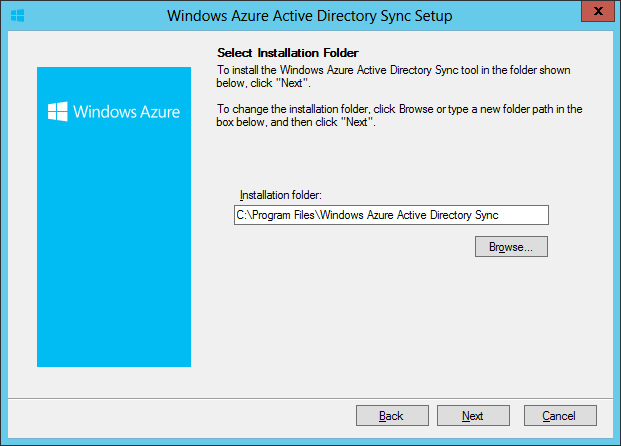
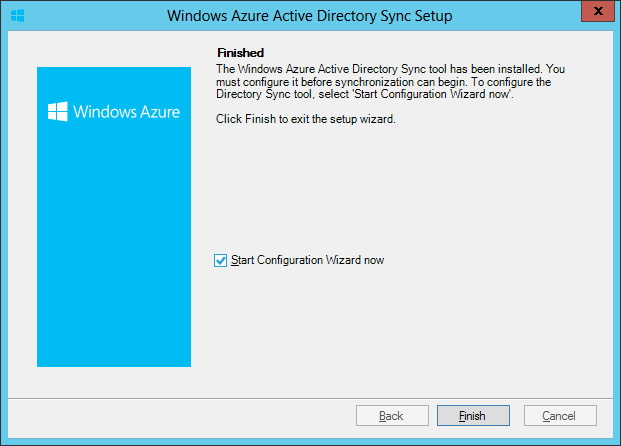
We just install using the defaults and then click Finish to start the Configuration Wizard:
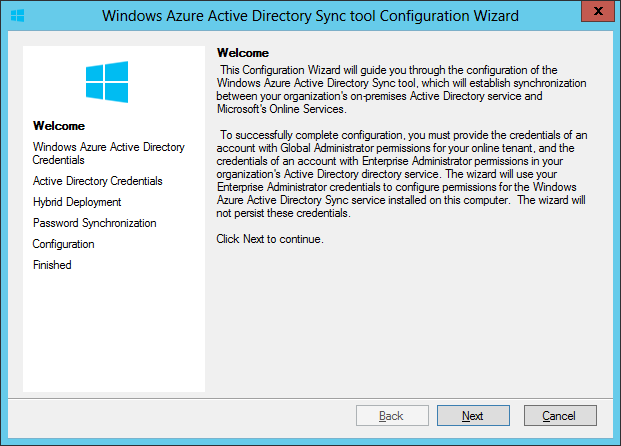
At the Welcome screen click "Next" to continue
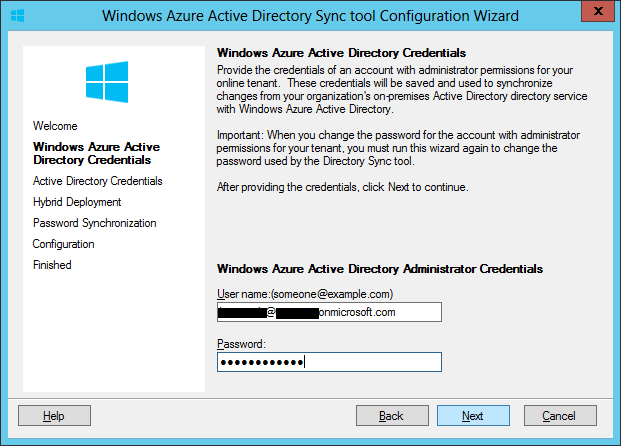
Next, we need to specify the admin credentials for the O365 E3 tenant:
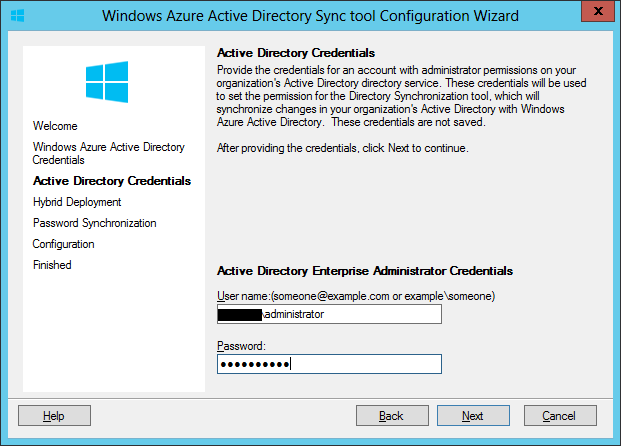
Following that we need to enter the credentials of the Onprem AD administrator account:
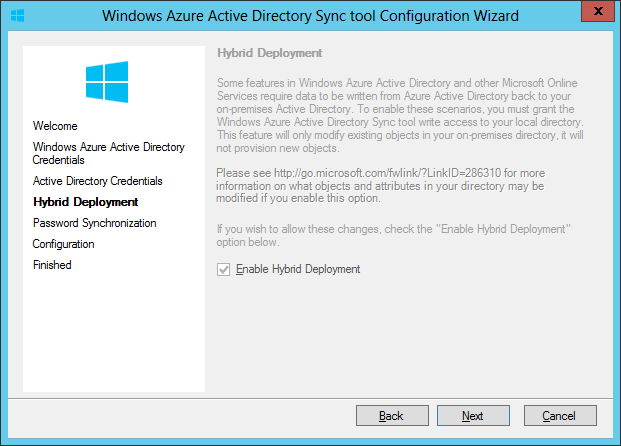
Next we see that the Enable Hybrid Deployment checkbox is automatically selected and click "Next" to continue. Note that account creation is one way from the Onprem AD to Azure's AD, but there are some attributes that do get synchronized back:
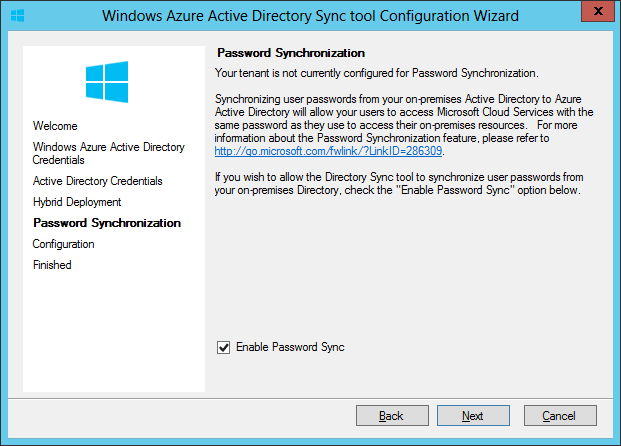
As mentioned, we will configure DirSync with Password Synchronization so the checkbox needs to be selected:
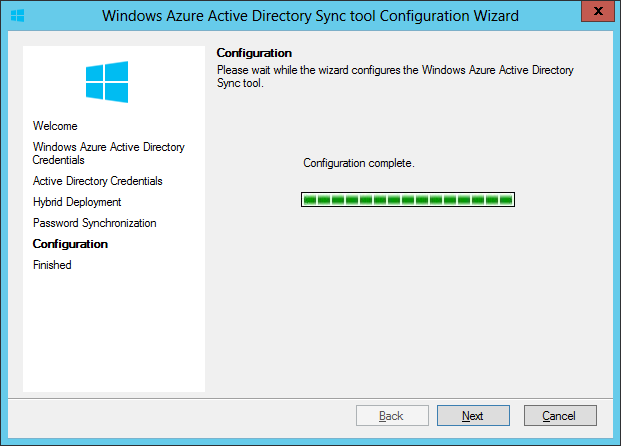
Once the configuration is complete, we can click "Next" to continue:
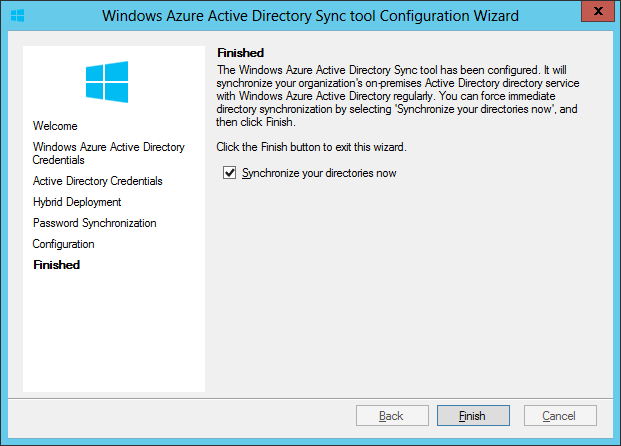
Ensure the checkbox is selected to start directory sync and click "Finish" to complete the wizard:
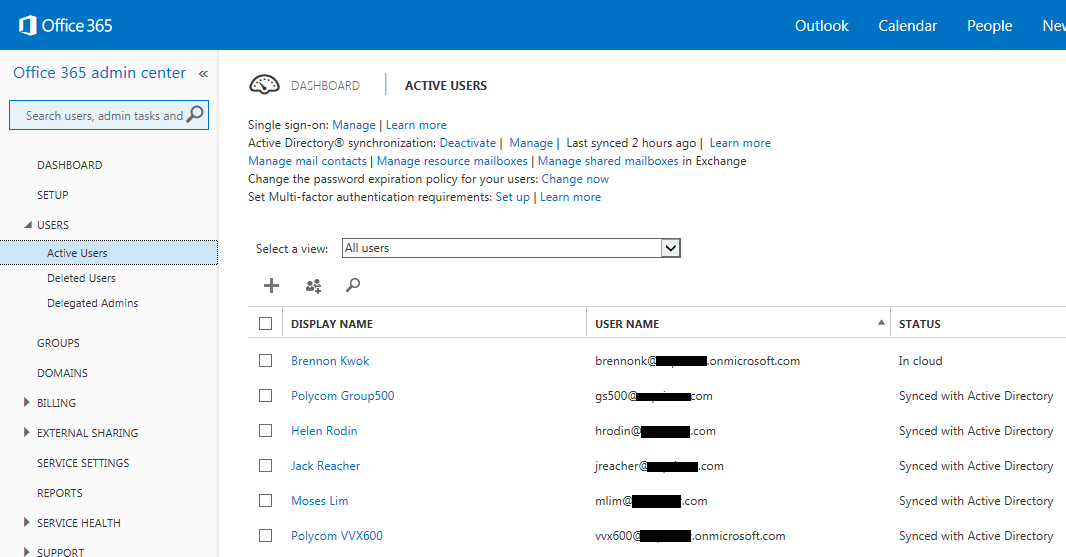
To verify that directory synchronization is successful, we can login to the O365 admin page and look at the users. From the diagram below we can see 5 new users that have been synced from the Onprem AD:
3. Install and Configure Active Directory Federation Services (AD FS)
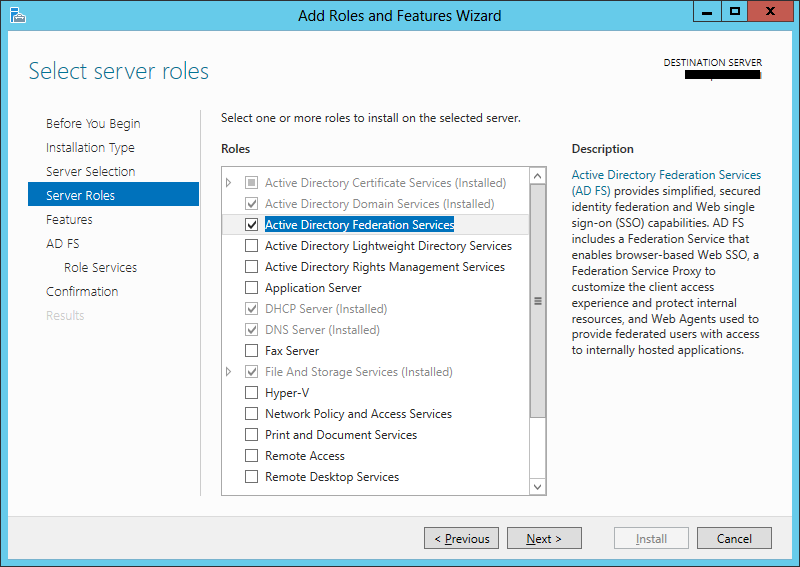
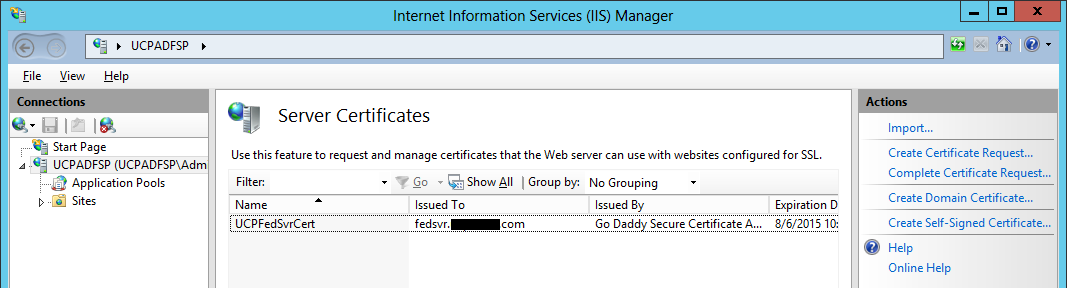
With DirSync configured, we next proceed to install and configure ADFS on Windows 2012. Note that you can install ADFS on a separate server but in this walk thru we will just use the same DC. Before beginning the installation, we will need to obtain a public SSL server authentication certificate. The Common Name or Subject Name of this certificate needs to match the name of the federated service, for this example we are using "fedsvr.mydomain.com". For this lab we created a certificate request using IIS on the DC and used this to purchase a standard, not UCC, SSL certificate from GoDaddy. After getting the certificate we imported it back into IIS (refer to this TechNet page for the steps to do this).
After that is complete, we can proceed to add the ADFS role to the DC:
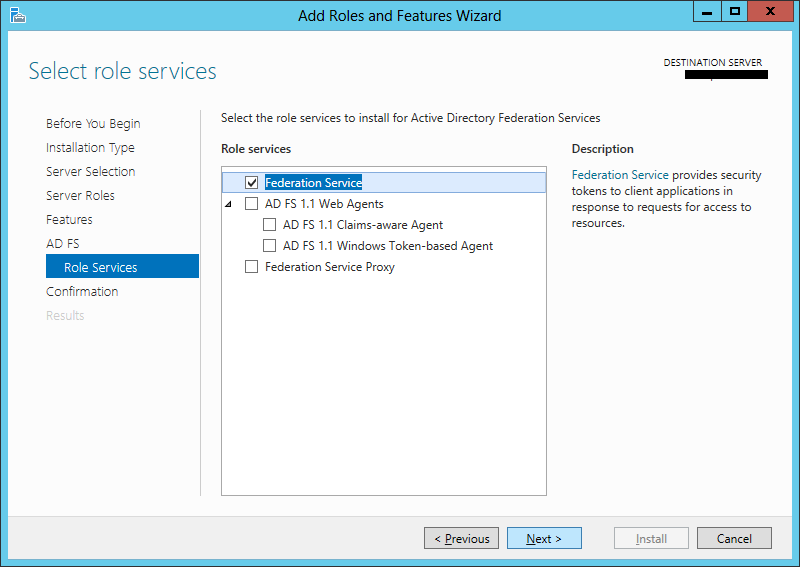
On the Role Services page, we only need to select "Federation Service" and click "Next" to continue:
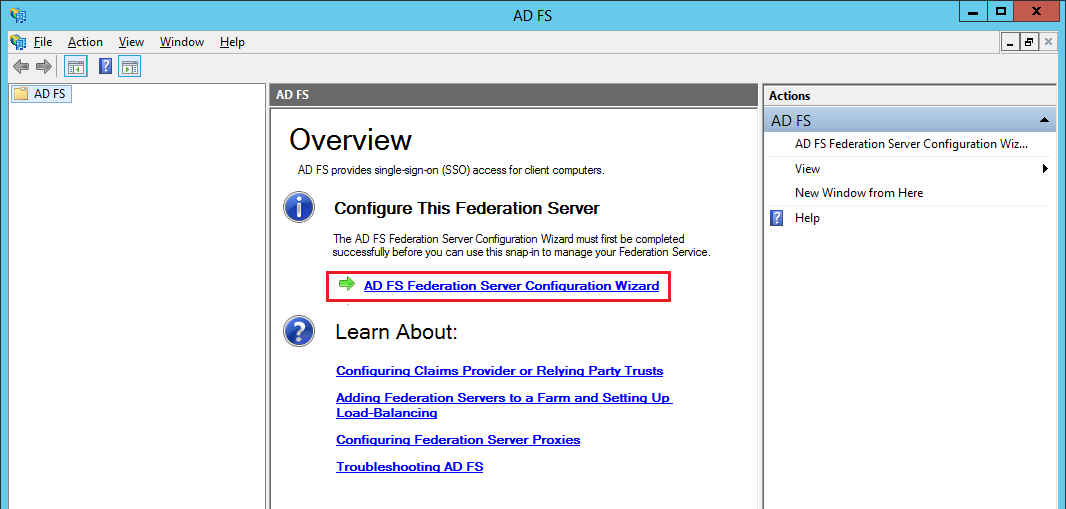
Once installation completes start the ADFS Federation Server Configuration Wizard:
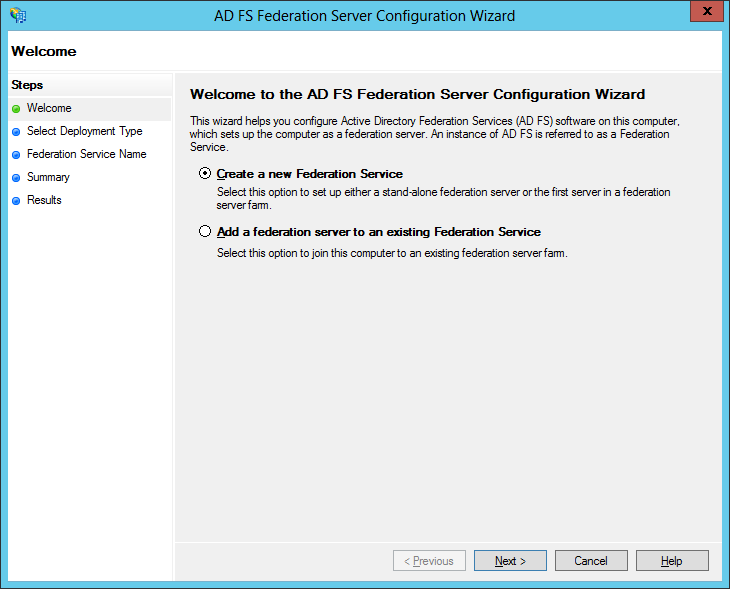
Click the first option to Create a new Federation Service:
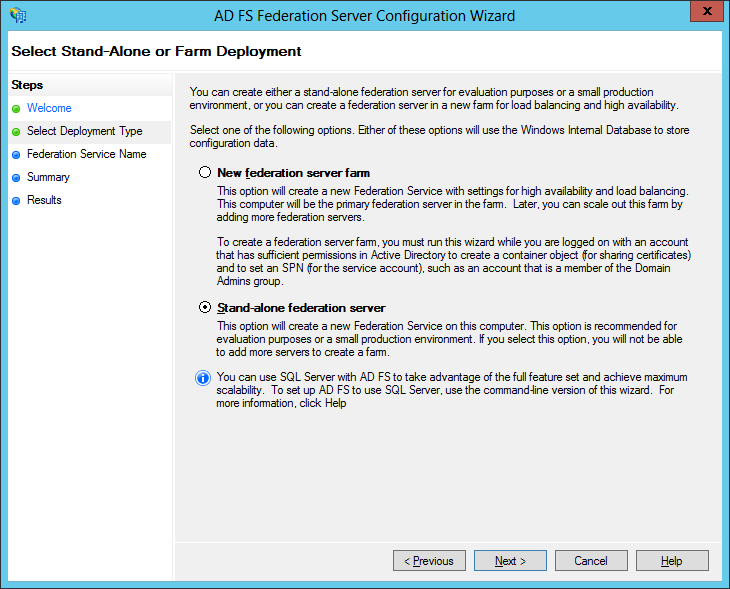
Microsoft recommends creating a federation server farm but for this walk thru we will just create a stand-alone federation server:
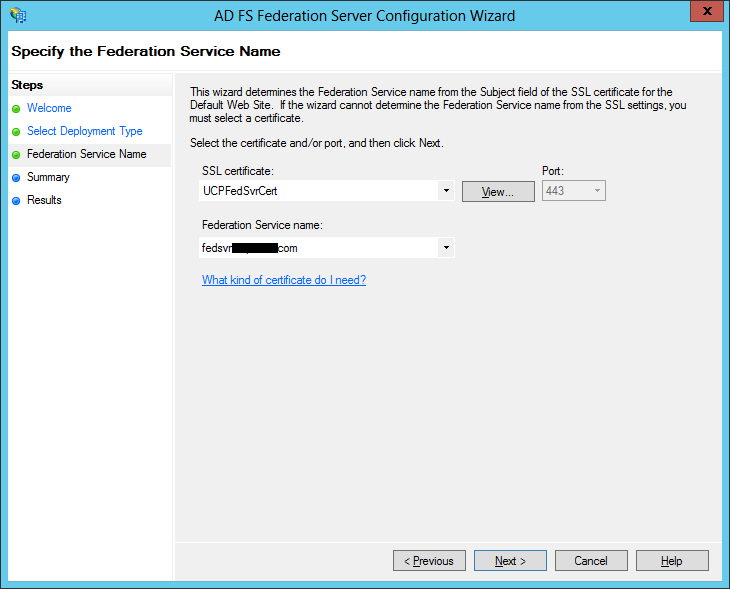
Next from the drop down list we select the SSL certificate that was imported earlier. We also select the Federation Service name which matches the CN or SN of the certificate:
At the next window, we just click "Next" to finish:

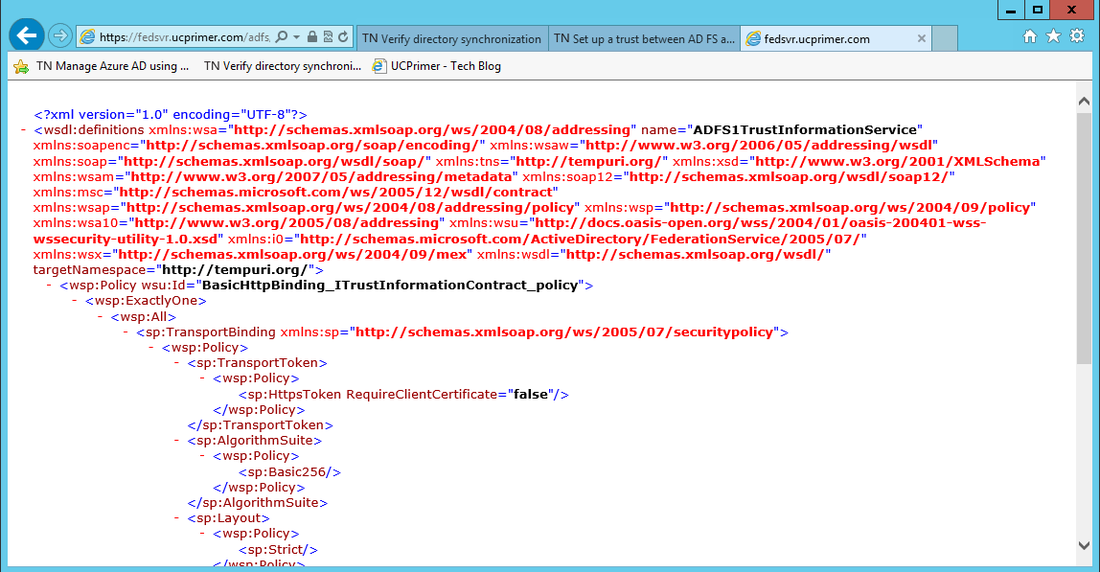
After the AFDS Configuration Wizard has completed, we can verify that ADFS services are operational by browsing to https://fedsvr.ucprimer.com/adfs/fs/federationserverservice.asmx and obtain and XML service description:
4. Install and Configure Active Directory Federation Services Proxy (AD FS Proxy)
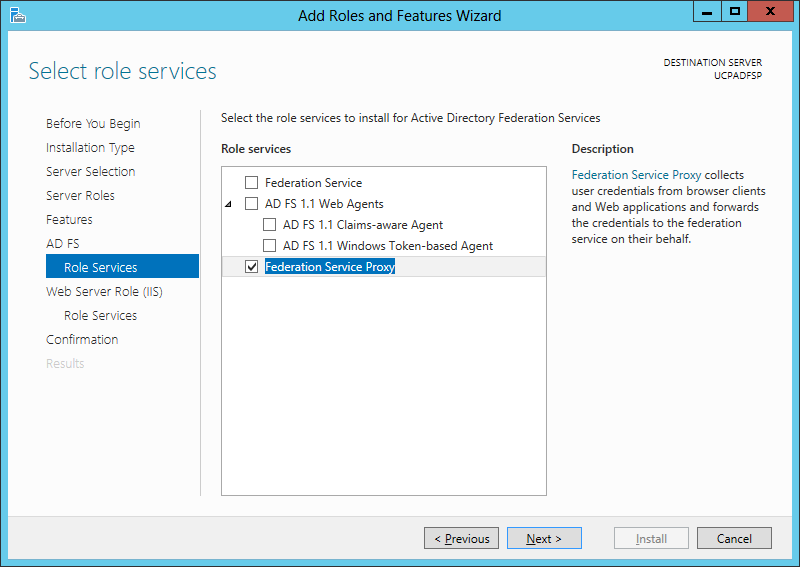
The ADFS proxy computer resides in the perimeter network and therefore cannot be collocated on the ADFS server. In this setup we installed a new Windows Server 2012 machine with 2 NIC cards for internal and external interfaces. The external interface has a NAT'ed public IP address which is assigned public DNS A Record that matches the FQDN of the ADFS service, which in this lab is fedsvr.ucprimer.com. Note that this computer is not joined to the domain. To begin, use the Roles and Features Wizard to add the Federation Service Proxy on the Windows 2012 computer:
The ADFS proxy computer resides in the perimeter network and therefore cannot be collocated on the ADFS server. In this setup we installed a new Windows Server 2012 machine with 2 NIC cards for internal and external interfaces. The external interface has a NAT'ed public IP address which is assigned public DNS A Record that matches the FQDN of the ADFS service, which in this lab is fedsvr.ucprimer.com. Note that this computer is not joined to the domain. To begin, use the Roles and Features Wizard to add the Federation Service Proxy on the Windows 2012 computer:
Allow the installation to proceed with the defaults. Next, we export the ADFS certificate along with the private key from the AD FS server and import the certificate into the ADFS Proxy computer using IIS:
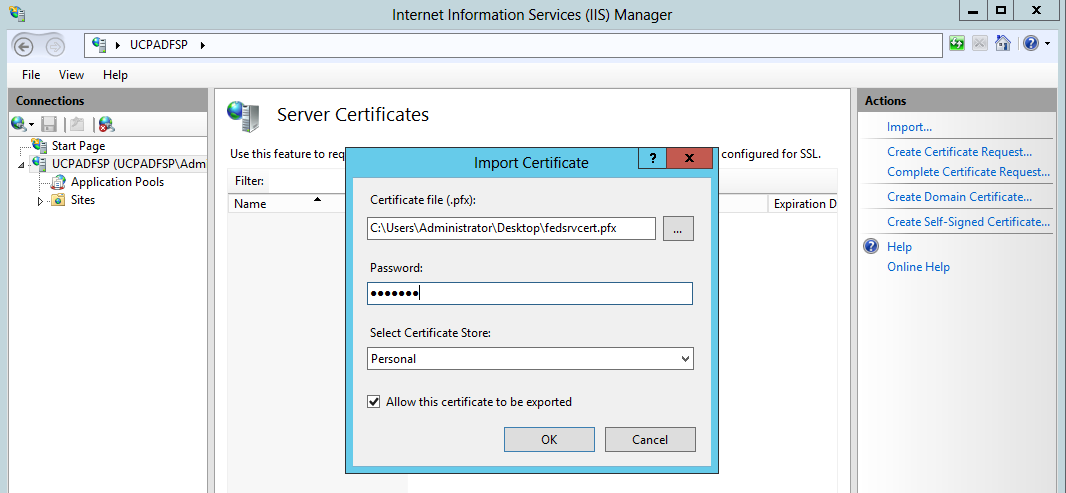
When the import is successful we should be able to see the certificate in IIS:
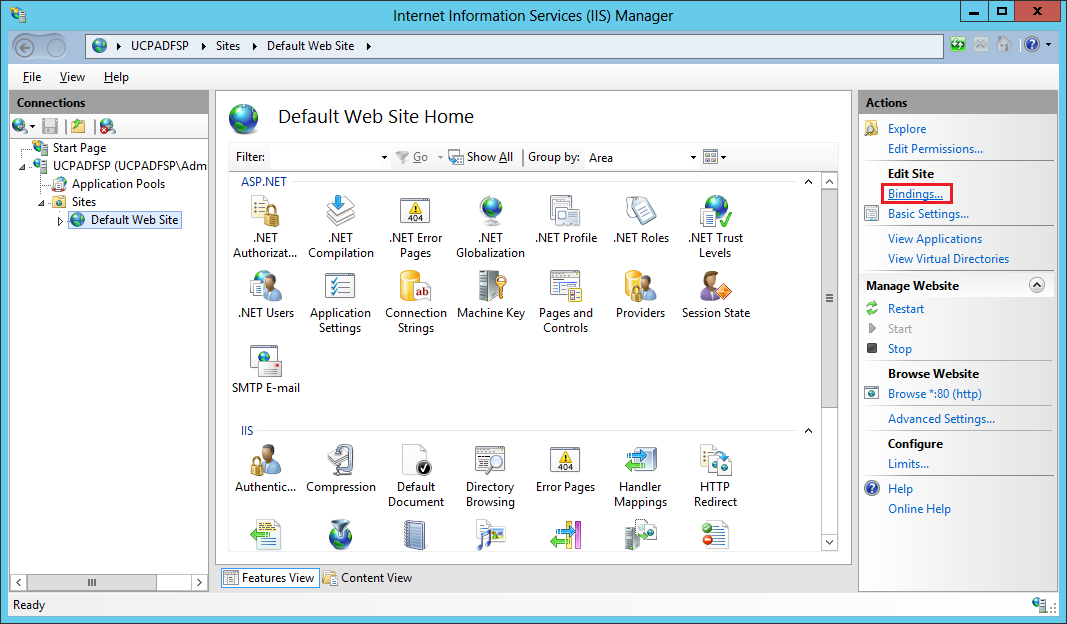
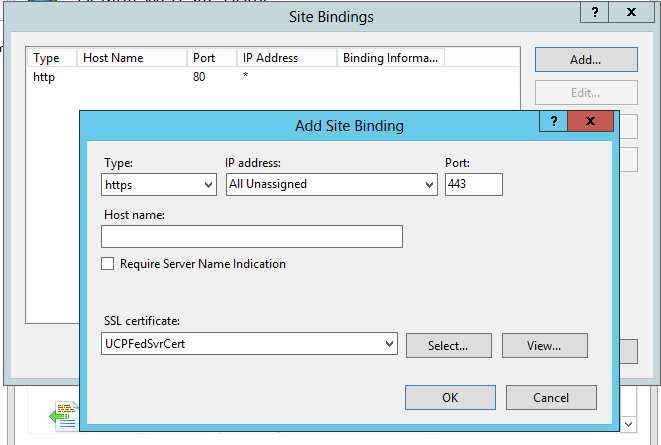
Now we need to bind the certificate to the https service in IIS. On the IIS home page click on "Bindings...":
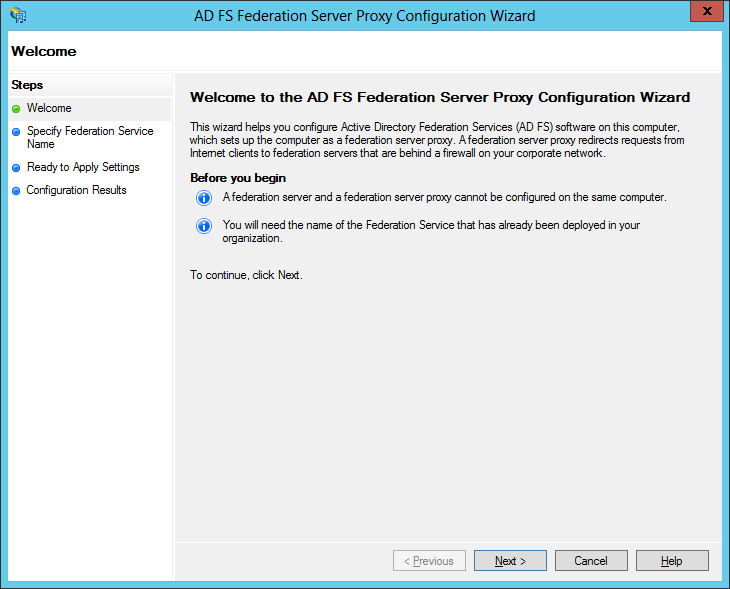
Next, we start the AD FS Federation Server Proxy Configuration Wizard:
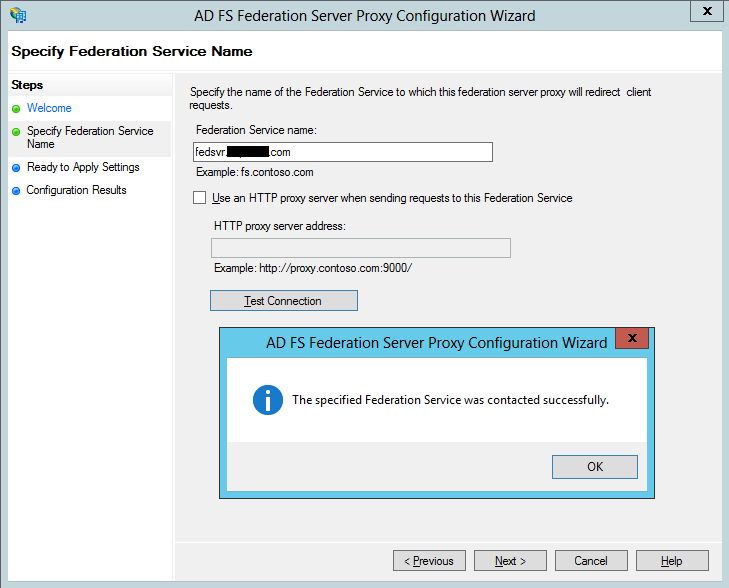
In the next step we specify the Federation Service name and click "Test Connection" to make sure the service can be contacted correctly. We also need to ensure that the ADFS Proxy server has a /etc/hosts file for the host record fedsvr.mydomain.com pointing to the AD FS server:
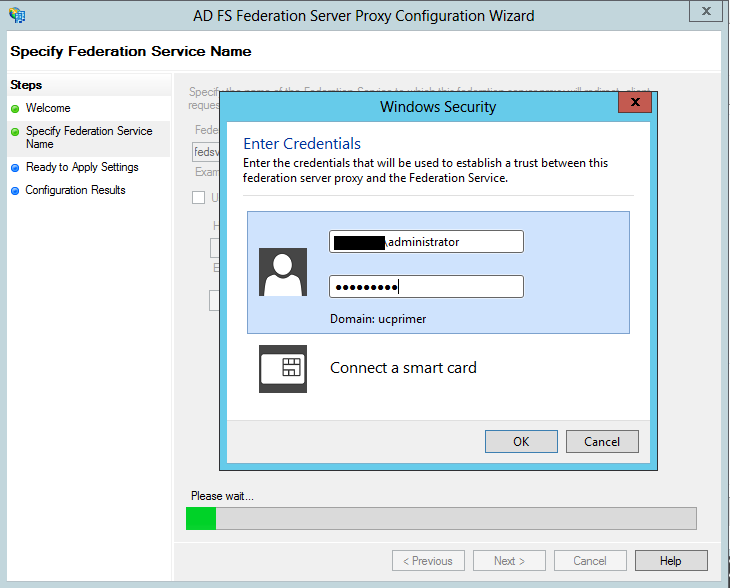
Then we establish a trust between this AD FS Proxy computer and the AD FS server which requires administrator credentials:
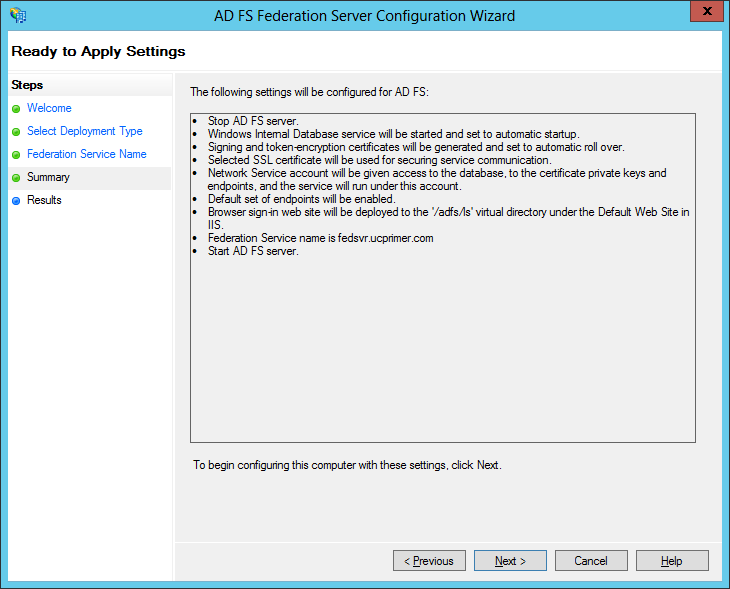
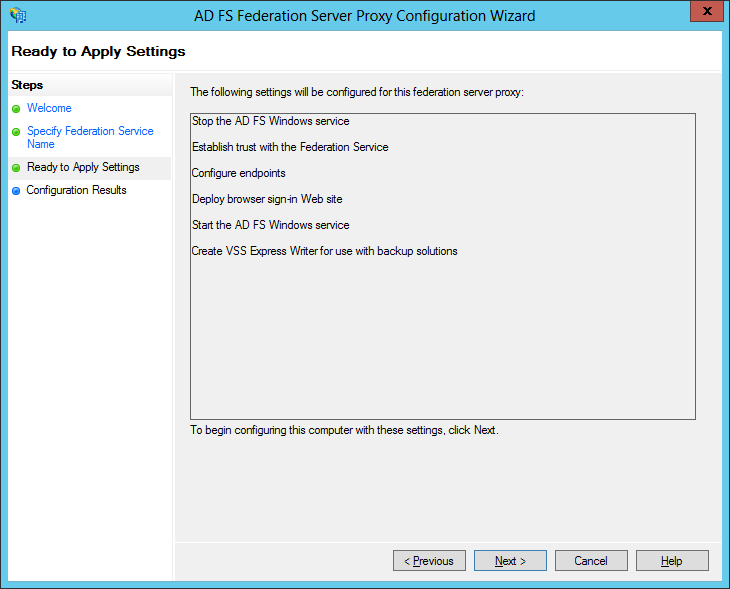
Now we are Ready to Apply Settings and click "Next" to proceed:
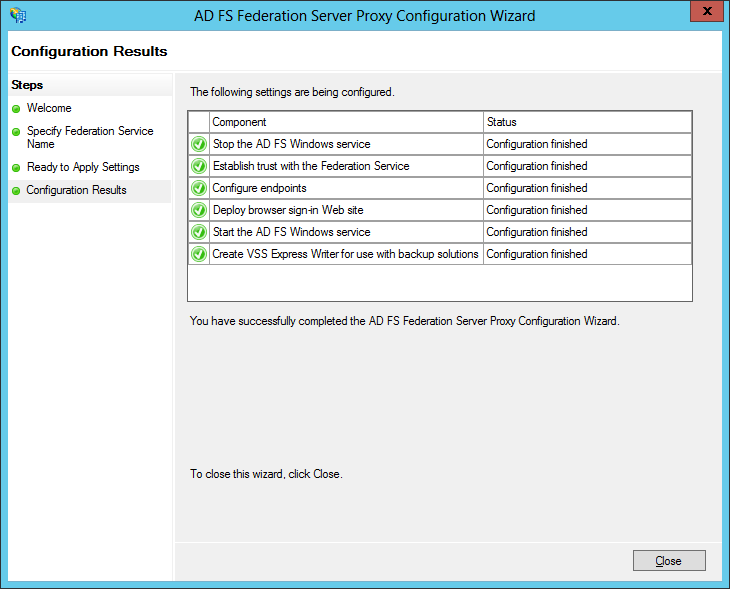
Allow the wizard to finish the configuration and click "Close" to complete:
5. Configure Single Sign-on (SSO) with ADFS
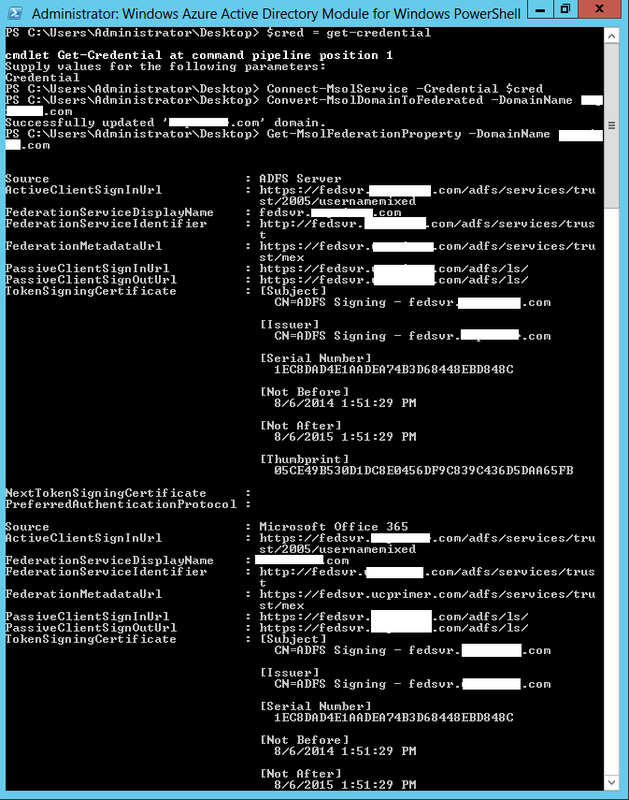
With the ADFS and ADFS Proxy setup, we can now configure SSO between the Onprem AD and O365's Azure AD. To begin, we download and install the Microsoft Azure Active Directory Module for Windows PowerShell on the ADFS computer. Once installed, open the module and run the following powershell commands to setup a trusted federation domain:
$cred = get-Credential // enter the tenant administrator credentials in the popup window
Connect-MsolService -Credential $cred
Convert-MsolDomainToFederated -DomainName <your AD domain>
Get-MsolFederationProperty -DomainName <your AD domain> // this is to verify successful setup
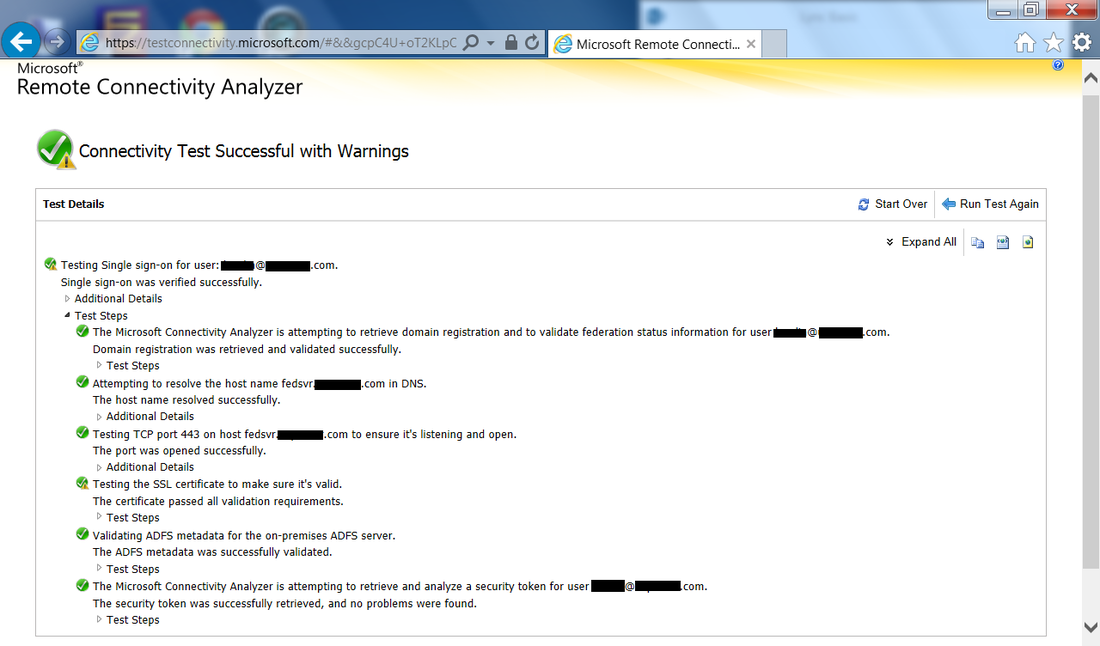
To test single sign-on connectivity, we can use the Microsoft Remote Connectivity Analyzer. Click the Office 365 tab, click Microsoft Single Sign-On, and then click Next. Follow the screen prompts to perform the test. The analyzer validates your ability to sign on to the cloud service with your corporate credentials. It also validates some basic AD FS 2.0 configuration:
6. Configure federation of Lync Server 2013 with Lync Online
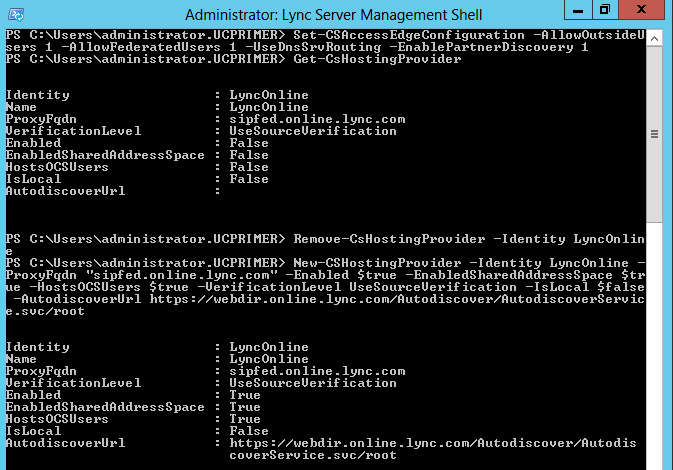
These series of powershell cmdlets are run from Lync Management shell to configure the necessary properties of the Onprem Lync for federation with Lync Online:
Set-CSAccessEdgeConfiguration -AllowOutsideUsers 1 -AllowFederatedUsers 1 -UseDnsSrvRouting
Remove-CsHostingProvider -Identity LyncOnline // Removes the default Lync Online Hosting Provider
New-CSHostingProvider -Identity LyncOnline -ProxyFqdn "sipfed.online.lync.com" -Enabled $true
-EnabledSharedAddressSpace $true -HostsOCSUsers $true -VerificationLevel UseSourceVerification -IsLocal
$false -AutodiscoverUrl https://webdir.online.lync.com/Autodiscover/AutodiscoverService.svc/root
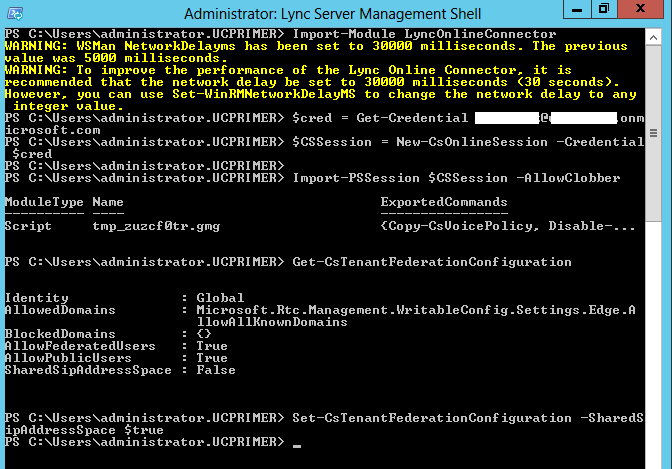
Before moving users from Lync Onprem to Lync Online, we need to configure the O365 tenant to share the SIP address space with the on-premises deployment. If this is not configured, we may see the following error message:
Move-CsUser : HostedMigration fault: Error=(510), Description=(This user’s tenant is not enabled for shared sip address space.)
To configure a shared SIP address space, establish a remote PowerShell session with Lync Online, and then run the following cmdlet:
Set-CsTenantFederationConfiguration -SharedSipAddressSpace $true
7. Move user to Lync Online and test calls between Lync Online and Lync Onprem
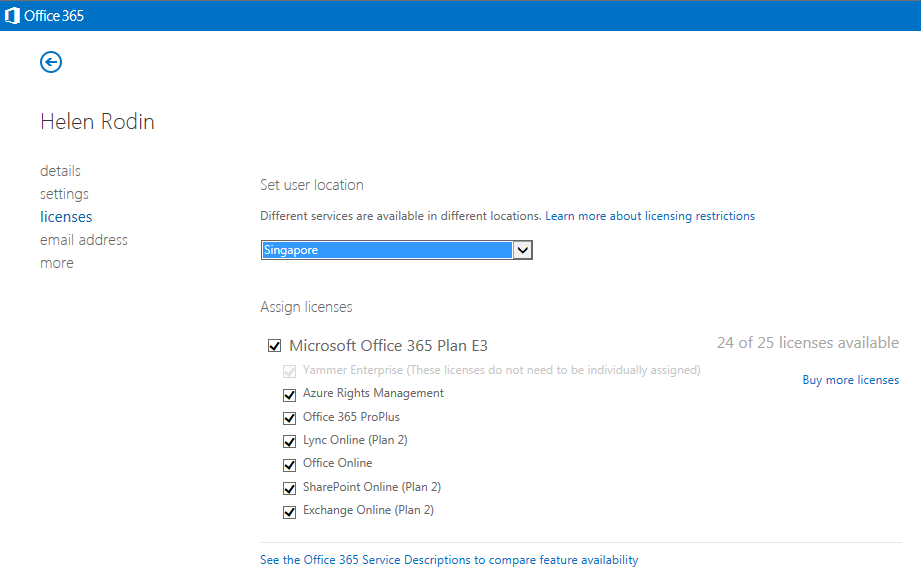
In the final stage, we move an existing Lync Onprem user to Lync Online. In this walk thru we move the user with SIP address [email protected] and AD UPN [email protected]. This user has already been enabled for Lync Onprem and is able to login from a Lync client. To begin the move process, we first login to the O365 admin page and assign a E3 license for this user:
In the final stage, we move an existing Lync Onprem user to Lync Online. In this walk thru we move the user with SIP address [email protected] and AD UPN [email protected]. This user has already been enabled for Lync Onprem and is able to login from a Lync client. To begin the move process, we first login to the O365 admin page and assign a E3 license for this user:
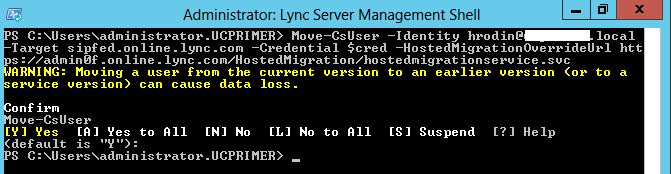
Now we can proceed to use the Move-CsUser cmdlet in the Onprem Lync Management Shell: to move the user from Onprem to Online. The steps for how to determine the parameter for HostedMigrationOverrideUrl are provided here. The cmdlet is
Move-CsUser -Identity <user's AD UPN> -Target sipfed.online.lync.com -Credential $cred -HostedMigrationOverrideUrl <Hosted migration override URL for your tenant>
Move-CsUser -Identity <user's AD UPN> -Target sipfed.online.lync.com -Credential $cred -HostedMigrationOverrideUrl <Hosted migration override URL for your tenant>
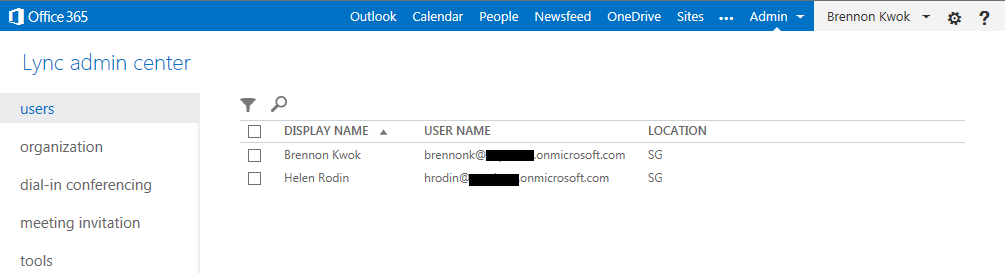
After the Move-CsUser command completes successfully with no errors, we can log in to O365 Lync admin center to see the user is now homed online:
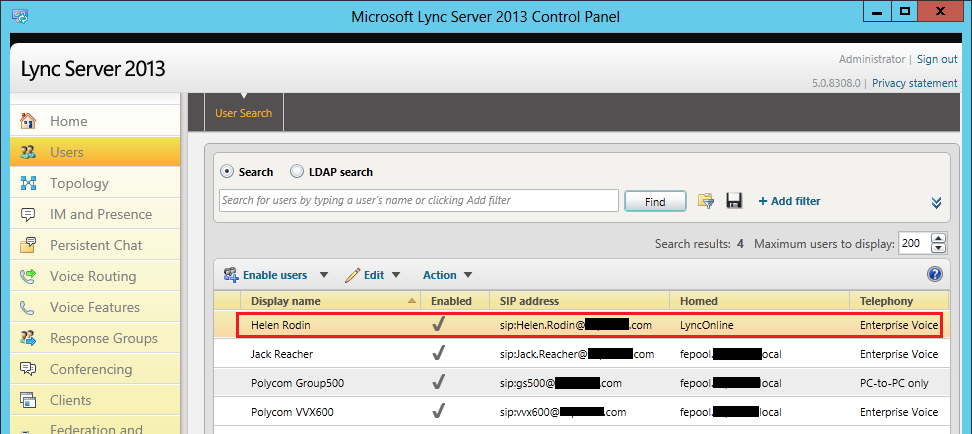
On the Onprem Lync Control Panel we can see the same user is specified as homed online:
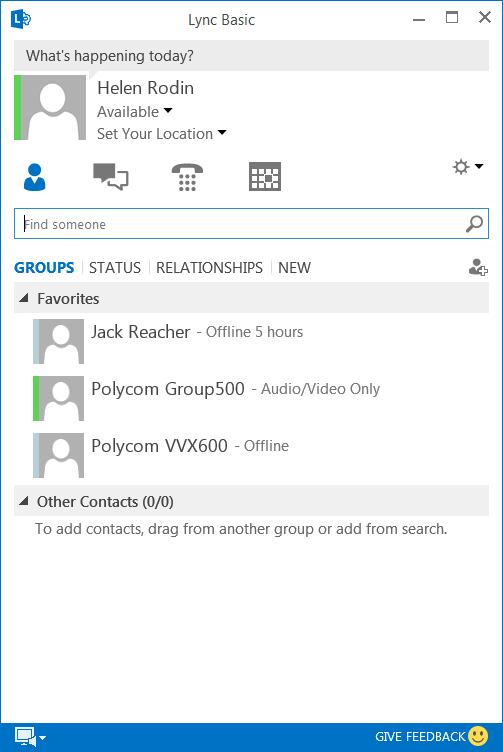
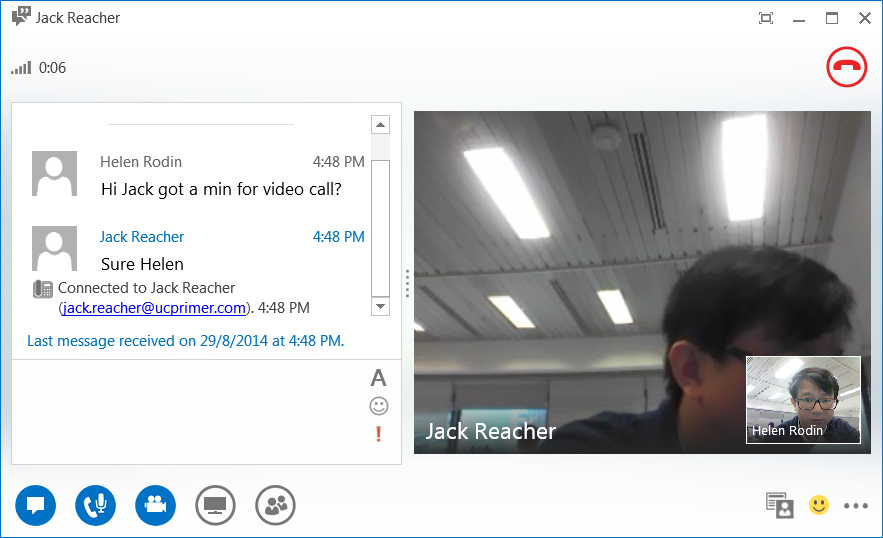
We can now test IM and video calls between hrodin who is homed Online and logged in from external network and jreacher who is homed Onprem and logged in from internal network:

This completes the walk thru for setting up Lync Hybrid Split-Domain with Shared SIP Address Space. As can be seen it was a long article with many steps involved but overall the process was not too difficult. Hopefully this article serves as a useful guide for those doing the same. Future articles will address configuring Polycom Room Endpoints and Infrastructure for Lync hybrid.


 RSS Feed