
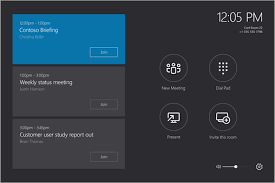
 | Skype Room System v2 (SRSv2) meeting room solutions are now available in many countries where Surface Pro devices are sold. Since it's launch last year, SRSv2 devices have been available from several vendors including Polycom, Logitech, Crestron and soon to be available from Lenovo as well. While all these vendors provide devices with different physical characteristics and dimensions, the software that powers these devices comes from Microsoft - more specifically, a SurfacePro 5 device running Windows10 operating system and the Skype Room app which provides the user interface and main functionality of the device. This blog post covers 5 tips on how to configure the SRSv2 device and are applicable for solutions from any of the vendors listed above. |
Tip#1: Skype Room System v2 accounts
SRSv2 accounts are needed for the device to login and provide calendaring and audio/video/content conferencing functions, that means having accounts on Skype for Business and Exchange. Depending on whether the environment is purely on-premise, or in the cloud, or a hybrid mix of on-premise and cloud, the steps on creating these accounts can differ slightly. In a previous blog post, I wrote about creating accounts in a hybrid environment with AzureAD sync'ed from on-prem AD, Exchange Online and Skype on-premise. For other types of environments, such as purely on-premise or pure cloud managed, the steps can be found in this TechNet article. Its worthwhile noting that Exchange resource mailbox accounts used for SRSv2 devices do not require any license. However, a Skype for Business enterprise CAL license is required for SfB on-premise and a Skype for Business Online Plan P2 license is required for SfB Online. Creating an account on Skype for Business requires the use of the 'enable-csmeetingroom' cmdlet and removing an account is performed via the 'disable-csmeetingroom' cmdlet. In a Skype for Business hybrid environment where some users are homed online and some on-premise, its better to run the 'enable-csmeetingroom' cmdlet on the on-premise Skype for Business front end pool. This creates the meeting room account on the on-premise SfB servers rather than in the SfBOnline servers. This is because lyncdiscover DNS records for hybrid envrionments will point to an on-premise server and during SIP registration, users will get redirected to online by the on-premise server if the account is homed on SfBOnline. However, I found that this SIP registration redirect does not seem to work correctly for accounts created using the 'enable-csmeetingroom' cmdlet.
SRSv2 accounts are needed for the device to login and provide calendaring and audio/video/content conferencing functions, that means having accounts on Skype for Business and Exchange. Depending on whether the environment is purely on-premise, or in the cloud, or a hybrid mix of on-premise and cloud, the steps on creating these accounts can differ slightly. In a previous blog post, I wrote about creating accounts in a hybrid environment with AzureAD sync'ed from on-prem AD, Exchange Online and Skype on-premise. For other types of environments, such as purely on-premise or pure cloud managed, the steps can be found in this TechNet article. Its worthwhile noting that Exchange resource mailbox accounts used for SRSv2 devices do not require any license. However, a Skype for Business enterprise CAL license is required for SfB on-premise and a Skype for Business Online Plan P2 license is required for SfB Online. Creating an account on Skype for Business requires the use of the 'enable-csmeetingroom' cmdlet and removing an account is performed via the 'disable-csmeetingroom' cmdlet. In a Skype for Business hybrid environment where some users are homed online and some on-premise, its better to run the 'enable-csmeetingroom' cmdlet on the on-premise Skype for Business front end pool. This creates the meeting room account on the on-premise SfB servers rather than in the SfBOnline servers. This is because lyncdiscover DNS records for hybrid envrionments will point to an on-premise server and during SIP registration, users will get redirected to online by the on-premise server if the account is homed on SfBOnline. However, I found that this SIP registration redirect does not seem to work correctly for accounts created using the 'enable-csmeetingroom' cmdlet.
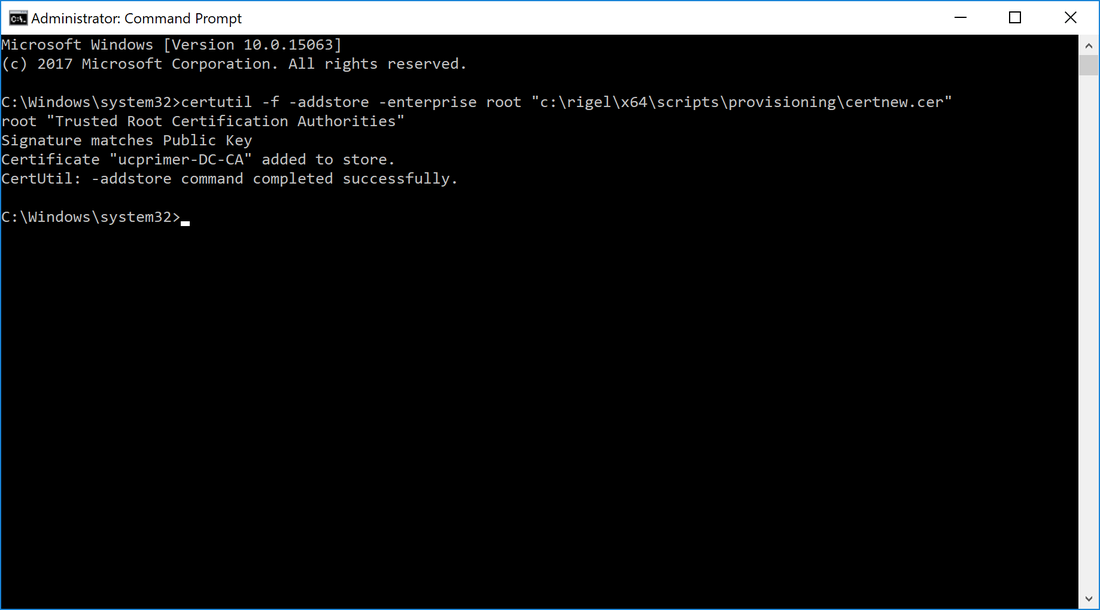
Tip#2: Root CA Certificates
If the SRSv2 device is using an account homed on SfBOnline, then this step is not necessary, However, for environments where Skype for Business is deployed on-premise, it is almost always mandatory to install the root CA certificate on the SRSv2 device so that it trusts the certificate presented to it by the SfB FE Pool. Installing the certificate is described in this TechNet article and basically involves copying the root CA chain file to a the SRSv2's C: drive and running the 'certutil -f -addstore -enterprise root <filepath>' cmdlet. if there are multiple root CAs, then multiple root CA certitcates must be installed using the same cmdlet. Remember to run the command shell with elevated administrator permissions. Below is a screen shot of what it looks like:
If the SRSv2 device is using an account homed on SfBOnline, then this step is not necessary, However, for environments where Skype for Business is deployed on-premise, it is almost always mandatory to install the root CA certificate on the SRSv2 device so that it trusts the certificate presented to it by the SfB FE Pool. Installing the certificate is described in this TechNet article and basically involves copying the root CA chain file to a the SRSv2's C: drive and running the 'certutil -f -addstore -enterprise root <filepath>' cmdlet. if there are multiple root CAs, then multiple root CA certitcates must be installed using the same cmdlet. Remember to run the command shell with elevated administrator permissions. Below is a screen shot of what it looks like:
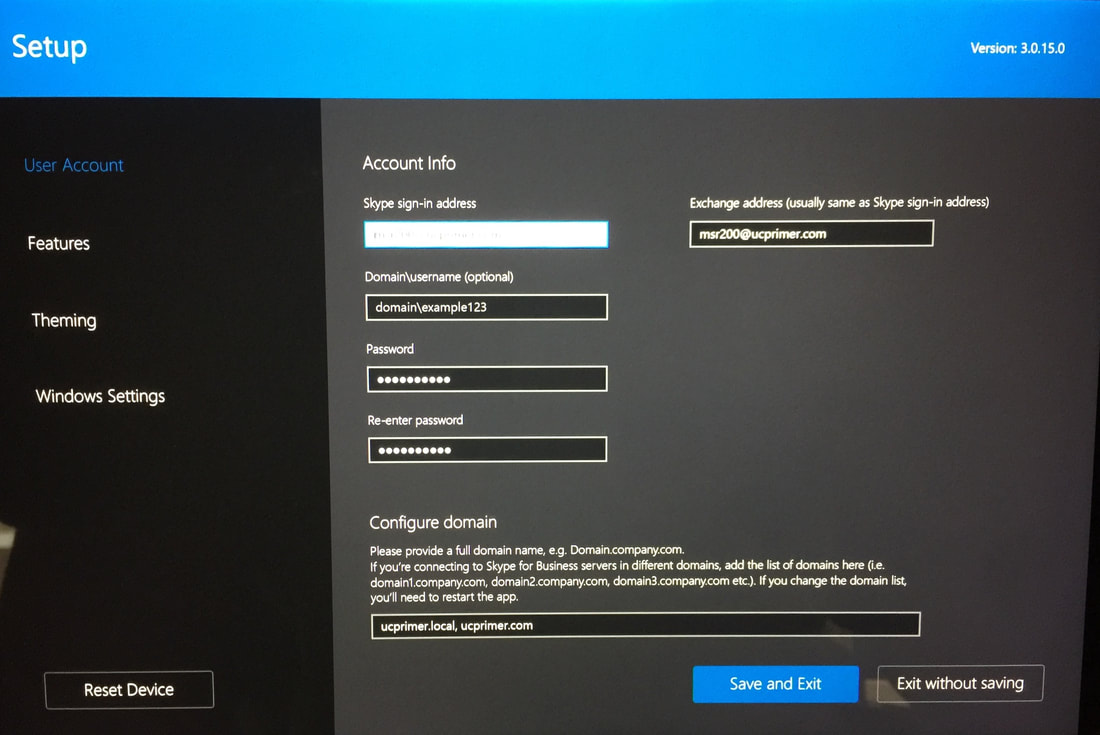
Tip#3: DNS Domains
There may be environments where the DNS domain suffix of the on-premise SfB FE pool is different from the SIP domain suffix. For example, the FE pool FQDN is 'fepool.mydomain.local' but the SIP domain and external DNS domain is 'mydomain.com'. It is important to include these DNS suffixes in the SRSv2 device as shown below. Otherwise the device may have problems signing in to Skype for Business
There may be environments where the DNS domain suffix of the on-premise SfB FE pool is different from the SIP domain suffix. For example, the FE pool FQDN is 'fepool.mydomain.local' but the SIP domain and external DNS domain is 'mydomain.com'. It is important to include these DNS suffixes in the SRSv2 device as shown below. Otherwise the device may have problems signing in to Skype for Business
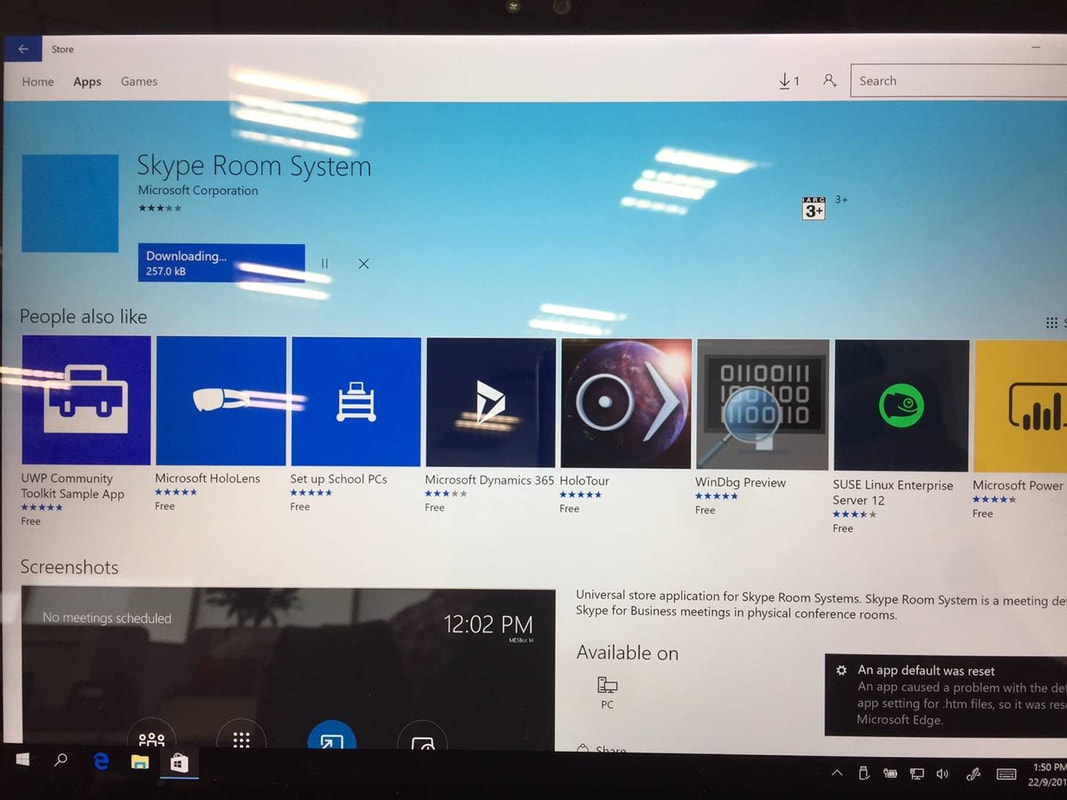
Tip#4 Updating SRSv2
Over time, Microsoft will release new updates to the SRSv2 application running on the device, and the latest version at the time of this blog post is 3.0.16. While the device should automatically update itself via Windows Update, should a manual update be required, the easiest way is to login as the administrator on the device and run the Windows Store app. Selecting "Downloads and Updates" on the app will look for any new updates to the SRSv2 application and give the option to install the new version if available. Note that other app updates may also appear and it is safe to update them as well. Below is the screenshot that shows the SRSv2 app being updated via the Windows Store app:
Over time, Microsoft will release new updates to the SRSv2 application running on the device, and the latest version at the time of this blog post is 3.0.16. While the device should automatically update itself via Windows Update, should a manual update be required, the easiest way is to login as the administrator on the device and run the Windows Store app. Selecting "Downloads and Updates" on the app will look for any new updates to the SRSv2 application and give the option to install the new version if available. Note that other app updates may also appear and it is safe to update them as well. Below is the screenshot that shows the SRSv2 app being updated via the Windows Store app:
There may also be peripherals such as USB cameras and speakerphones attached to the SRSv2 device and these peripherals can also be automatically updated via Windows update. Depending on which vendor the SRSv2 device was purchased from, there may be a registry key required to enable this. Also, the dock on which the Surface Pro is mounted on is different for each vendor, and the dock firmware itself may need to be updated as well. For both of these updates, contact your vendor for assistance if the firmware needs to be updated.
Tip#5: Internet Proxy
In environments where devices on the corporate intranet are allows to access the internet via a web proxy, then there are 2 options. The easiest option is to allow the SRSv2 device bypass the web proxy and access the internet directly and this can be done by providing the IP address or MAC address of the SRSv2 device to the network administrator and requesting for a bypass. In the event that bypassing the web proxy is not allowed, the proxy settings need to be configured on the SRSv2 device. This requires modifying the registry and the steps are provided in this TechNet article.
In environments where devices on the corporate intranet are allows to access the internet via a web proxy, then there are 2 options. The easiest option is to allow the SRSv2 device bypass the web proxy and access the internet directly and this can be done by providing the IP address or MAC address of the SRSv2 device to the network administrator and requesting for a bypass. In the event that bypassing the web proxy is not allowed, the proxy settings need to be configured on the SRSv2 device. This requires modifying the registry and the steps are provided in this TechNet article.
Conclusion
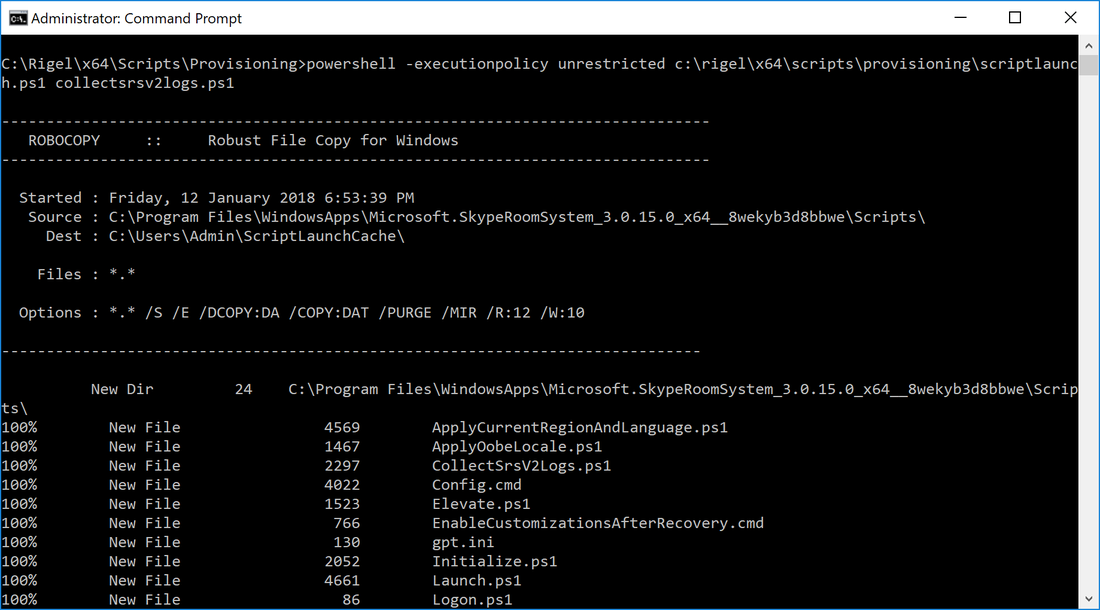
Hopefully the tips provided in this blog article is helpful when configuring SRSv2 devices to work. If these tips still do not help in resolving any issues, then gathering logs may be required for further troubleshooting. Microsoft has provided a script to collect these logs in the SRSv2 device which is located in the folder c:\rigel\x64\scripts\provisioning folder. To run this script, start an elevated command prompt and run the following cmdlet:
powershell -ExecutionPolicy unrestricted c:\rigel\x64\scripts\provisioning\ScriptLaunch.ps1 CollectSrsV2Logs.ps1
This will create a zip file containing the logs in the c:\rigel folder. Below is a screenshot of this script running for reference.


 RSS Feed