
 | In the previous blog post, we covered the details of deploying 802.1x EAP-TLS on Polycom VVX phones using Cisco 2960X switch and Windows NPS RADIUS server. Deploying device certificates manually on the phones can be a time consuming process especially for high security environments when a unique device certificate is required for each phone. With the release of UCS5.9.3 firmware in June this year, Polycom VVX phones now support Simple Certificate Enrollment Protocol SCEP for easy requesting and assigning devices certificates for 802.1x EAP-TLS authentication. This blog post builds upon the same lab environment of the previous post but describes in detail how to add and deploy SCEP. |
The details of how SCEP works is beyond the scope of this post but more information can be obtained from this Microsoft website. For readers unfamiliar with how 802.1x EAP-TLS works and the various components required, it is highly recommended to first read the previous blog posts mentioned above where we describe the various settings requied on the Windows server CA, NPS role services as well as the Cisco 2960X switch. In this walk through, we already have the necessary components needed as shown in blue below and will add and configure the SCEP service in yellow:
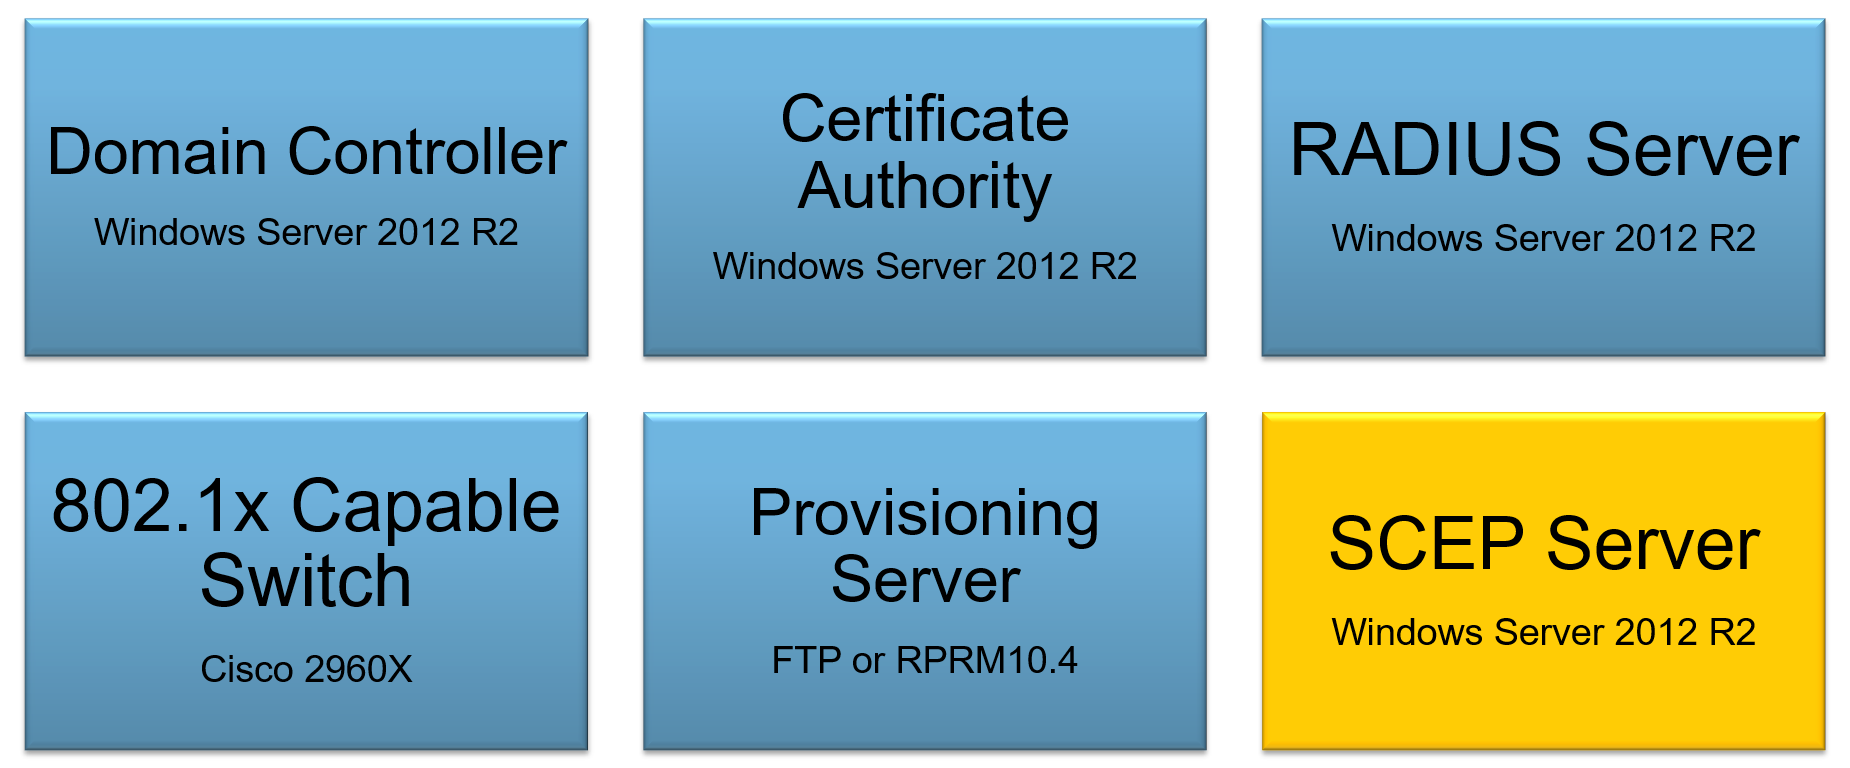
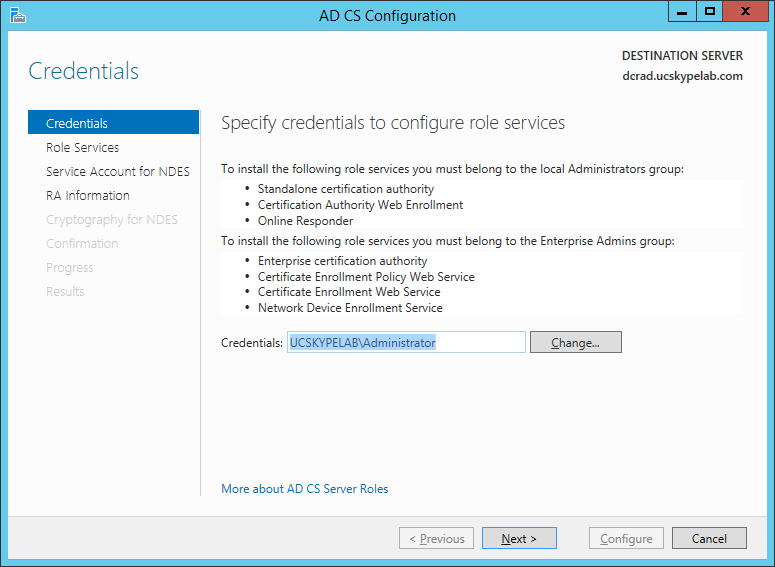
For production environments, it is recommended to deploy SCEP role services on a separate server; however to keep this lab simple. we just add the SCEP services to our existing Windows 2012 R2 server which is also the AD DC, CA, and NPS RADIUS server. We first need a SCEP service account that is also a member of the local IIS_IUSRS group. In our lab we created a new AD domain account named SCEPSvc which will be used later throughout this walkthrough. To add the SCEP role, this we simply use the Windows Server Roles wizard to add the NDES service into the AD CS role as shown below:
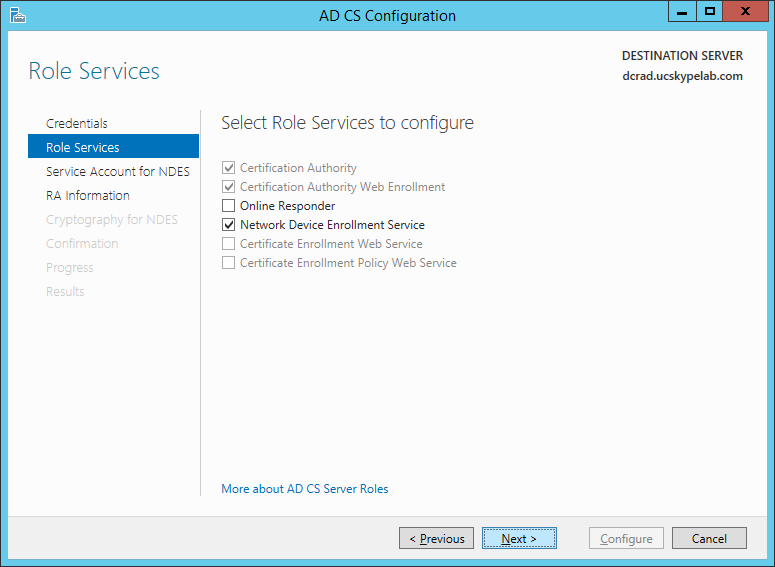
For SCEP we want to add the Network Device Enrollment Service (NDES):
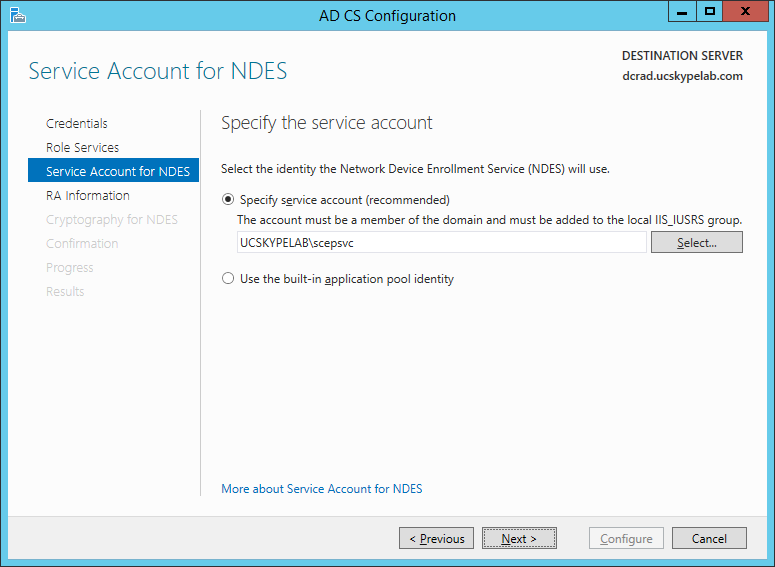
We need to specify the SCEP service account created earlier:
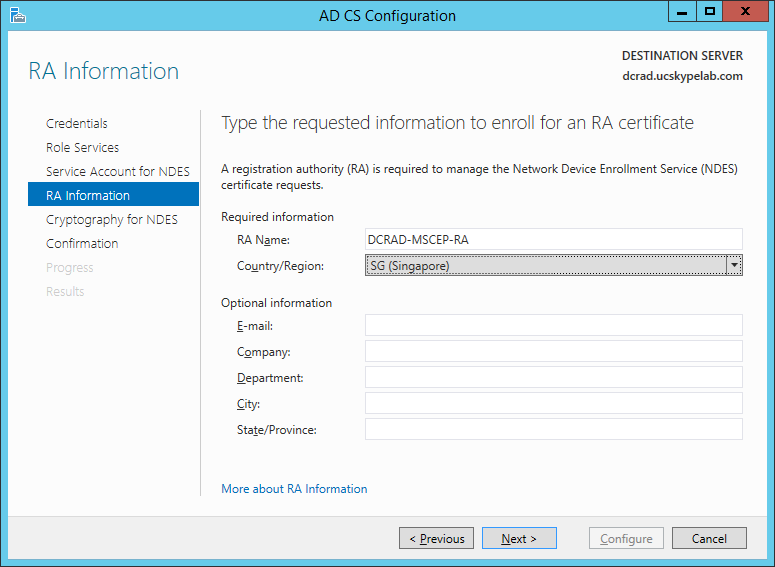
For the Registration Authority (RA) we can accept the defaults:
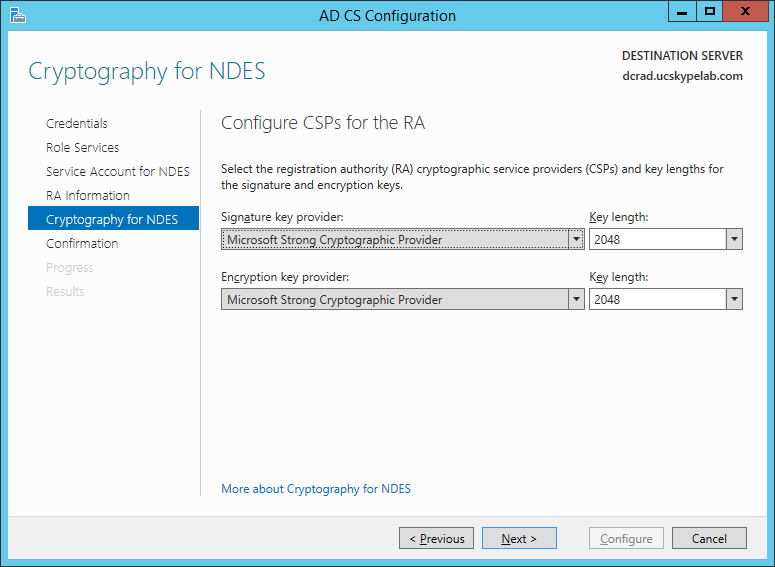
We'll use the default crypto providers and a key length of 2048 bits:
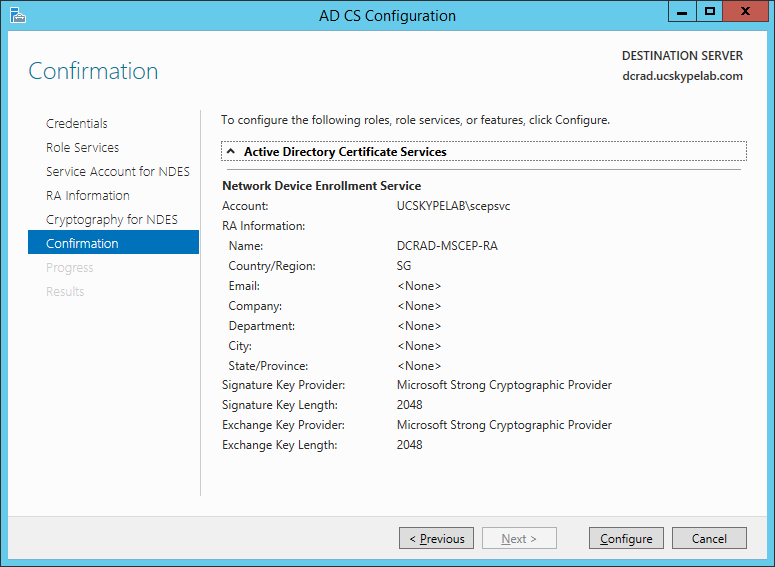
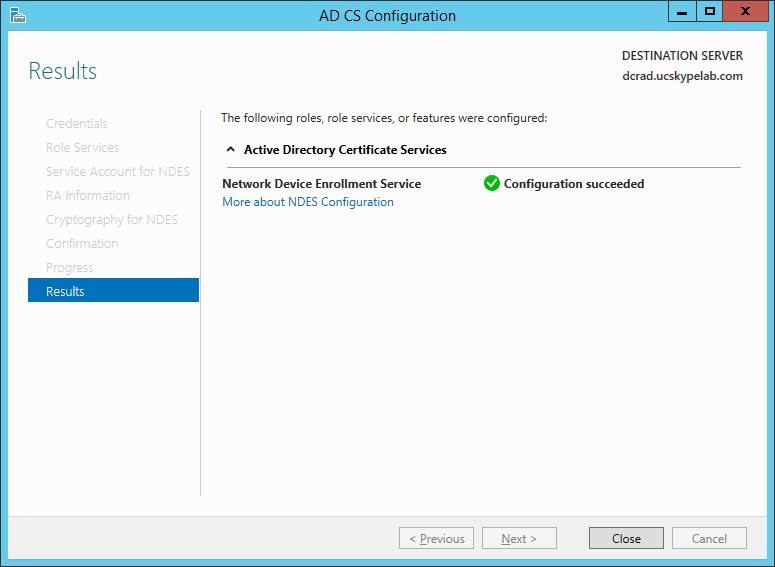
After reviewing the information, we can click on "Configure" to proceed:
Upon successfully installation we should get the screen below:
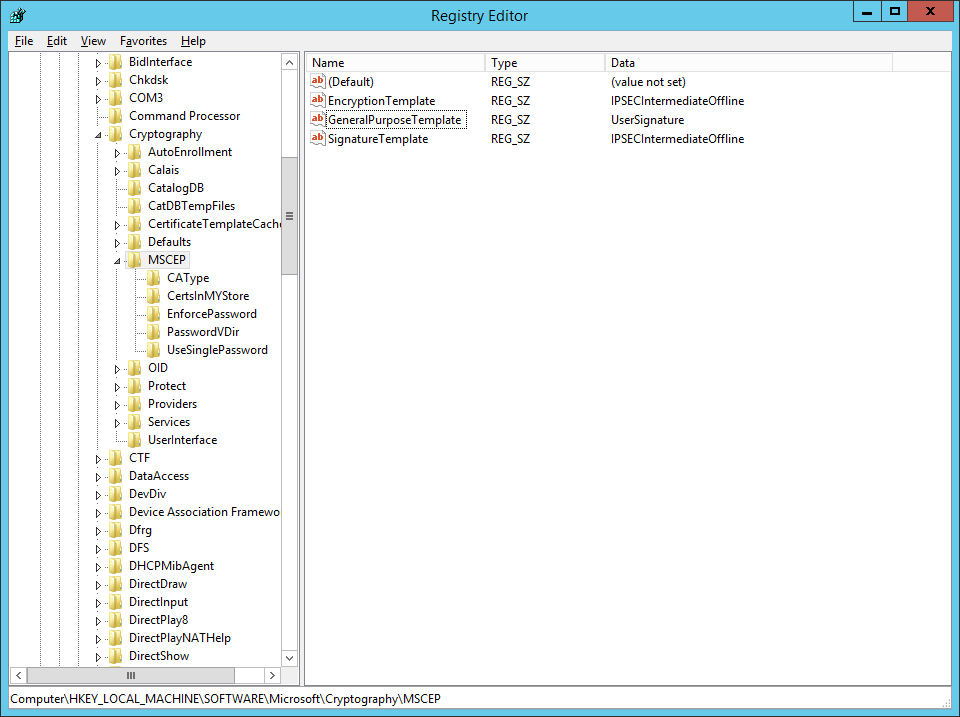
Next we need to specify the certificate template that the SCEP service issues for the Polycom VVX phones. By default, SCEP will issue a certificate of template type "IPSECIntermediateOffline" which will not work with 802.1x EAP-TLS. To configure this correctly, start registry editor and navigate to \HKLM\Software\Microsoft\Cryptography\MSCEP and change the "GeneralPurposeTemplate" key value to "UserSignature" as shown below. After that restart IIS for the setting to take effect
To being using SCEP, we browse to http:<SCEPServer>/certsrv/mscep_admin/ and after a few seconds we should get a page that can be used to enrol device certificates for our VVX. This page contains the thumb print of the CA certificate along with the one-time enrollment challenge password as shown below:
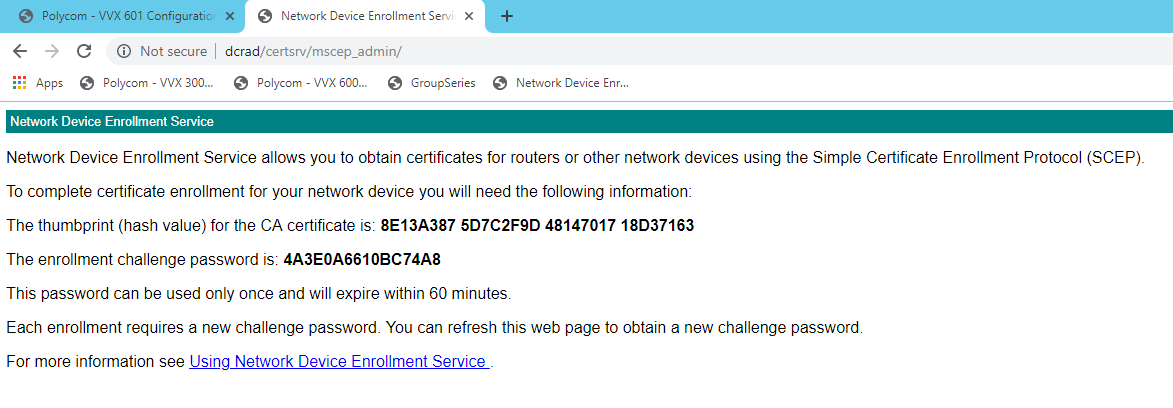
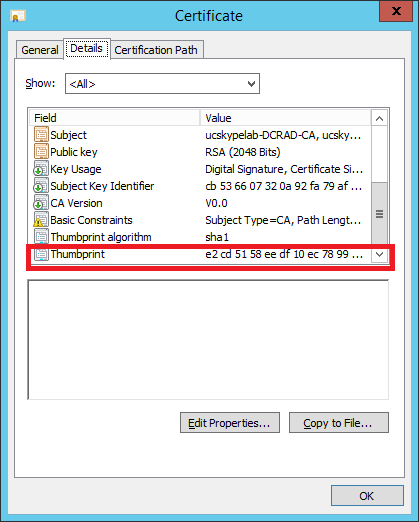
It's important to note that the CA certificate thumbprint shown in this page is not the thumbprint of the CA certificate but the thumbprint of the RA certificate, and hence cannot be used to enroll for certificates on the Polycom VVX. We need to get the thumbprint of the issuing CA certificate which is different as shown below (note that the thumbprint is different from the web page):
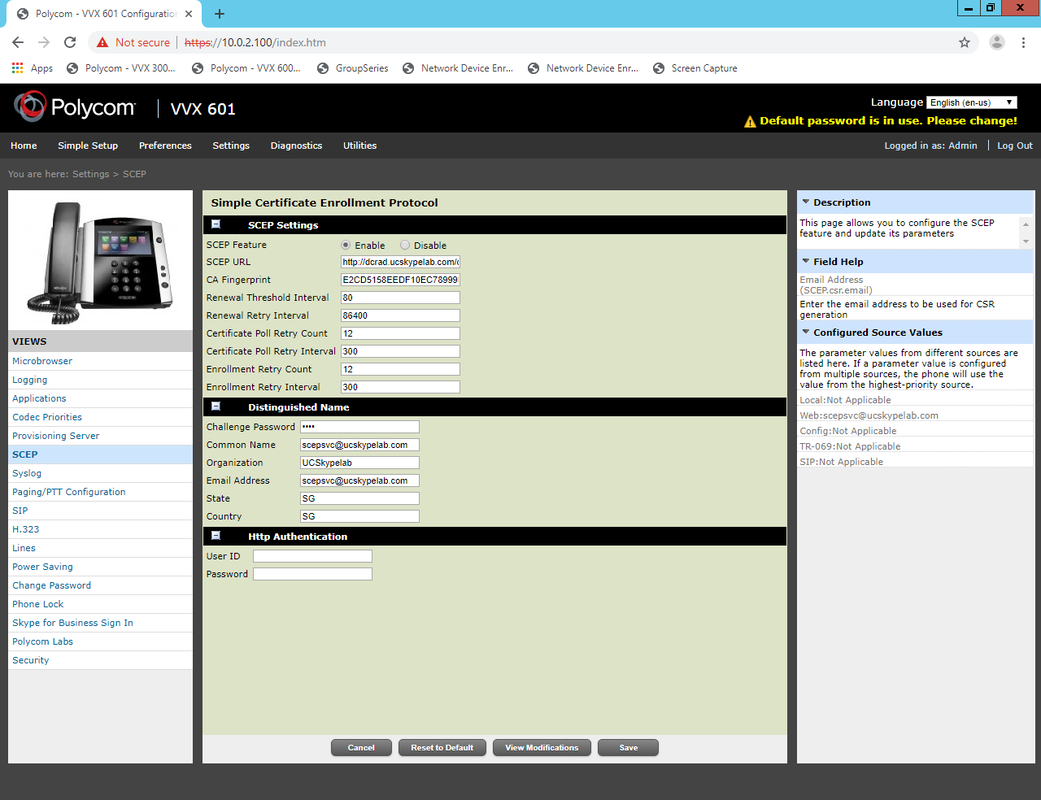
Now we are ready to enroll certificates on the Polycom VVX phone using SCEP. Browsing to the phones admin UI, we navigate to the Settings->SCEP and select the Enable button. This will allow us to enter the following information:
SCEP Feature: Enable
SCEP URL: http://<SCEPServer>/certsrv/mscep/ (Please don't forget the final '/' in the URL or SCEP will fail)
Challenge Password: <As shown in the SCEP server web page> (This can only be used once and is valid for 1 hour)
Common Name: <UPN of the AD account of the phone>
Organization: <Your organization>
Email address: <Same as Common Name>
State and Country: <Your State and Country>
Example screen is shown below:
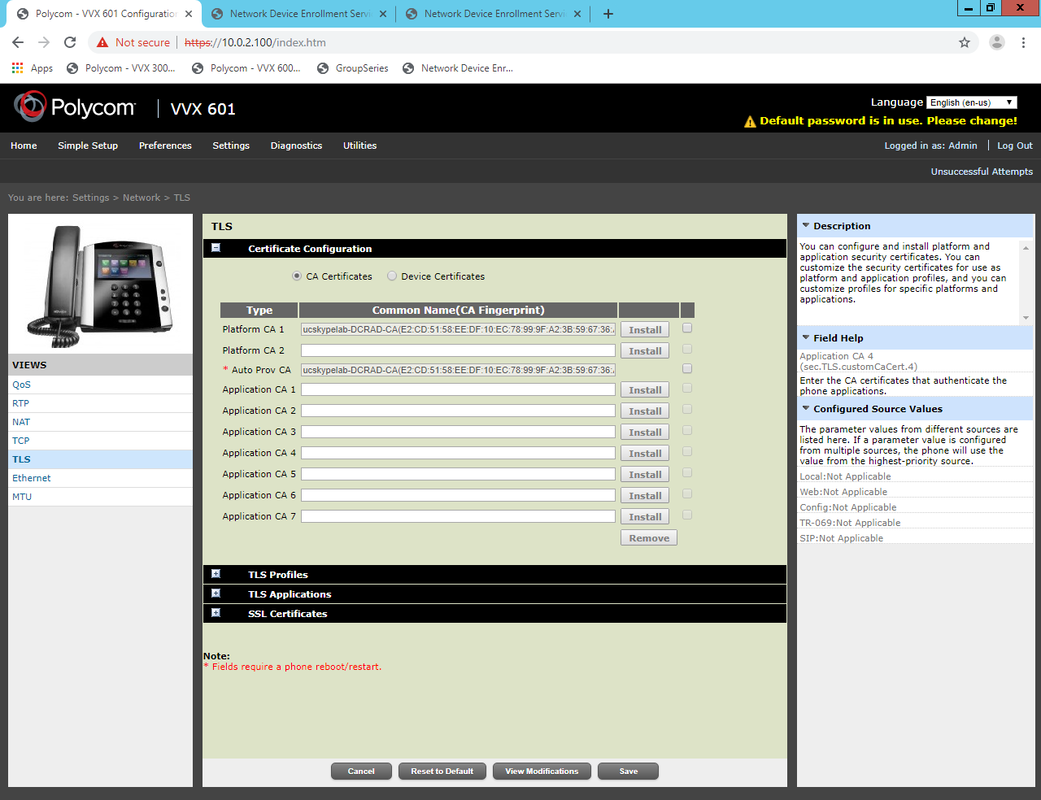
Once we click on "Save" above the phone will attempt to connect to the SCEP service and download the Root CA certificate as well as enrol for a new device certificate. If successful, we can see the certificates on the phone menu at Settings->Network->TLS. The Root CA certificate will be placed in the Auto Prov CA as shown below:
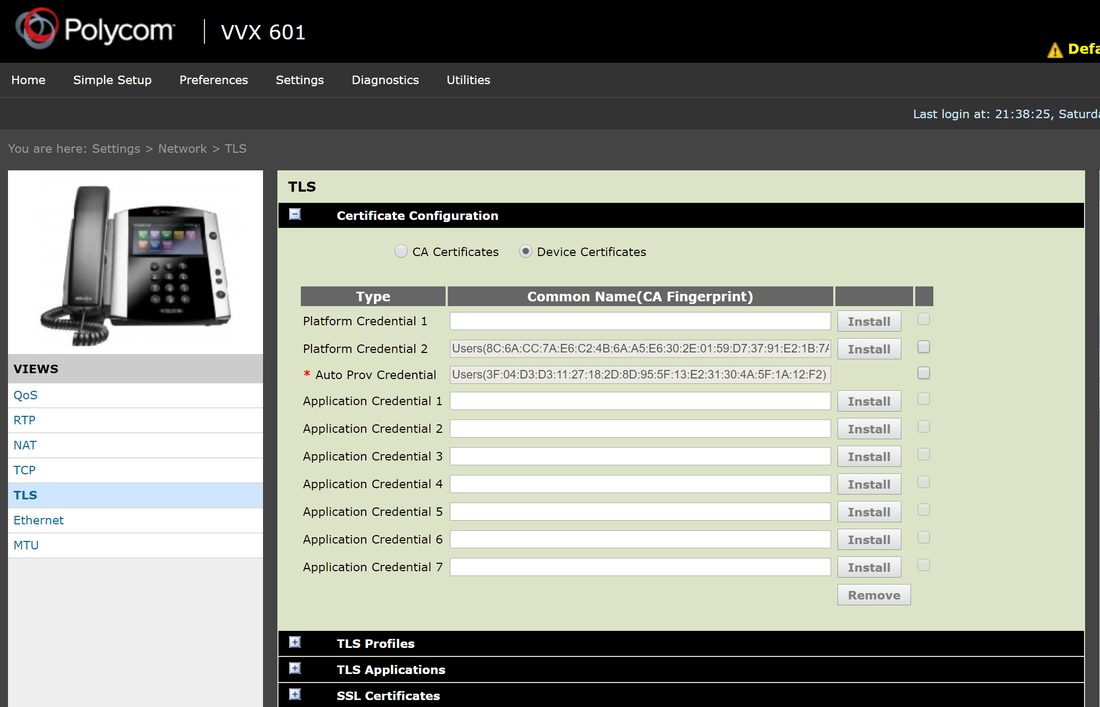
And the 802.1x device certificate will be placed in the Auto Prov Credential as shown below:
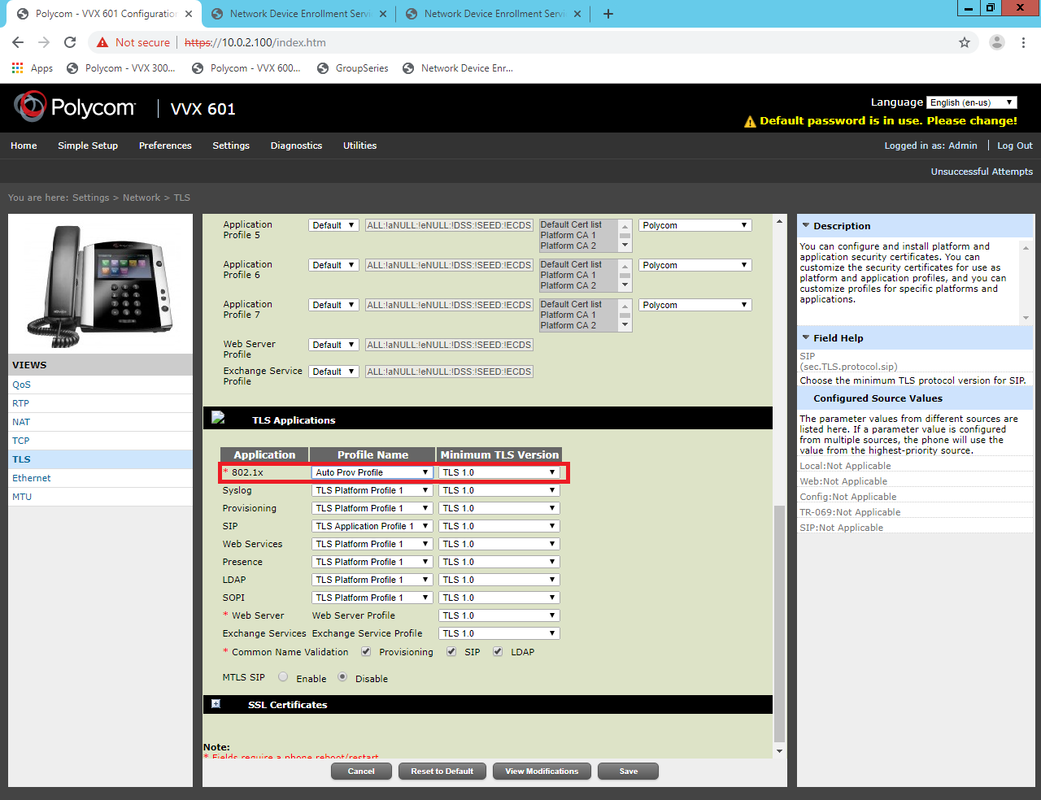
Since SCEP will put the device certificates in the Auto Prov Credential, we need to specify this on the TLS applications for 802.1x on the phone:
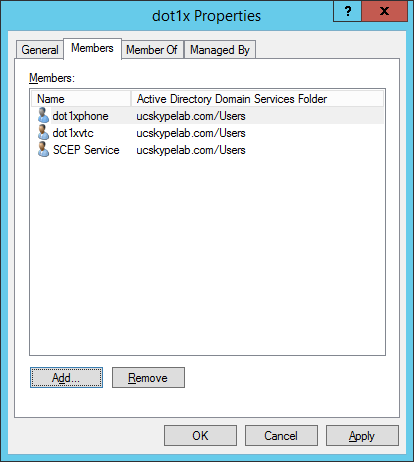
Next we need to add the SCEP service account to the Windows AD group that was configured in the NPS server. This was explained in the previous blog where the NPS policy specifies that the "dot1x" Windows group is a required condition for allowed access. The screen show is reproduced here:

Hence we need to add the SCEP Service account to the dot1x AD Group
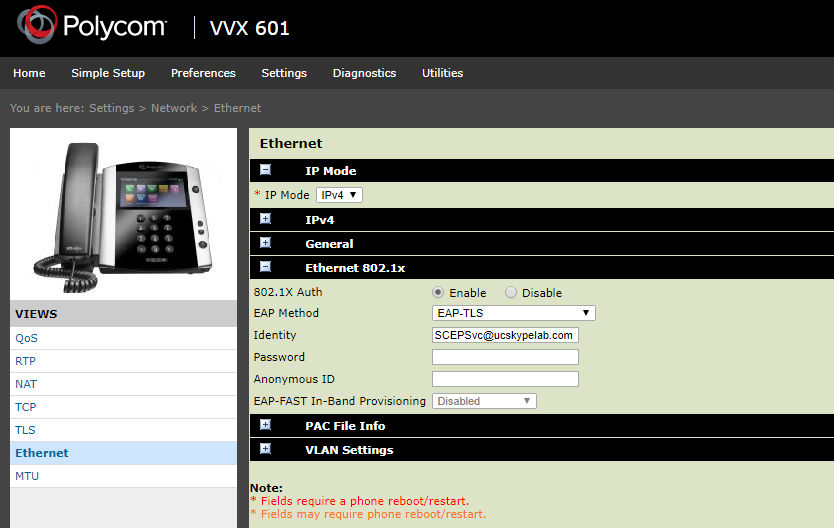
Last but not least, we enable 802.1x on the Polycom VVX phone on the Settings->Network->Ethernet->802.1x menu.Here we specify the following parameters:
802.1X Auth: Enable
EAP Method: EAP-TLS
Identity: <SCEP Service Account>
Password: <Blank>
Example screen shot is shown below:
802.1X Auth: Enable
EAP Method: EAP-TLS
Identity: <SCEP Service Account>
Password: <Blank>
Example screen shot is shown below:
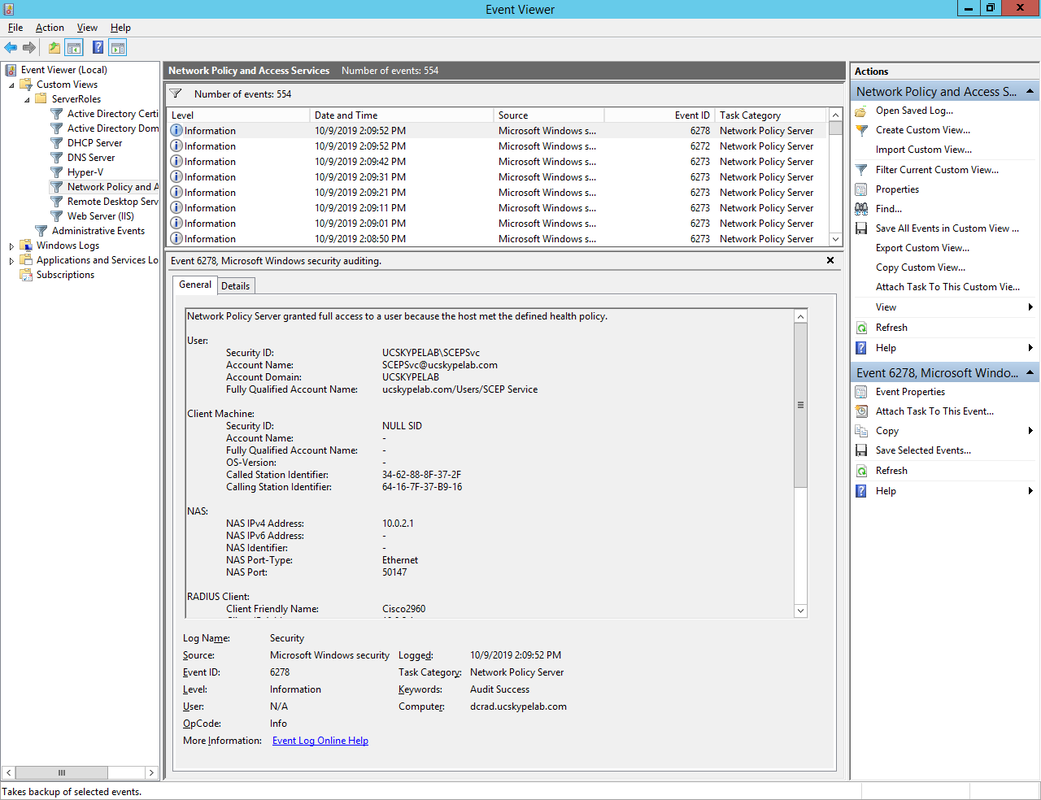
After saving the above settings, we can connect the phone's ethernet port to the Cisco 2960 switch port that has 802.1x enabled. After a few seconds the phone will get authenticated and obtain an IP address from DHCP server. On the NPS event viewer, we can look for event 6278 that logs a successful authentication as shown below:
This concludes this blog post on how to depoy 802.1x EAP-TLS on Polycom VVX phones using SCEP in a lab environment. Hope this has been helpful and do leave comments or questions below.


 RSS Feed