
Just a few days ago, Microsoft made generally available new features for Office365 CloudPBX functionality which is the Auto Attendant and Call Queues. As its name implies, Auto Attendant allows companies to create an intelligent virtual receptionist that helps callers navigate the system with interactive prompts, while Call Queues provides a mechanism to offer a single number to call for distribution lists or multiple Skype for Business Online users at the same time. This article walks through the creation of Auto Attendants and Call Queues using the web administrative portal. Do note the following two points which are applicable at the time of this writing:
1. Auto Attendants and Call Queues are supported in a pure-cloud environments. Hybrid environments such as the one seen in this walkthrough are not officially supported
2. Creation and set-up of auto attendants requires either getting or transferring existing toll or toll-free service numbers. In addition, toll-free service numbers require PSTN Consumption Billing to be setup. In this walkthrough we will acquire and use toll-free service numbers for our Auto Attendant and Call Queues but note that none of this will be callable as we do not have PSTN Consumption Billing setup.
With the above, lets begin the walk-through.
1. Logging into the Office365 Admin Portal and creating a new Distribution List
We first create a distribution list so that it can be assigned to our Auto Attendant and Call Queue. In this example, we create a DL called Main Reception" and turn off the option to allow people outside of my organization to send email to this DL This is done to prevent junk mail. This is shown in the diagram below:
We first create a distribution list so that it can be assigned to our Auto Attendant and Call Queue. In this example, we create a DL called Main Reception" and turn off the option to allow people outside of my organization to send email to this DL This is done to prevent junk mail. This is shown in the diagram below:
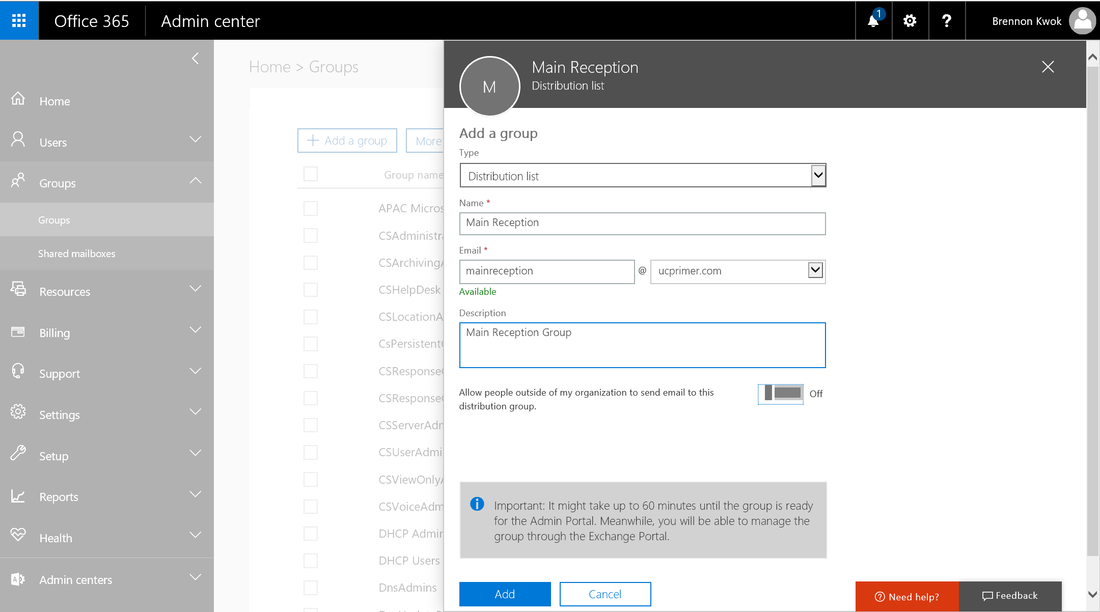
After the Distribution List has been created, we can proceed to add people in the list which is a straightforward procedure not shown here.
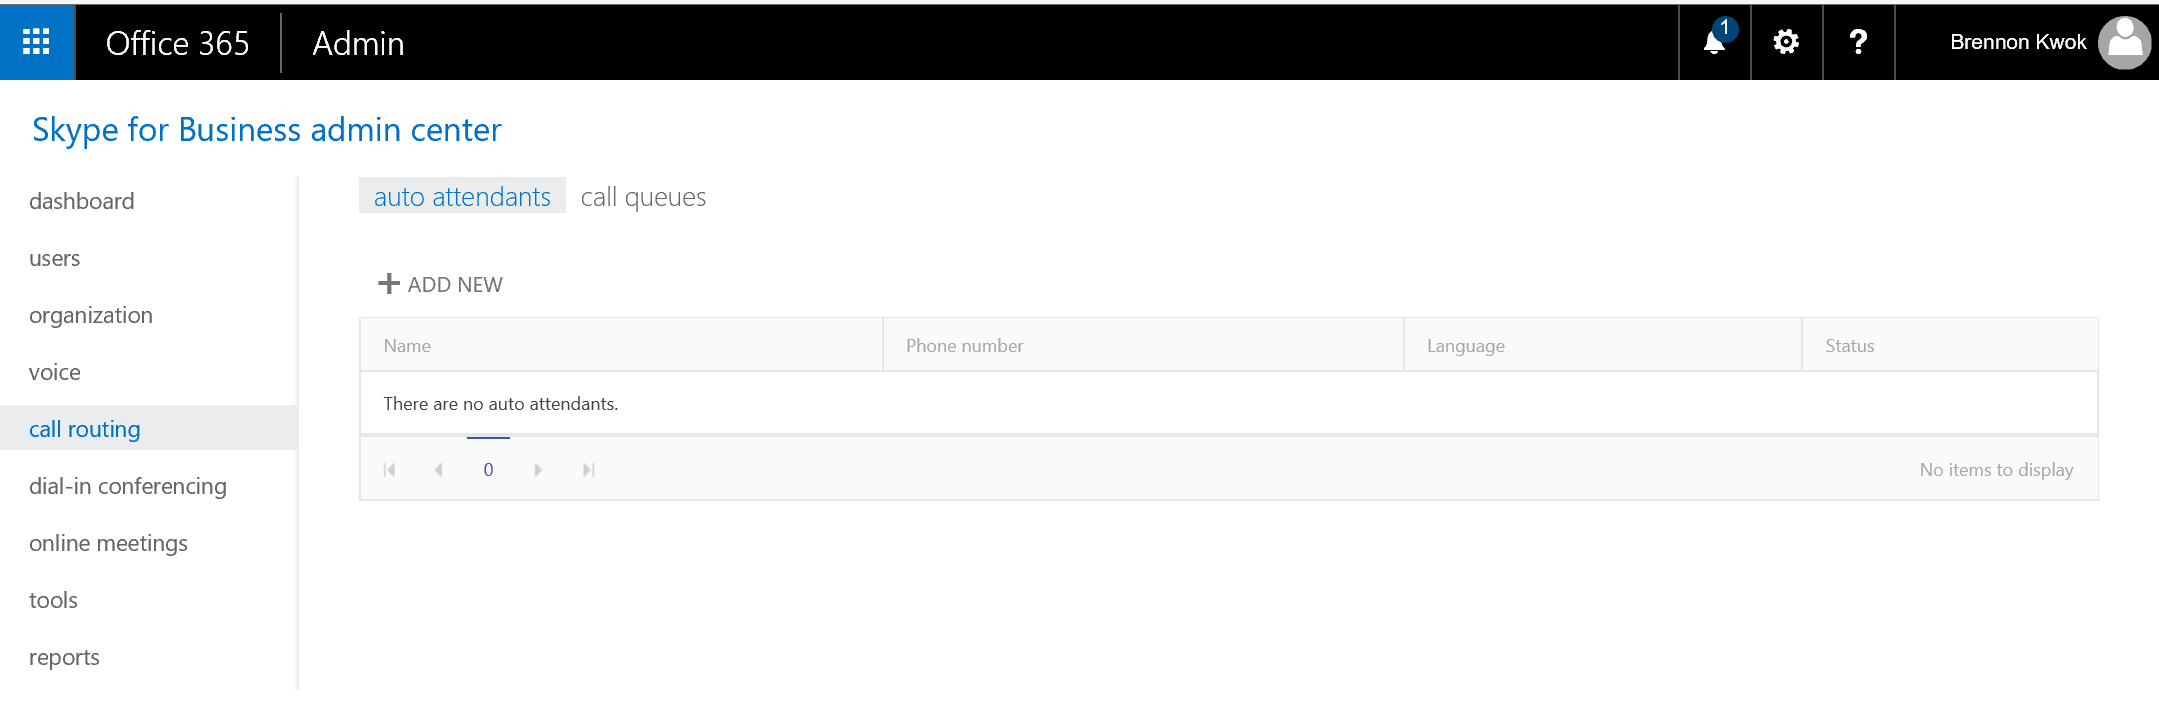
2. Go the Skype for Business Admin Center
Here we can see a new "Call Routing" menu on the left which shows two tabs - Auto Attendants and Call Queues. This is where we will create and configure these 2 new features in CloudPBX:
2. Go the Skype for Business Admin Center
Here we can see a new "Call Routing" menu on the left which shows two tabs - Auto Attendants and Call Queues. This is where we will create and configure these 2 new features in CloudPBX:
3. Acquire Toll-Free Service Numbers
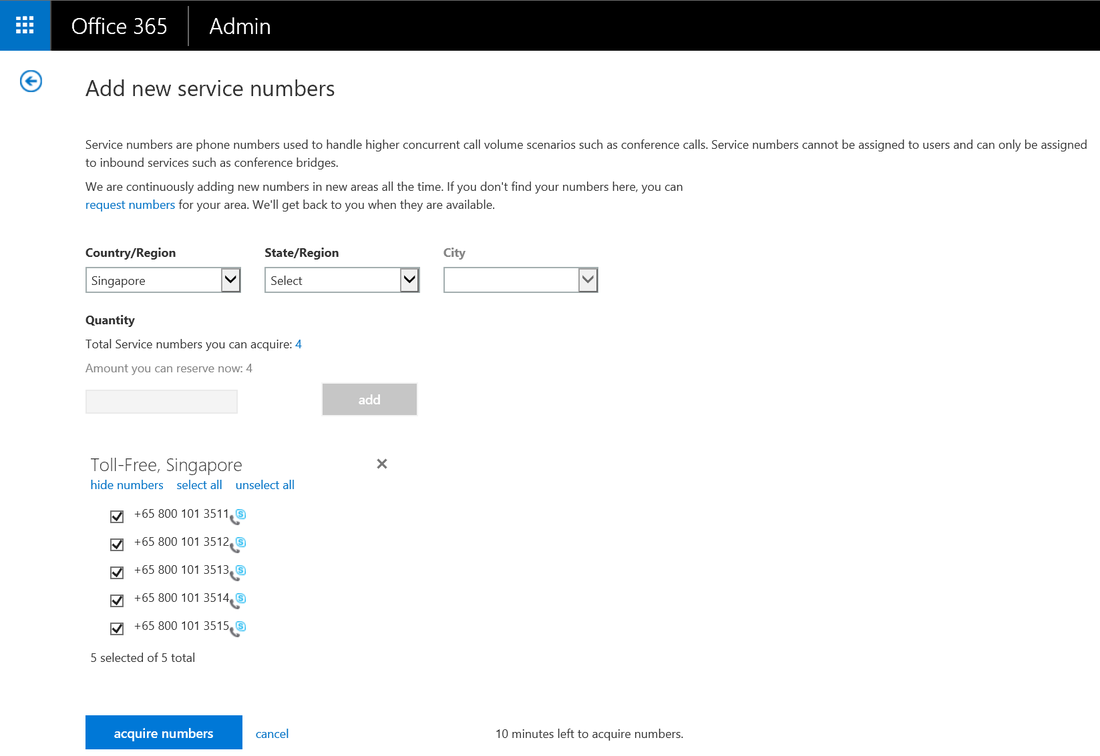
As mentioned, we need toll or toll-free service numbers for this Auto Attendants and Call Queues to work. In this walkthrough, we go to the voice menu and the left and acquire the available toll-free numbers for our location. We have 5 available and we select to acquire all 5 as shown below:
As mentioned, we need toll or toll-free service numbers for this Auto Attendants and Call Queues to work. In this walkthrough, we go to the voice menu and the left and acquire the available toll-free numbers for our location. We have 5 available and we select to acquire all 5 as shown below:
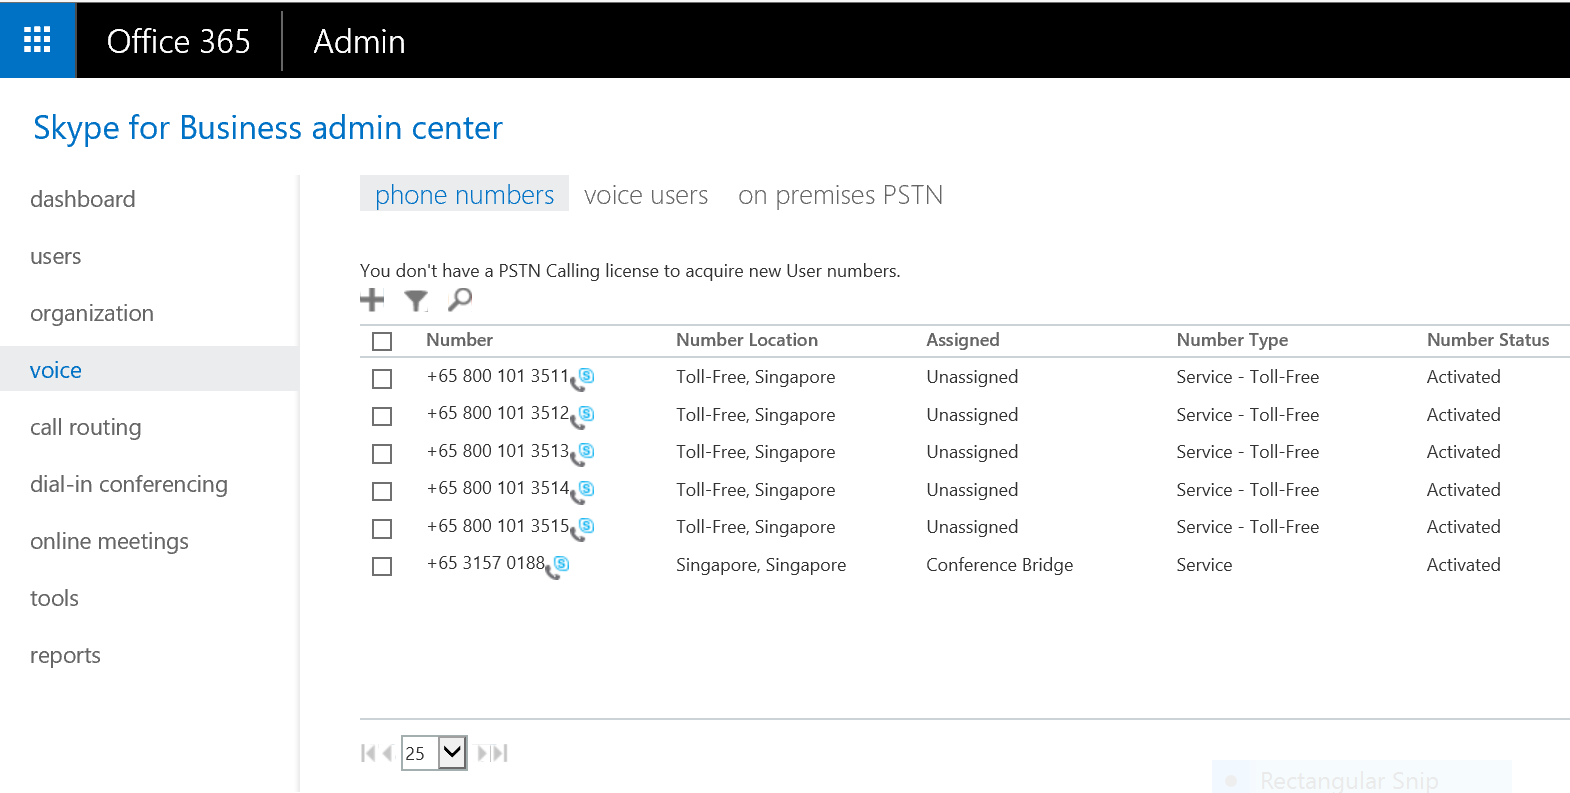
Once the numbers are acquired they will appear in the phone numbers tab along with the PSTN Conference Bridge which was already in the list because our E5 subscription entitles us to a PSTN Dial in conferencing capability. This is shown below:
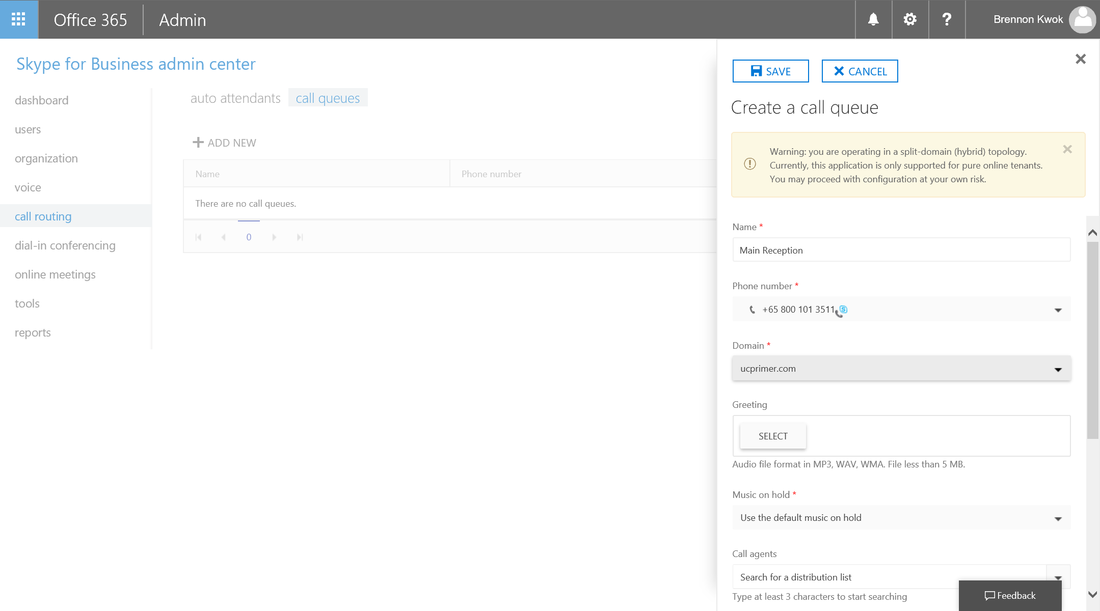
4. Create a Call Queue
Now we can proceed to create a Call Queue. This is done in the "call routing" menu on the left and selecting the "call queues" tab then clicking the "ADD NEW" button. This will bring up the window on the right which allows us to enter a name for the queue, select the phone number from a drop down list and optionally uploading and select an audio greeting in MP3, WAV or WMA format. We can also choose to upload and select a Music on Hold file or use the default one. This is seen in the diagram below
Now we can proceed to create a Call Queue. This is done in the "call routing" menu on the left and selecting the "call queues" tab then clicking the "ADD NEW" button. This will bring up the window on the right which allows us to enter a name for the queue, select the phone number from a drop down list and optionally uploading and select an audio greeting in MP3, WAV or WMA format. We can also choose to upload and select a Music on Hold file or use the default one. This is seen in the diagram below
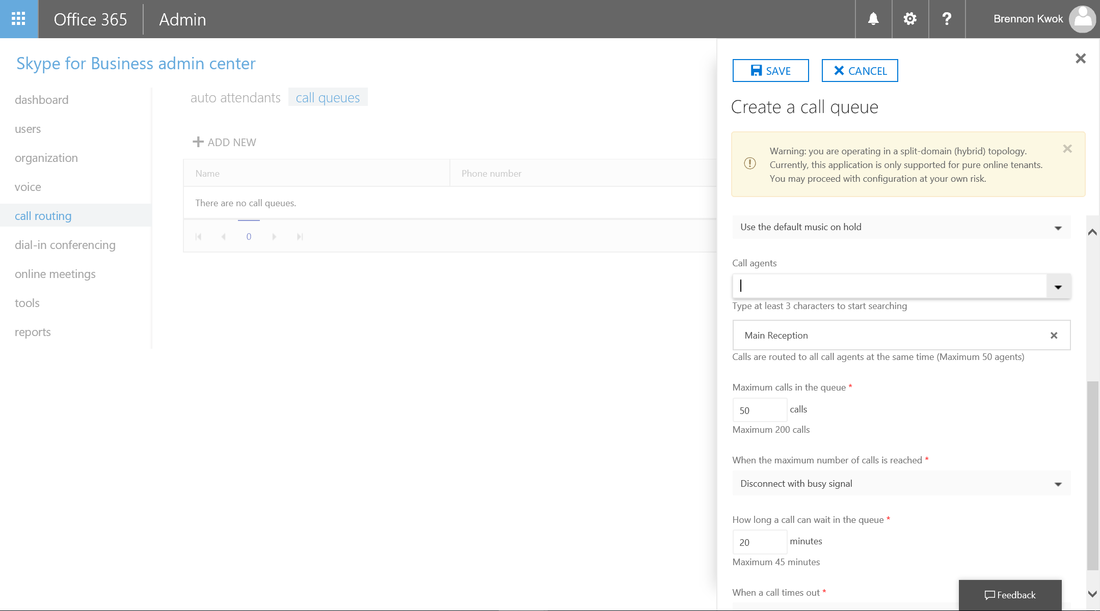
Next we specify the call agents for this call queue by typing in the name in the search box and the portal will return us a list of search results which we can select. This can be the distribution list that we created earlier, or can be a specific person in our company. Other settings that we can configure include the max number of calls in the queue, what actions to take when the max number of calls is reached, how long a call can wait in the queue (default 20mins) and what happens when the call times out. This is all shown in the diagram below. Once completed we click on the "Save" button and our call queue creation is finished.
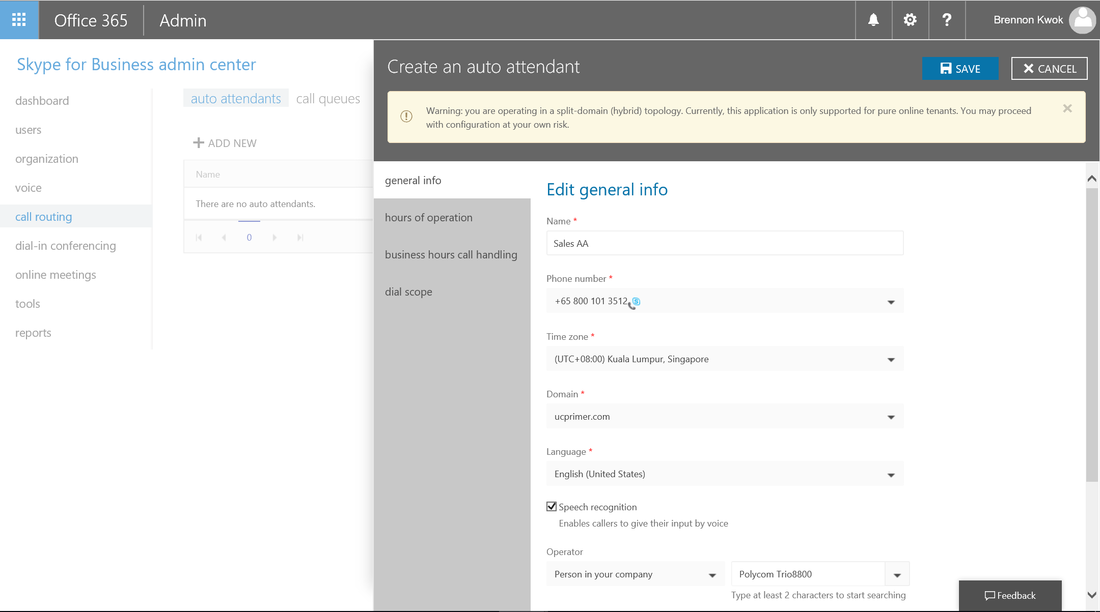
5. Create an Auto Attendant
Next we proceed to create an Auto Attendant by selectin the "auto attendants" tab and clicking on the "ADD NEW" button. This brings up the menu on the right which allows us to specify general information. In this walkthrough, we create a new Auto Attendant named "Sales AA" and select one of the acquired toll-free numbers from the drop down list. We choose the domain, language and whether to allow Speech Recognition which gives callers the ability to give their input by voice in addition to using DTMF tones. In the "Operator" section, we can choose a person or a call queue. Note that when selecting a person, this user must be enabled with an E5 license and homed on-line. Alternatively we can select the call queue that we created earlier. This is shown in the diagram below:
Next we proceed to create an Auto Attendant by selectin the "auto attendants" tab and clicking on the "ADD NEW" button. This brings up the menu on the right which allows us to specify general information. In this walkthrough, we create a new Auto Attendant named "Sales AA" and select one of the acquired toll-free numbers from the drop down list. We choose the domain, language and whether to allow Speech Recognition which gives callers the ability to give their input by voice in addition to using DTMF tones. In the "Operator" section, we can choose a person or a call queue. Note that when selecting a person, this user must be enabled with an E5 license and homed on-line. Alternatively we can select the call queue that we created earlier. This is shown in the diagram below:
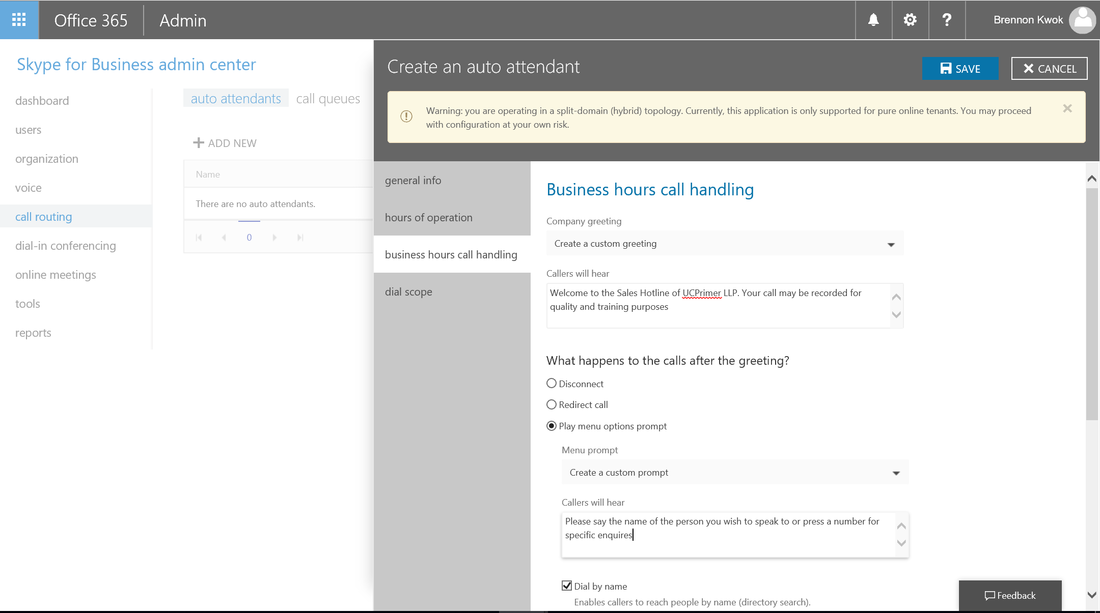
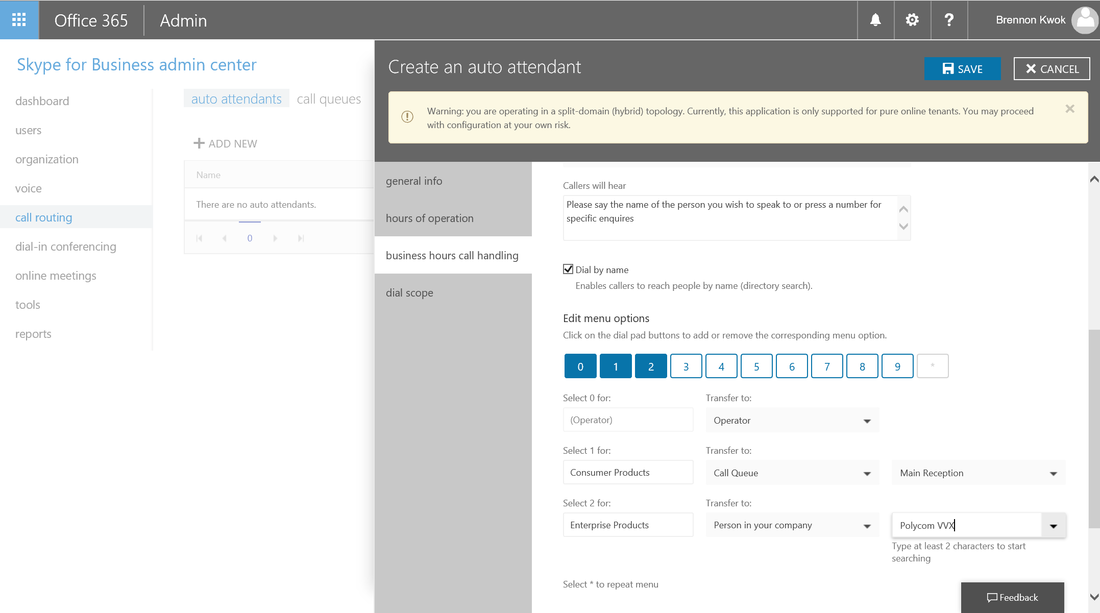
Next we need to specify the way calls are handled by this Auto Attendant. In this walkthrough, we select a custom greeting and enter the text in the box below. The callers will hear a text-to-speech voice of the text entered. We can then select happens to the call after the greeting which can be to redirect to a person or to play a menu options prompt which is what we are doing here. We also select a custom prompt by entering the text in the box below and also choose to allow callers to reach people by name directory search as shown below:
To finish the Auto Attendant, we now specify what menu options are made available to the caller. There are 10 configurable options that the caller can choose by pressing 0-10 on the keypad. The default option 0 wil be to transfer to the operator specified earlier. Additional options can be configured by choosing the number and selecting to transfer to either a call queue or to another person. In this walkthrough, we have configured option 1 to transfer to a Call Queu and option 2 to transfer to a person. This is shown in the diagram below.
Once complete we can click on the "Save" button and our Auto Attendant will be created
Conclusion
As can be seen in this walk through, creating auto attendants and call queues is simple and straightforward. Microsoft has made these 2 much sought after features part of the CloudPBX capability in Office365 E5 which adds great value to the subscription. Organizations can expect even more enhancements in the future as Microsoft adds more capabilities in the coming months.
As can be seen in this walk through, creating auto attendants and call queues is simple and straightforward. Microsoft has made these 2 much sought after features part of the CloudPBX capability in Office365 E5 which adds great value to the subscription. Organizations can expect even more enhancements in the future as Microsoft adds more capabilities in the coming months.


 RSS Feed